
Various approaches to drum kit and percussion setup and drum technique, and how to alter your miking and recording technique to suit them
By Paul Vnuk Jr. with David Blascoe
In this article, I get to combine my three favorite passions into one place—drumming, percussion, and audio engineering.
We are going to look at a variety of drum-recording steps that will hopefully fit your needs and style: Full “mic ‘em all” set-ups, minimal setups with 1–4 mics, and then—to top it off—I have asked my good friend David Blascoe (who has been bitten by the lo-fi/hip-hop bug) to chime in with some of his successes in his bedroom with extremely budget gear.
 What do you really need?
 What do you really need?
I am sure that you have heard the saying that for “professional” results you need the best player playing the best drums in the best room recorded with the best mics. There is truth in this statement, but in reality, for many of us all four of those elements rarely coexist in our world at the same time.
If you are purposeful and determined in your approach, there are alternatives that can and often do work out just as well.
The drummer: Of all of the abovementioned areas, this is the most important of them all. If you have ever had the misfortune of tracking a less-than-competent player you will know how painful a process it can be. However, don’t confuse skill level with flash. I will take a competent timekeeper who can groove over a flash fill master who cannot come back in on the one—any day of the week.
The kit: The better the instrument, the easier it is to capture, but even a no-name starter kit can be made to work, since the right heads and their tuning, and the quality of the cymbals, can make all the difference. Consider the style of music to be recorded, get appropriate heads, preferably a day or three before the session so that they can settle in, and spend as much time as you need tuning them to perfection. Learn to tune drums—some drummers aren’t very good at it!
As to cymbals, back when I worked at a retail music store, the one rule of thumb I had when selling low-end drum kits was this: Spend the bulk of your money on the cymbals! You can tune a low-end drum set to sound OK, but a low-budget, tinny cymbal will always sound like one. If that’s all you have, beg, borrow, or rent better cymbals.
The space: With great drum rooms in great studios quickly becoming a thing of the past, most of us are better served looking instead for unique and interesting spaces: Old churches with vaulted ceilings, big open warehouses, a high-school or college auditorium or theater, or somebody’s Great Room—you know, those living rooms with the big 20-30’ sloping ceilings usually connected to a loft or open hallway.
If you are stuck in a bedroom or smaller office space, there is still hope, and the best approach would be to go as dead as possible and put packing blankets on the walls or over high-backed chairs as makeshift gobos around the kit. Think of it as akin to the ultra-dry drum rooms of the 1970s.
The mics and gear: Except for overheads and perhaps room mics, dynamic mics will do a great job, and they tend to be much more affordable and durable than their condenser brethren.
The world of preamps is an endless rabbit hole of both taste and lust, so for this article, as long as you have enough to cover the necessary inputs of your session, we will largely leave this area alone.
Know the sound of mics: No matter how small or large you go with miking a drum kit, the most important common denominator of both is that you must know your tools!
I am lucky, if not spoiled, since I have spent time in both music retail as well as being a gear reviewer, and this has allowed me to try tons of different kit over the years. I still love a good mic shootout. Throwing up five mics on a snare or tom, listening to the results, and mentally cataloguing their differences is always educational if not downright essential.
If those options do not exist for you, why not check with other musicians, project studios and even clubs in your area, anyone who may have a mic or two other than what you own? Invite everyone over, order a pizza, and spend a night listening to the differences. While it may sound hokey, host a monthly gear shootout at your studio. Build up a working knowledge of a vast range of mics and their uses—any way you can, even if you have to rent a bunch for a day.
So with that in mind, let’s look at some common drum recording setups.
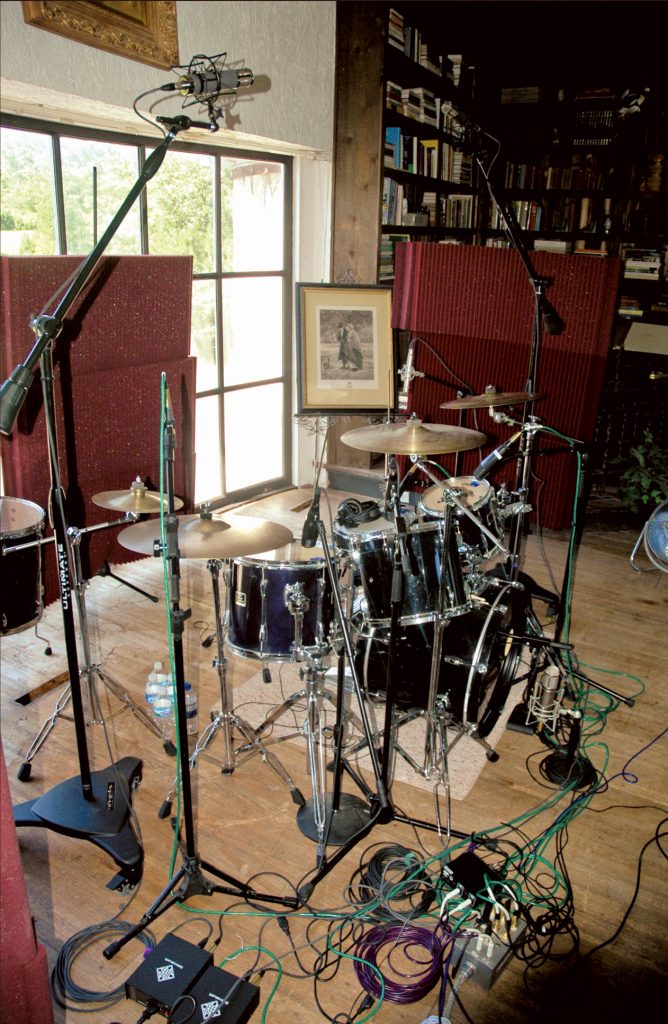
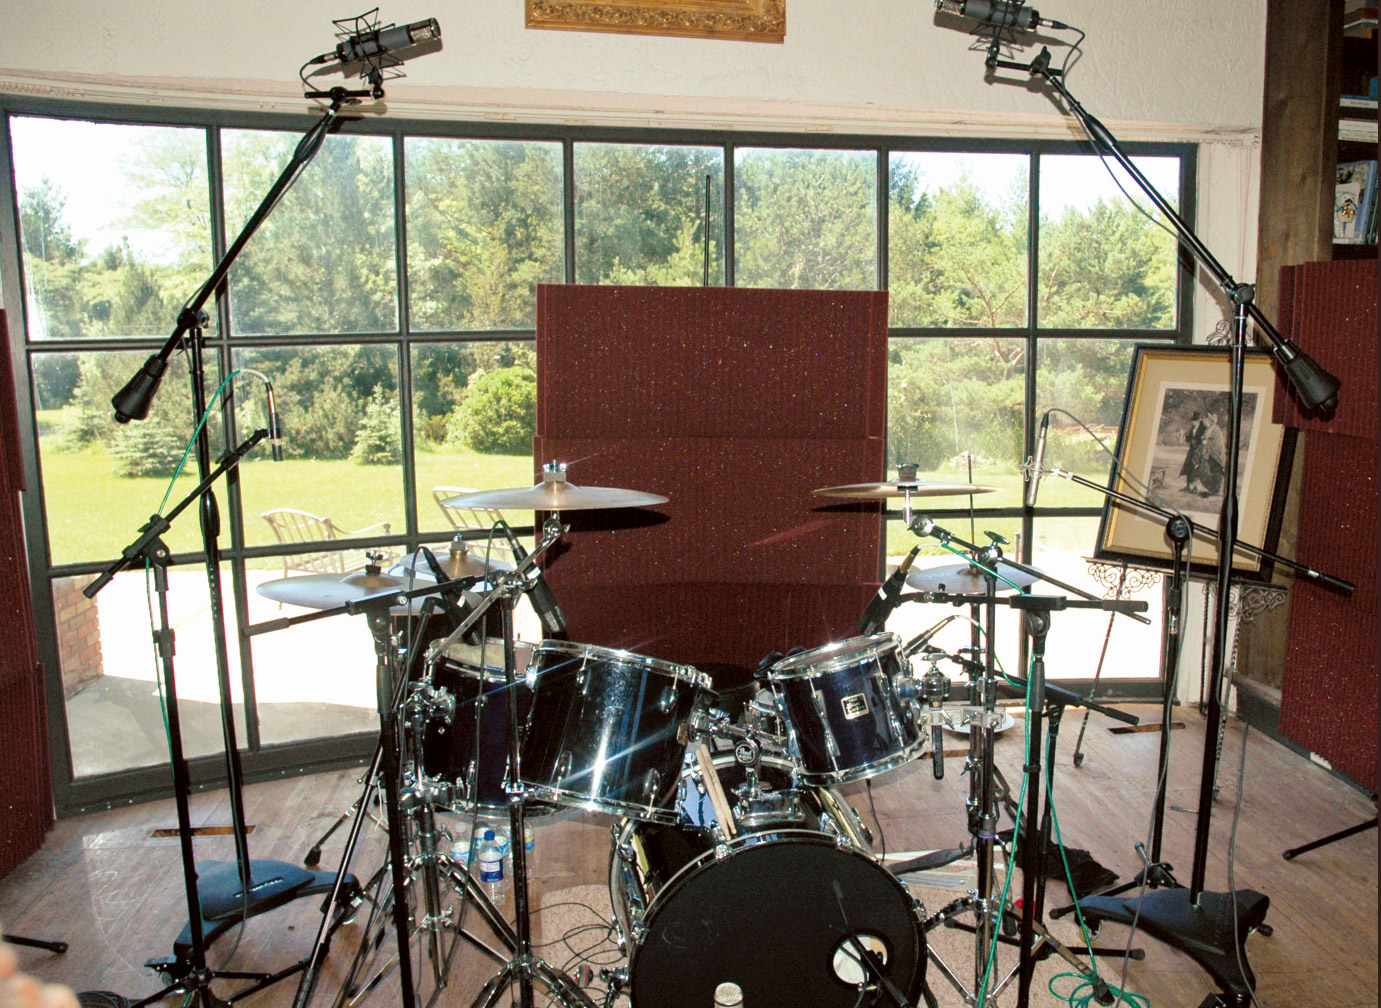
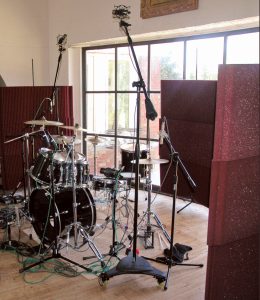
Mic it all, twice if you got ‘em
First up let’s look at what is probably the most common drum-mic setup since the 1980s—to mike everything individually.
For most typical modern pop situations, be it country, rock, R&B, Christian Contemporary, and such, I will place mics on the inner and outer kick, over and under snare, hi-hat, ride, the top of each tom, and cap it off with a pair of overheads. I will also use a mono front-of-kit mic or a pair of stereo room mics, depending on the overall style. I have friends who will additionally mic the bottoms of the toms—not something I do, but if it’s your thing, go big or stay home!
Placement and mic-style choices
Before we get into placement, take note: All recommendations about distances and angles aside, let your ears be the ultimate guide for mic placement! Not just with cymbals but when miking the entire drum kit (or any instrument for that matter), I recommend a good set of isolating in-ear monitors which will allow you to move mics around the drums while zeroing in on the sweet spot, without getting your eardrums blown out by way of a thrashing drummer. The more time you spend moving mics, fine-tuning drums and conquering the room, the better your tracks will sound.
The main goal in miking up a kit piece by piece is flexibility and control. So you will want as much separation between all kit pieces as you can get. This is accomplished by not only choosing the right mic, where and how you place it, but also through creative equalization during tracking and or mixdown… In other words, tight-patterned mics and judicious frequency cuts.
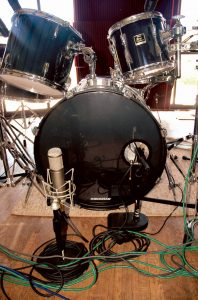
Kick: In this situation I prefer a good PZM-style boundary mic on the floor of the bass drum, or a kick-drum-specific dynamic on the bass batter head for the slap and pop. For the outer head I will use an additional kick-specific drum mic or—more often—a large-diaphragm FET mic about 1 to 3 feet away from the front of the kick. Sometimes, for even greater boom and separation, I will baffle said mic with couch cushions or packing blankets.
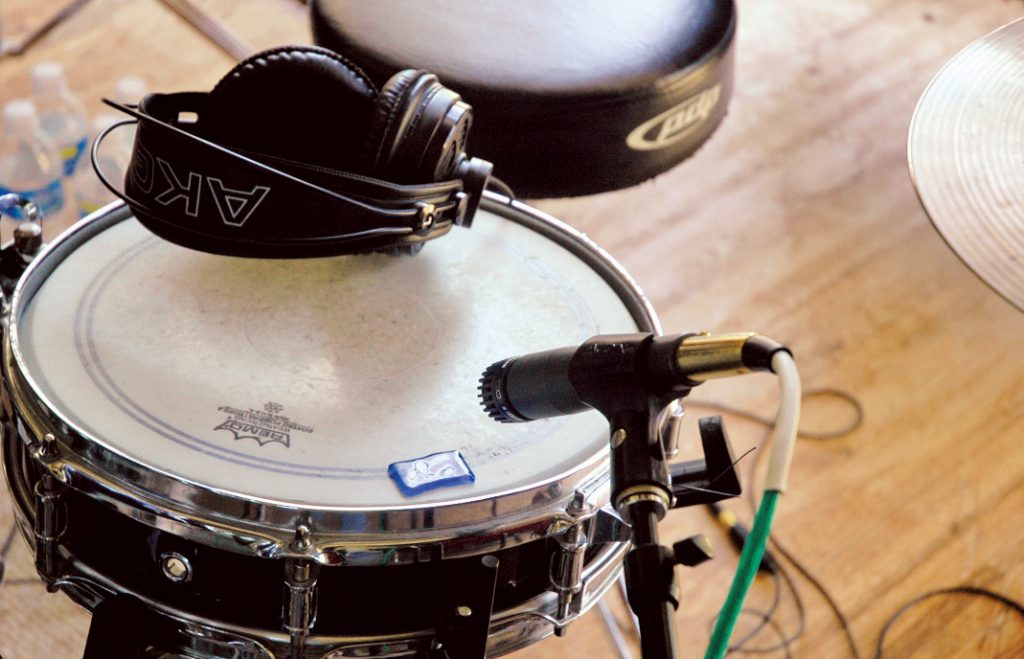
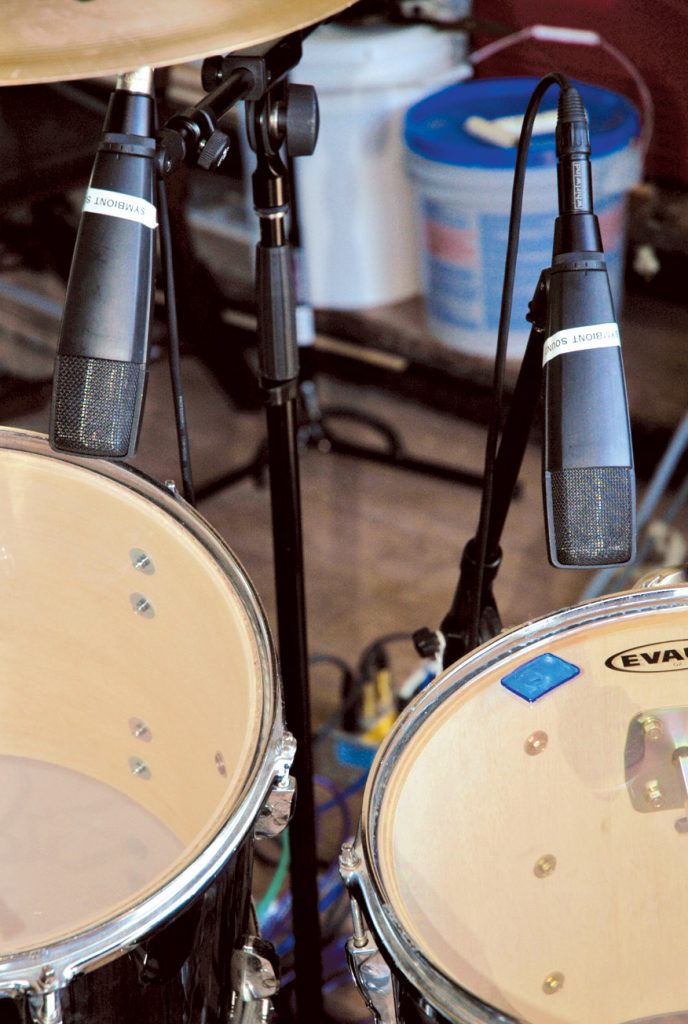
Snare and toms: For the snare top it’s hard to beat your average dynamic mic, coupled with a good out-of-phase (180 degrees polarity) micro condenser for the underside rattle. The same goes for toms, where I use almost always a set of good matched dynamic mics. The only time I deviate from this norm is if I am recording a band live, then I switch to hypercardioid small-diaphragm condensers or micro-sized condensers, both of which help give greater control and isolation.
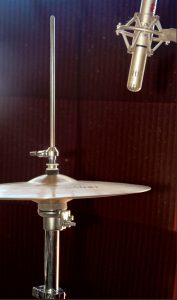
Cymbals and overheads: For overheads in the studio, I am a large-diaphragm guy as I want the big picture of the whole kit. Again, however, if it is a live session or if I want to zero in more on just the cymbals, then pencil condensers do the trick. For hats and rides it is again almost always a small-diaphragm condenser, giving special attention to placement and angle. Again, nothing scientific, I just move the mic around the cymbal until I get the tone I am after.
Generally the closer you get to the cymbals, the more low overtones and longer ringing decay you capture. In the case of the hi-hat, you get a deep chuff. Distance gives you more tick and brightness, yet less forward presence.
Blending it all together
When mixing the individual elements in a drum kit, the choices are vast. Will you mix from player perspective or audience perspective? Will the snare and hi-hat be mixed with the kick in the center, or will you pan the kit wide? How wide? What kind of compression or EQ will you add? While this topic alone could warrant its own article (and we have a couple in this online library and revisit the topic frequently in the magazine), here are a few simple considerations to play with.
Panning: When panning kit pieces, always be aware of their position in your overhead mics, which themselves need not be hard-panned. But if you do want the drums to sound wide and the individual elements to appear across the stereo spectrum, then you need to exaggerate them in your mix. I guarantee, however, that no matter how wide it sounds in your headphones (which will often sound like too much) or on your studio monitors, when you hear the mix in the real world—like in a car or on a computer—the panning almost never seems as wide as you were intending.
Playing with space and tone: If you have the luxury of a great open room, always use one or two room mics. They make a much more unique alternative to simply slathering a dry kit in digital reverb, although that can be fun too.
Of all the drum setups, a multiple mic setup offers the most control for tonal shaping of the kit into the mix. Just like with panning, I recommend that you not be shy or precious—this is why you miked and tracked every piece of the kit in the first place—you wanted the control, so use it! EQ and compression can be dangerous, but that is half the fun!
Could less be more? Having said that, however, the reverse is also true—just because you miked everything up does not mean you have to use it. The outer kick mic may sound great by itself, as might the top snare mic. The biggest mic that I typically see engineers foregoing is the hi-hat mic, since the hat tends to bleed mercilessly into every other mic anyway.
Of course, once you get past that point and move into dropping the tom mics and just going with their sound in the overheads, then it’s time to consider…
The 3-to-4ish mic setup
This setup can be essentially a variation on the Glyn Johns setup, or just about any other of the historic setups discussed in other articles, and most of the time we just file it under “vintage”.
Aside from being practical in situations when all you have are three or four inputs, it also yields great results for jazz, classic R&B, indie and punk rock, and any style where you want to treat the kit itself as one instrument as opposed to a large collection of smaller instruments.
Whether you are sticking with the strict placement of the Glyn Johns method (which requires measurement of distances from the snare to the various mics for phase matching) or not, most setups such as this will typically include one or two overhead mics with a kick and/or a snare mic for reinforcement.
When mixing this setup, you will be treating the drums as one stereo (or even mono) instrument. Your choices will be limited to the width of the kit’s image, and you’ll find that either (a) the kick and snare drive the song with subtle reinforcement from the overheads, or (b) the complete opposite is true.
The sum is greater than its parts! In this setup, the sound and tuning of the drums is even more important than when miking up each kit piece individually, as there are little to no options to fix, to re-EQ, tweak, or even artificially replace an element in the mix. And even though the kick and snare are still on their own, their (intended) bleed into the overheads will also be more noticeable, so even only tweaking their tracks too much may sound odd or unnatural in the mix.
Vibe over perfection: Of course the fact that the kit is taken as a whole is part of this method’s appeal and as such the kit should be pre-tweaked and tuned to fit the vibe and sound of the track. The kit could be open, boomy and unmuffled, or small and tight in a slappy room—just have a sound in mind first! Knowing the songs and arrangement beforehand will help. One of the biggest mistakes I find when tracking this way is a client who wants a big vintage wide open drum sound in a large “wet” room, who then proceeds to be disappointed that said vibe gets lost once they layer on five dense guitar tracks, keyboards, and a bunch of other stuff.
Placement and mic-style choices
Kick, snare and toms: Mic choices for kick, snare, and toms (if you mike toms at all) remain similar to those in other miking setups.
Overheads: It’s the overhead mic choice and placement that is key in this configuration. Again, small- or large-diaphragm mics are the most appropriate depending on your needs and taste, but more importantly, how do you set them up?
Of course the Johns method with its adjacent planes is one option. A simple XY mic setup (mics pointing at each other at a 90 degree anglewith capsules nearly touching) works well here and offers a nice tight phase-coherent stereo field. It’s also common to angle the mics outward at 110 degrees and separated by 6 inches or so (ORTF placement), or even split them apart on separate stands in a wide exaggerated spaced pair. But collapse to mono and check for phase problems!
Another common variation is to have one condenser as a mono overhead, and the other condenser at roughly waist level a few feet out in front of the kit. One mic becomes more of a cymbal catcher, while the other emphasizes the kit as a whole and blends it with the room depending on how close or far you move it.
Ribbons? One other type of mic that sounds exquisite in this setup is a ribbon mic in place of one or both of the condensers. It will be a much more vintage or classic tone by nature and should nicely roll off the high bite of the cymbals.
Location, location, location: In addition to the placement decisions of the overheads and their width, also consider the actual physical placement of the drums and cymbals themselves within the kit. Here I recommend listening to the drum mix in a pair of good headphones, and as the drummer plays, make sure that the toms and cymbals sit where you want them in the stereo field, and pay special attention to their volumes.
Although it may take the drummer a few takes to get used to the changes as you move and tweak their setup (and some drummers may simply refuse to let you do it), rearranging drums may avoid things like an unnatural cymbal or drum hits that were too close to one of the mics.
Minimal mono and stereo setups
And then we get down to one- and two-mic setups. In my work this usually manifests itself in folk, bluegrass sessions and jazz, where a smaller size vintage drum kit is recorded with one good ribbon mic or tube condenser, or a matched stereo pair.
 Balance and placement
 Balance and placement
In this setup, distance is the key to how full or punchy the kit will be, and all but predetermines where it sits in the mix. For mic placement the choices include a mono mic or a set of mics in a Bluemlein array (a figure-8 patterned variant on the XY set up) placed at listener height, about 3 to 10 feet in front of the kit.
My other favorite trick is to treat the mics simply as room mics and space them wide in the room, which truly pushes the kit back in the mix, but in a very natural way that would not be as believable were it accomplished through mixing and panning alone.
Lastly it is also common to have one mic be an overhead and capture the brightness of the kit, while a second mic lives out in front (as described above) and balances the low end and the room sound. For mixing, these setups are similar to the 3- and 4-mic setups.
Tracking Percussion
Before I played drums, I was a percussionist with a special interest in Arabic and African musical forms. As a result, most of my own musical releases contain copious layers of percussion parts. Some years ago I was involved in a year-long project for Sony Creative Software entitled Continental Drift and its companion volume Aftershocks. Both were collections of world music loops, which of course contained musical phrases on everything from djembe to tabla to dumbek to Native American gathering drum, as well as bells, bowls, shakers, rattles, and even ceremonial jingle dress.
My sonic goal for this library was to offer up a set of sounds that sounded more like well-recorded and polished field recordings rather than your typical overprocessed, tight world recordings that you find as impulse buys on the counter in most coffee shops. So I figured that for this article I could also offer up a couple of my percussion tips and tricks.
Solo, layered solos, full ensembles, and “field” recordings
In recordings where the only percussive element is a single drum like a dumbek, djembe or cajon, or a matched set like congas, bongos or tablas, clarity and a large-as-life sonic image (if not larger!) go hand in hand. For that I hardly ever use a dynamic mic. Instead I find that a good small-diaphragm condenser works well when I’m trying to focus on the head of the instrument and give it the balance of closeness and dimensionality. Of course a pair in an XY pattern or even a spaced pair is great for the dual drums mentioned above. Again, choosing one pattern over the other, and how you pan, is key to where it lives in the mix.
I find that condensers do a better job of highlighting the subtle finger playing typically found in most forms of ethnic percussion. Exception: Heavy-handed players of a djembe or congas.
Another favorite technique I love for solo percussion recording is to use a Mid/Side setup. This gives it a forward focus that still has the feel of a subtle stereo field.
If you multitrack and layer percussion parts to build an ensemble in the mix, large-diaphragm mics and distance are your friends. The depth gives the illusion of the ensemble players occupying the same space even when each is recorded in mono. If you want to get tricky, set up a stereo pair of mics and do each take with the player sitting in a different spot.
For real ensembles and field recordings of percussion-heavy groups, the technique is the same. Of course if you want to simply throw up a stereo pair of mics on a percussion ensemble, it should sound fine; this method has worked for years. But by adding in spot mics on some or all drums, you can obtain more forwardness, fidelity and dimensionality. Dynamics or small-diaphragm condensers work equally well here.
 Looping and reality tricks
 Looping and reality tricks
Lastly a variation of this technique is what I used for many of the instruments on my libraries. All of them were recorded individually, but when the loops are stacked it gives the illusion of ensemble percussion that you can mix and control.
Every loop was recorded with a setup of 3–4 mics and was a combination of all of the above. Stereo distance miking, blended with close-up, small-diaphragm condensers mixed in about 30–40%.
A few last bits of advice when recording traditional ethnic instruments: Many world instruments are roughly made and have intonation issues, buzzing issues and anomalies. If it jingles, rattles or scrapes, give yourself a good 3 to 6 feet from the mic for clarity and believability. Although often foreign to our delicate studio ears, leave these “flaws” in!
My Drum Mic Choices
When the Editor read this article, he asked me, “What do you use? Your advice is good and general but readers will be curious.” Fair enough. For most of my sessions I use the following mics, alone or in combination:
- Inner Kick: Audix D6, Shure Beta 91a
- Outer Kick: Shure Beta 52A, ADK Berlin 47 Au, Lauten Horizon
- Snare Top: Shure SM57, Audix i5, Audix Micro Drum Mic, Blue Ball, Telefunken M80
- Snare Bottom: Shure Beta 98
- Toms: Audix D2 (Rack Toms), Audix D4 (Floor Tom), Shure Micro Drum Mic, Sennheiser MD 421
- Hi-Hat: Shure Beta 87a, Lauten Torch, Neumann KM 84, Audio-Technica Pro 37r
- Ride: Neumann KM 84
- Overheads: Telefunken AR51, Neumann KM 84, Aston Spirit, Royer R-121, sE Electronics Voodoo VR1
- Room Mics: Lauten Atlantis, sE Electronics Voodoo VR1, Peluso 2247LE
For 90% of my percussion work I use the Shure KSM44, Neumann KM 84, Blue Ball, and sE Electronics Voodoo VR1.
Lo-fi, low-budget drum experiments for the bedroom
By day my friend David Blascoe is the drummer for the Christian pop band Citizen Way, but by night he dons his eclectic musician/producer hat as part of the indie duo The Silent Sound. He also produces grooves for hip-hop acts and video game scoring, and is inspired by the production techniques of Jack White, Daniel Lanois, the Roots, and of course George Martin.
What makes all of this interesting is that most of his initial work took place in his childhood bedroom, with a single entry-level 2-channel audio interface, a pair of $99 MXL mics, and the free copy of Steinberg Cubase LE that came with his interface.
Good lo-fi
While he strives for a lo-fi sound, it is a very produced and deliberate sound that is the result of years of work and experimentation, rather than the “lo-fi cuz he can’t do hi-fi” aesthetic common to many of today’s young artists. It also helps that he is a monster drummer who can groove solidly to a click, with ease. He also has a nice collection of high-end drums, a vintage snare, and a large selection of cymbals in all sizes, like 12″ through 17″ hi-hats.
Most of his work starts by recording his real drum kit with one or two condensers and then crushing and manipulating it in post with copious amounts of compression, bit depth reduction and/or extreme equalization.
He often starts with the 2-mic setup of one mic in front of the kit and one mic overhead. The biggest challenge is then to find a position for the overhead where it is not too close to the cymbals, but also not too close to the low ceiling where reflections become problematic.
On the flip side he will occasionally do the opposite and turn his mics around and face them into the corners, ceiling and walls to maximize the slapback and reflections for a deliberate effect.
Oddly enough, he is not a fan of using dynamic mics for single drums, as he feels they are too mushy and lack detail. His only successful dynamic mic experiments involved laying the mic on the carpeted floor in front of the kit to exaggerate the low end of the room and create a smeared image when compressed.
Bigger rooms, same tricks
Now that his band has moved into a full-on rehearsal/studio space, his minimal idealism remains the same. One of his new favored techniques is to use a single small-diaphragm condenser, horizontal to the top of the kick drum, facing the kit about 4–5′ in front. Or if he wants a bigger in-your-face sound, he will take the same mic and place it parallel to, but just over, the snare and allow it to capture the whole kit, bleed and all. He also likes low-end ribbons for the same thing. He also occasionally expands this setup to 4 mics to mix in other details of the room. In each instance compression, or what he surely recognizes as being an overt abuse of compression, is a key component to his sound.
He also likes to treat his kit with towels, as in the Abbey Road drum sound, and of course he experiments with different drums and cymbals for effect—see the 17″ hi-hats mentioned earlier.
Each limb a fader
Lastly David points out that any time a drummer works with the limitations of a one- or two-mic setup, they need to be able to self-mix as they play, and he is not talking about mixing with a piece of equipment. Instead he pretends each limb has its own internal fader, meaning you need to be constantly aware of how loud you are playing each drum or cymbal, and need to adjust your playing accordingly to how it sounds in the mics and the mix. This will be a foreign concept that will take some time and practice to master for many drummers who have been taught to bash as loud as they can and expect the recording engineer to bring it down in the mix for them.
His last bit of advice is that if you are starting out tracking drums in your bedroom with a pair or better yet a single microphone, forget the rules of “proper” placement. With a pair of headphones on, walk around the room with the mic while someone plays the kit; when you find the magic sweet spot, regardless of the position, angle or distance… leave it there!
Wrapping it up
I hope that this article has inspired you in some way. If you have never ventured beyond the world of sampled and programmed drums, I hope you will try real live drum tracking, and even if you have been tracking drums for years, I hope you have found a new angle or something to simply try. It doesn’t have to be hard and it’s not magic—although if you’re careful and use your ears, the results can sound magical.