
Select the right tools for your singer
By Dave Martin
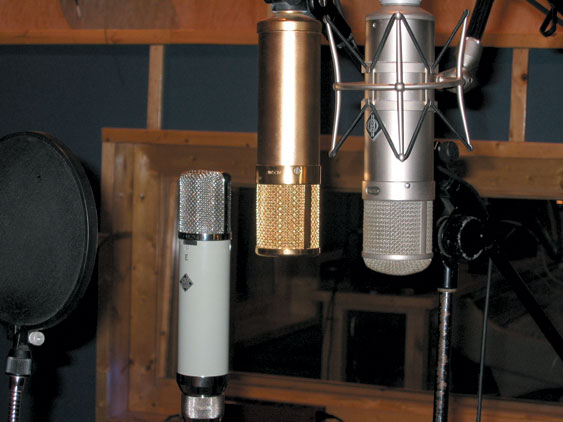
Choosing a mic
A process that’s been written about at great length in the last few years is the ‘mic shootout’—where a number of different mics are tried out, to see which one sounds the best for any given singer. (Life was a bit less complex in the days when studios—even professional studios—had only one vocal mic…). Keeping in mind that (a) most folks have great difficulty in comparing tones when more than a few seconds pass between them, and (b) most readers of Recording don’t have a boatload of mics available at any one time, here’s a simple, quick, and reasonably accurate alternative.
First, choose your candidates wisely. Honestly, a whole lot of microphones aren’t going to be suitable for a typical vocal recording session. Small-diaphragm condensers tend to be prone to plosive sounds when used 3–6″ from a vocalist; quite a number of dynamic mics are intentionally band-limited or designed to boost specific, non-vocal frequencies (think of the special-purpose kick-drum mics as members of this category); and others simply don’t sound good on vocals.
Pick two or three that you think will be potential vocal mics and set them up on stands right next to each other. Oh, and if the singer is absolutely sure that he wants to use a specific mic—and especially if he brings it with him—try that, too. It’s a whole lot better to try it and then reject it than to hurt the singer’s feelings.
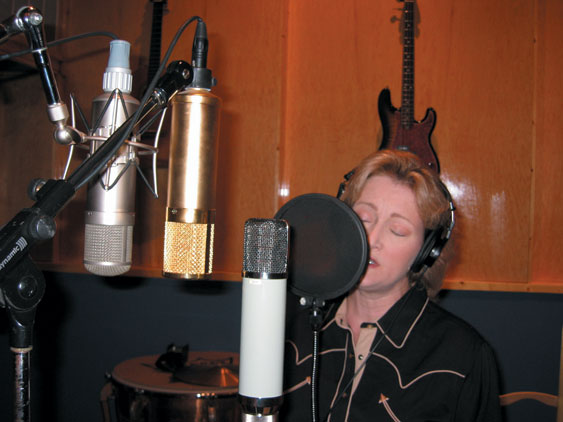
Plug the mics into similar preamps and then to separate tracks of your recorder. Record-arm all of the tracks, but mute the output of all but one (strange things can happen to the sound if two or three microphones are coming back into the singers’ headphones at the same time). Match the levels and have the singer sing a verse and a chorus of the song, then have him come into the control room to listen.
 My personal approach is to label each of these test tracks as letters or numbers rather than with the names or model numbers of the mics being tested. Listen to these tracks one at a time, without worrying about which one is which. Choose the mic you like best, and then delete the tracks you don’t like. With only one track (and only one mic attached to that track), you’ve made the decision you needed to make. Send the singer back out into the room, and have him figure out which mic is the active one (by scratching on it or something), and take the others down. This process should take less than 20 minutes, and will work as well as any other method.
I should point out that sometimes there are differences of opinion between you and the singer; remember that in my world, the singer is often the client, so I accommodate him. Kinda. I’ve been known to leave the singer’s mic choice up as well as my mic choice, and record them both (with one track muted).
Do I hear a voice in the back, saying, “But what if you have a lot of mics, and a lot of different preamps?” Well, to be perfectly honest, if you have those things, you should also have spent the time to learn the sonic characteristics of your mics and your preamps before the talent arrives. You should choose a few likely pairings from your closet, and work with those.
Keep in mind the need to make decisions—this is one of those times when you have to choose a direction and move on. Pick a couple of mics and a couple of preamps, try them, and choose the one that sounds best at the time.
The recording chain
Moving into the realm of opinion, religion and speculation, let’s talk for a minute about the signal chain options for recording vocals. A complete signal chain could run from microphone to preamp to compressor to EQ (or EQ then compressor… but see below) to the recorder. Some of these items are optional; the preamp isn’t, so we’ll start there.
There are all kinds of preamp flavors these days—solid state, tube, with or without transformers. How do you choose? Well, the easy answer is that you should choose the preamp that sounds best with your chosen microphone and the singer’s voice. While there are those who will swear (with a straight face, no less) that you are supposed to use solid-state preamps with tube-powered mics, or that it will get too ‘tubey’, or that tube compressors and tube preamps are ‘too warm’ unless the mic is solid state, there really are no rules. I’ve tracked vocals with an all-solid-state signal path, and I’ve tracked them with all-tube gear. If it sounds good, it is good. That’s the bottom line.
Most of you have read that 24-bit converters have a theoretical dynamic range in excess of 144 dB. Since compressors and limiters were originally developed to limit the dynamic range of signals to something that was usable for the broadcast and recording systems of the time, it makes a certain amount of sense to use no compression with modern recording systems. Any modern recording system certainly has the capability to capture both the loudest and softest sounds that a singer makes.
On the other hand, most of us are used to the sound of compressed vocals; we expect that the lead vocal track will sit pretty comfortably within the 3–5 dB of dynamic range that today’s recordings are crammed into. In addition to that, every compressor adds its own flavor to the recording; this flavor is another component in a ‘contemporary vocal’ track. For me, the bottom line is that while compressing vocals during recording is no longer a necessity, it helps to achieve the sound that folks expect today, as well as allowing hotter average levels to be recorded—more on that in a minute.
On the other hand, I don’t often use EQ when tracking, for a couple of reasons. The first is that I’m often recording the lead vocals before everything else is on the track. So I don’t know what frequencies are deficient in the vocal track, and I don’t know what frequencies need to be cut. So by avoiding the use of EQ while tracking, I don’t end up committing something to tape that will have to be undone later. The second reason is that I find that if you choose the right microphone to begin with, you minimize the need for corrective EQ at a later time.
If you do use an EQ, I strongly recommend putting it after the compressor in the chain. Why? Because the gain reduction circuitry in most compressors is more sensitive to some frequencies than others (perhaps not to a huge extent, but it’s noticeable); by placing the EQ after the compressor, you can alter the tone of the signal going to tape without also altering the amount of gain reduction.
Levels to tape
And this brings me to another pet peeve of mine; while it’s not specifically about vocal recording, I gotta mention it. With such huge amounts of dynamic range available with modern recording systems, there’s no need to try to make the vocals (or, for that matter, any signal) as hot as possible. Leave some headroom between the loudest signal and full scale. Even if your peak level is 10 dB below full scale, you can always turn it up when you mix.
The small (theoretical) hit that you might take in the noise floor is worth avoiding any possibility of digital overs, which results in really ugly distortion. Recording slightly lower levels frees you, as the engineer, from a little worry about the technical aspects of the recording process, and allows you to concentrate more on the performances you’re attempting to capture.
 Headphones
I mentioned in Part 1 that I believe in keeping the lines of communication open between the singer and the engineer. Even so, as engineers and producers we sometimes have to have some other way to help guide the singer along the path to a great track. Threats of physical harm might work with some singers, but a better tool for most of us is our power to control the headphone mix. Let me just offer a few approaches that might be of some assistance.
From time to time you may find yourself working with a singer who might be consistently a bit flat—every note can be off just a bit. While my first suggestion to the singer with pitch problems is to ask him to remove one ear of his headphones so that he can hear what he sounds like in the real world, sometimes this doesn’t work.
With a singer like this, one approach is to try turning the vocals down in the headphone mix. The idea here is to get him to have to push a little bit to hear himself over the track; singing loudly can cause a singer to sing a wee bit sharper, and if you can find the balance that makes him in tune, you’ve won. And the opposite is just as applicable—if the singer is consistently sharp, you can turn their voice up in the headphones. When they hear their own voice as the loudest thing, they may lighten up and sing softer, again possibly leading them to better tuning. I’ll usually tell the singer what I’m doing (and why) when I do this, by the way; I prefer my singers to be aware of what’s going on.
Another method of helping singers with pitch problems is to change the mix that they’re getting, though in some cases, this is singer-specific. Some instruments aren’t real helpful regarding pitch—organs with Leslie cabinets (rotating speakers) or vibrato, electric guitars with flangers, tremolo or vibrato going, non-fretted instruments like fiddle and steel guitar, and even some synth pads that have a chorus or flange going on. If I’ve got tuning problems with the lead vocals and these instruments are prevalent, I often simply remove them from the headphone mix, leaving only those instruments that do offer the singer a definite pitch center.
Another thing you can try is changing the reverb—some singers are more in tune with no reverb, others sing better with a ton of reverb. Mess with it and see which works best for a particular singer.
What about tuning the vocal?
I know some producers who don’t worry at all about the pitch of the singers that they record—they routinely plan to tune the vocals after the singer is done. I’m not one of those producers, however. Not only would I rather get the performance from the artist (instead of from a Pro Tools operator), but I don’t care for the sound of over-tuned vocals.
That’s not to say that I won’t use that sort of processing if the client requests it—after all, he or she is the client, but I’d rather not. The last three records I produced didn’t have any tuning at all—no Auto-Tune, no Melodyne, nothing like that. The artists and I simply worked until we were happy with the sound and the feel of their vocals. What a concept, right?
Part 1 of this article covers strategies in the studio and working with vocalists during the session.