Take the fear out of miking acoustic guitar with this step-by-step guide
By Gene Porfido
Acoustic guitars are a completely different ballgame from electrics (which you can read about in my companion piece here). There’s no amp to add tone or distortion (unless you play through one), and capturing the instrument in its natural beauty presents completely different issues.
As with electrics (but more so), it’s hard to get the same tone your ear hears onto a recording. Rather than just coming from speakers, the acoustic’s sound comes from different places on the guitar. There’s the warm bass from the body, the squeak of the fingers across the frets, the percussive sound of the pick gliding across the metal strings (if it’s a steel string guitar), the space you’re in… and all these arrive at your ears at different times.
On Mics & Miking
- Great Guitar Gear + Great Setup = Great Sound
- Is There A Shred Behind the Couch?
- Recording the Vocalist/Guitarist
- Going Deep With Electric Guitar Miking
- Electric Guitar For The Non-Guitarist
- Understanding the Acoustic Guitar
- A-List Guitar Miking Setups
- Miking the Acoustic Guitar
- Recording the Classical Guitar
- A Mic, An Amp, A Beginner
What the player hears is even harder to capture. Even if you put mics next to his or her ears, the musician’s body works somewhat as a resonant chamber.
So we have to resign ourselves to accepting a different sound. There are acoustic guitars that just sound good no matter how you record them; then again, I’ve worked with acoustics that sound decent in the room but are impossible to record. Still, as with the electric guitar, your odds of ending up with a good recording are much better if the sound is great to start with.
Getting a feel for the player’s style and nuances can also make the difference between a mediocre and an exciting recording. In my experience, when possible it’s important to spend five or ten minutes listening to the player and the guitar go over a track before even considering mic choice.
Walk around to listen for sweet spots on the guitar and in the room. Sometimes you’ll need to move the player, perhaps into a corner or under a beam in the ceiling to find a spot that just gels with the guitar. Once you’re situated in the room, put your ear up close and listen to the wood. Listen to the front, sides, and even the back. Then think about a mic that’s going to capture or accentuate what you hear.
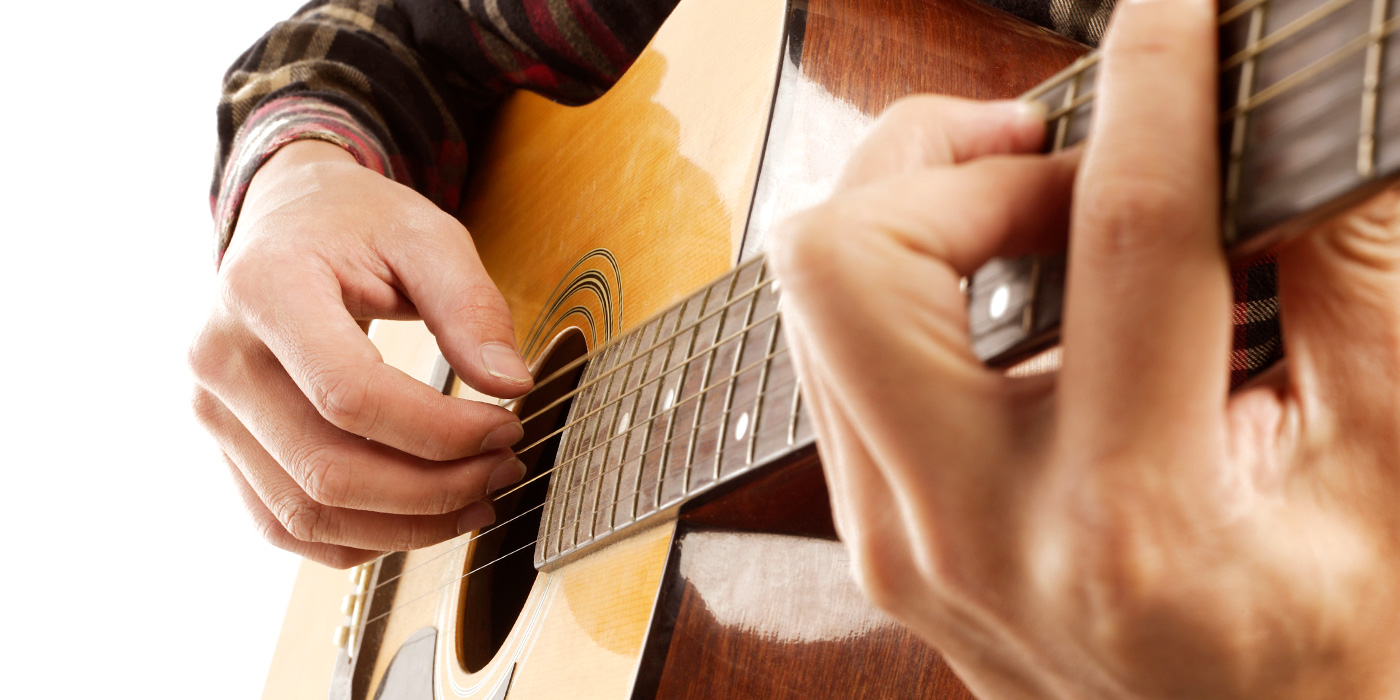
Miking acoustic guitars
While many of the mics that work well on electric work with acoustic as well, the acoustic is a much more detailed instrument, and using a high-quality condenser or ribbon mic can capture the real depth of the instrument.
The AKG C414; Neumann U 87, U 89 or U 47 fet; and Shure SM81 are among the favorite mics I’ve personally used, although there are a lot of good mics to use on acoustic guitar. The Electro-Voice RE20, a dynamic mic, works well on a lot of acoustic guitars.
Some high-end mics like the DPA 4000 series and some beautiful tube mics like the Manley Gold Reference or Neumann M 149 simply add beauty to everything they pick up. Lower priced models from many manufacturers can also do a really nice job.
A favorite mic technique of mine is to place one or two good mics near the player’s ear on his fingering hand (left ear for right hand pickers) and point them right at the sound hole. This helps capture a bit of what the player hears.
Generally you’ll want a mic in front of or near the sound hole, though, because a lot of the sound flows from there. It’s also nice to place a mic somewhere up the fretboard; depending on the guitar and player, it can be around the 12th fret (where the body meets the neck) or even as far down the neck as the 5th fret, just far enough off the fretboard so it doesn’t hit the player’s hand.
You can get excellent finger response, as some players finger very hard, but be careful not to pick up too much squeaking or sliding as the player changes positions on the neck. A great acoustic guitar player’s hand noises will actually help a track. Properly recorded hand noise really gives the impression of sitting there in front of the guitar—which is when you know you’ve done a good job of capturing the instrument.
Mixing in two or three other mics can be tricky, as there is a lot of opportunity for strange phasing problems. Listen, move mics incrementally to minimize issues, and in a pinch, you may have to time-align the tracks in your DAW after the fact. There are also phase-adjustment boxes that you can put inline on one mic’s cable to dial in the best phase response.
Along with a mic near the hole and one on the neck, you might try the one by the ear, one overhead pointing down at the player from about three or four feet, an omnidirectional mic a couple of feet directly in front of the player (to catch room ambience) and maybe even a close mic on the back of the guitar to pick up nothing but dark wood tones and the guitar rubbing against the player’s body. Placing two condensers above the player, one left and one right, much like you might mic an overhead on a drum kit, can make a nice live dual-mic recording setup.
Then you balance all these mics in the mix. Sometimes just a hint of one mic can make a difference to the sound. And sometimes you just need a hint of room sound.
Strum and shriek
A player who sings at the same time requires a different technique. This can mean close miking only, or it can mean changing the position and pattern of your mics to narrow the soundfield enough to keep vocals out of the guitar track. Some engineers will record the vocal and guitar out of phase, which can cancel the voice out of the guitar track on playback.
If there’s a chance you’ll be keeping the vocal and tracking the guitar later (or vice versa) you may want to find some kind of flat absorbent object to use as a baffle above the guitar mic, most likely on a mic stand. With little luck you should still be able to get a good sound on both instruments.
On the other hand, it can be nice to get some bleed between the mics for a real, intimate sound. Otherwise you can end up with two tracks that sound like they were recorded at completely different times. It all depends on whether this or mixdown flexibility is more important. My personal preference over the past ten years has always been to strive for as natural a sound as possible, to make it sound like you’re right there in the room.
Strum and rock out
The same holds true if you’re recording a band that wants to do everything live. If the band and guitarist are comfortable with it, try to isolate your acoustic guitar player using a gobo—or better yet, actually place him or her in a separate room; even the control room is good for this. (A gobo is large, thick panel that blocks sound.) If the guitarist is in the room with the band, you have to ensure you don’t end up with another bass or kick drum track instead of the guitar.
Having a pickup for the acoustic is a great help for isolation, but pickups rarely sound anywhere near as good as a quality mic. Balancing a pickup and a mic or two gives you a clean guitar signal with tone added from the mics, but this is a tricky situation to mix, so take your time.
Eventually it always comes back to the reality that the acoustic guitar wants to be recorded separately. If necessary, record a scratch track with the band. You’ll end up with a guide track that may end up being used or combined with a better track later.
Leaking cans
Be very careful of headphone leakage too. Click tracks especially are pure hell; regardless of how low you might have the click in the guitarist’s cans or how “closed” they are, the click is a sharp transient that often ends up on tracks during quiet parts.
This is where good engineering skills come in, as you can ride the click up or down for quiet parts. Just remember that the guitarist still needs to hear it, even when he or she isn’t playing. Headphone mixes of the whole band can also leak, so be prepared to move the mic a bit so you won’t have to hide anything unwanted by changing your balance at mix time.
Precious tracks
In the real world, the number of tracks you have available will often dictate how many channels the guitar gets. Sometimes it’s necessary to submix two or more mics to one track.
That means you only get one chance to balance the mics. And you wondered why bands use 96 tracks to do a single cut? With everything on its own track, come mix time you can take whatever you want from each mic’s track, even changing the balances or adding completely different effects and EQ in different sections of the song.
It’s also possible to submix to more than one track, of course, and that can actually work in your favor, since you have fewer tracks to deal with when you’re mixing. Once again, nothing has to be done in any particular way. The more you can experiment with mics, tone, and balances, the more fun and more options you can bring to the music.
Finally, remember that there are also plenty of times when one mic on the amp or acoustic is all you need for a whole song or even an entire record. Don’t feel you need to throw lots of mics at a problem that doesn’t exist.
Equalization
Sometimes simple is best. But sometimes simple isn’t best, which is when some EQ can further the creative process. EQ can really help sweeten a track, and in many cases it can help get the tone that’s evaded you even after trying every mic and mic position known to mankind, for example adding a little 12 kHz to the mic near the picking hand to bring out some picking noise.
EQ can also solve problems. Maybe there’s cymbal bleed or an obnoxiously prominent frequency leaking from the headphone mix into the room mic. Use EQ to notch it out, dialing in a very narrow bandwidth and leaving the surrounding frequencies alone. Like bad mic technique, EQ can create subtle phase problems that neither you nor the band you’re recording will be happy with; conversely, it can make a mix.
Obviously, all effects and processing (including EQ) are pretty hard to undo once they’re committed to tape or disk, so it’s usually best to use them in moderation while recording and save the heavy-duty manipulation for mixdown.
Main squeeze
Compression can really even out a guitar track. Among other things, it can bring power chords out so they make your hair stand on end. By adjusting the attack and release times along with the ratio, you can make the pick attack more or less prominent. Or you can make a super-clean guitar float above the track.
While it’s impossible to list compression settings that will work in every circumstance, here are a couple of starting points to try out. These apply mainly to predictable, solid-state compressors rather than to more nonlinear tube “character” units.
Try a fairly moderate 3:1 or 4:1 ratio with a fast attack (to keep the pick noise down) and slow release time, say one second or slightly less. The guitar should stay nice and even throughout the song.
Now change to a slow attack time that allows the initial transients through. This will keep the attacks sounding normal. Then the compressor grabs the sound, and with the right ratio and right amount of makeup gain, you can bring up the tails of sustained notes that would be dying out without compression.
Next, try switching to a fast attack, very fast release, and heavier ratio of 6:1 or above. This squashes the attack but makes the decay sound normal. On a clean sound, a 4:1 ratio with fast attack and very slow release times will leave the guitar compressed at all times (assuming you set the threshold low enough). This is a classic clean guitar sound that you’ve heard a million times.
Most compressors sound different from one another, in fact they make a huge difference to the sound—which is why there are so many of them on the market. It takes some time to become familiar with compression and compressors to know which one and what settings will give the right sound.
Many guitarists will have their own stomp box compressors. These are designed to go inline between the guitar and the amp. You could use them on a mixer channel insert or aux send, but they don’t always sound right with line-level signals. While anything in the line when you record the guitar is permanent, these processors can often expose new and very cool sounds—especially at radical settings.
Other effects
Other effects—chorus, delay, reverb, and other delay/pitch-based programs—can be the icing on the cake. There’s a huge variety, from subtle single choruses up to thick 12-stage superflangers that spread one track across the entire stereo field.
You’ll want to be careful with your choice of delay-based effects if your mix is going to be played in mono. Cheap delays often get width by phase inverting one channel and panning the inverted version to the other side; this can sound good in stereo but result in strange frequency cancellations (or even no echo at all) when you collapse the program to mono.
Chorus adds space, depth, and color to a clean electric or (used sparingly, especially on a nice 12-string) acoustic guitar. Lovable as it is, it’s very easy to use too much and end up with a cheesy sound.
Delays can add front-to-back space to a guitar. A few repeats with a delay set to quarter or half notes in time with the song can bring a part right out of the mix as it trails into the background.
Multiple tight delays at around 35 to 100 milliseconds, panned hard or nearly hard left and right, open up a wide aural plane—much like a chorus but without the pitch movement. Suddenly that single track sounds like two or three guitars. You can almost trick the ear into believing the sound is coming from outside the speakers if you do it right.
Flanging, phasing, auto-wahs, and some of the other effects available in many guitar effects units are all useful too. Effects could easily take up an entire article of their own; the point is that they’re an important part of today’s guitar sounds, and might be worth experimenting with to give your tracks a little special something.
Left turn on red light
Whether a guitar sounds mean and low-down or beautiful and soulful is mostly up to the player. But it’s not difficult for an engineer to help the player get the right sound for the recording.
The engineer’s challenge is to get the best possible sound at the source, and then to use their abilities to capture that sound. Lots of things play a role: the instrument, amp, room, mics, recording equipment, outboard equipment, effects, mix… and the skill of the engineer. Hopefully you’re now better armed to deal with all that.