Choosing and placing mics, from the obvious to the out-there
By Dave Martin
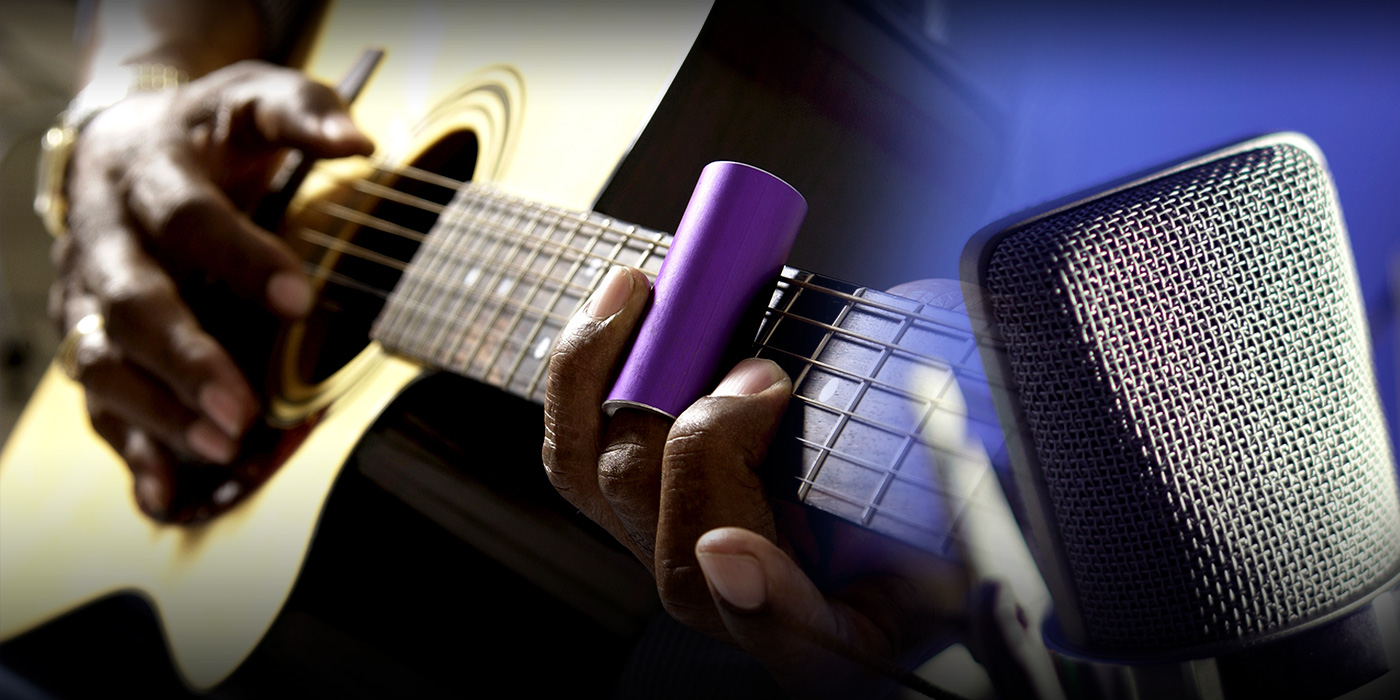
There are lots of ways to record acoustic guitars. In the last 10 or 12 years, my approach to recording acoustics has changed quite a bit—as I’ve learned about the various tools and techniques that others use, I’ll try them out; if they work for me, I add them to the arsenal. The approach I take in any given session depends on all of the usual variables—the instrument, the player, the song, the room, and what tools I have available on any given day. Let’s start with the tools.
Microphones
If I were to generalize (which is dangerous—there’s always an exception to any rule), I would suggest that small-diaphragm condenser mics tend to have a slight edge on all acoustic instruments… except upright bass, which is a topic for another article.
 Why small-diaphragm mics? Well, perhaps it’s that large-diaphragm mics tend to be less accurate in their off-axis response than small-diaphragm mics, or that the proximity effect is more controllable with the smaller mics, or maybe it’s that it’s easier to place small-diaphragm mics in the space between the music stand and the musician, but most likely, it’s simply that I like the sound of my small-diaphragm mics better.
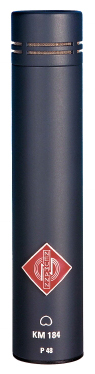
When the only small-diaphragm mics I had were Shure SM81s, those were what I used. As my mic locker grew, I would try the new mics on acoustic to see if I could improve the sound of my recordings. Some, like AKG’s 460/CK61 (no longer in production) combination, didn’t work for me, while the later AKG 480/CK61 was much more natural-sounding. I’ve had good success with both Neumann KM 84s and the current KM 184s (the 184 seems to have a ‘zingier’ high end, while the KM 84 sounds sweeter and a bit rounder), as well as Earthworks and DPA mics.
Three microphones would be called current favorites, though; one is the M-582, a small diaphragm tube mic made by the Microtech Gefell/Neumann plant in the former East Germany, and the other two are a couple of the exceptions I mentioned earlier. They are both large-diaphragm mics—one is a mic from Taylor Hohendahl Engineering (TH E), with a large 26 mm diaphragm capsule (reviewed October 2001), and the other is Shure’s KSM44 (reviewed March 2001), a most excellent value and a fine-sounding, transparent large-diaphragm mic.
Mic patterns
Most microphones sold these days have a cardioid pickup pattern, which means that the mic is most sensitive to sounds coming from in front of the capsule, and is less sensitive to sounds coming from the sides and the rear. Most cardioid mics have a pronounced proximity effect, which means that the low end response of the mic is increased as it is moved closer to the sound source. But don’t forget that both omnidirectional mics (which are sensitive to sounds coming from all directions) and figure-8 mics (bidirectional mics which are more sensitive from the front and back and less sensitive to sounds coming from the sides) can be enormously useful, as I’ll detail in a bit.
Also remember that there are options other than large- and small-diaphragm condensers. Besides some rather odd pieces like Neumann’s Dummy Head (KM100) and boundary mics like the Crown PZM, you can also try dynamic microphones—the Sennheiser MD 441 has a really nice top end, almost condenser-like, and for certain situations the ubiquitous Shure SM57 may give you exactly the sound the song needs. Ribbon mics are certainly usable—there’s something almost magical about recording a 1940s Stromberg archtop acoustic with a 1940s RCA 77DX or its modern equivalent from AEA or Cloud. Even lavalier microphones, like the Sony ECM series, can be used with great effect. And don’t forget that the built-in pickup on many acoustic guitars can be usable for certain applications.
Preamps and compressors
Let’s step away from mics for just a moment to talk about what the mics are feeding. The preamp I choose depends in large part on whether I need the most natural acoustic sound I can get, a more present and contemporary sound, or something that’s smooth and full. In my studio, I would go for the Great River MP-2, Manley’s 40 dB tube pre, or the Great River MP-2NV, respectively. If for some reason I feel compelled to EQ when tracking (something I seldom do), then I would use some Vintech X73s—the Neve-type EQ on the X73 is quite euphonic on acoustic guitars.
90% of the time I prefer the sound of a transparent optical compressor on acoustics; the Manley ELOP is my first choice for that. For a bit more aggressive compression, while maintaining some transparency, I’ll choose a Crane Song Trakker. And if I’m after a rocked-out acoustic guitar, a Universal Audio 1176 is hard to beat.
These are the tools that I regularly use for acoustic guitars—while they work very well for me in my room, they aren’t the only tools that can be used. Besides, far more important than the microphone, preamp and compressor is where you put the microphone in relation to the guitars.
Mic placement
It’s been said before, but bears repeating—the best way to find the optimum placement of a microphone is to find the spot where the instrument sounds best. Do this by putting a finger in one ear and listening to the instrument with the other, moving around until you find the spot where it sounds best to you. Then put a mic in that spot.
I mentioned a little earlier that I rarely use EQ when tracking acoustics—so many tones can be achieved by placing the right microphone in the right spot that electronic equalization is usually unnecessary. For example, you might put a microphone 6 to 8 inches from the guitar, pointing at the neck about midway between the sound hole and the 12th fret.
When you listen to the signal, you may decide that the mic is picking up too much of the guitar’s low end—it sounds boomy. If this is the case, you could either point the mic farther up the neck and away from the sound hole (where a lot of the low end comes from), or you could pull the mic back another 6 or 8 inches (which will lessen the proximity effect of the mic). If the sound of the mic is too bright, you can move the mic closer to the sound hole or closer to the instrument. This isn’t an either/or choice; the character of the low end created by proximity effect is different from that attained by moving the mic closer to the soundhole.
Another approach is to use the off-axis frequency response of a mic to your advantage. Earlier I mentioned that cardioid microphones are more sensitive to sounds coming from in front than from the side; that’s true as an average, but many microphones exhibit a decreased sensitivity to certain frequencies as the source is moved off axis (that is, away from the front of the capsule). As an example, at 30 degrees off axis, a specific mic may be 2 dB less sensitive at 1 kHz, and 4 dB less sensitive at 10 kHz. For the user, this means that one way to change the sound captured by that mic would be to point it slightly away from the sound source.
Placing omnis
Omnidirectional microphones don’t exhibit a proximity effect; for the most part, moving an omnidirectional mic away from the guitar will only decrease the volume of the microphone’s output, and increase the amount of room sound picked up by the mic. If you’re recording in a great-sounding room, this is an advantage. If not (and most of us are not recording in great-sounding rooms, and even fewer of us work in extremely quiet rooms), then increasing the distance between the mic and the guitar could be a detriment.
On the other hand, since omni mics don’t exhibit any proximity effect, you can minimize the room sound by placing the mic much closer to the guitar than you could with a cardioid pattern mic. I’ve placed omnis like the Earthworks QTC1 as close as an inch away from an acoustic guitar, almost completely eliminating unwanted room sounds from the track, but without any bass buildup.
Placing bidirectionals
The use of bidirectional (figure-8) mics may require a little forethought, since they are as sensitive to sounds coming from the rear of the mic as much as they are to those coming from the front. On the other hand, these mics have a much greater rejection of sounds coming from the sides (the area 90 degrees away from the front of the mic) than a typical cardioid mic. If you want to minimize ambience that would be picked up by the back side of a bi-directional mic, a sound absorbing gobo can be used. But the room ambience, which will usually be at a much lower volume than the direct sound, may really enhance a particular track.
Another good use for these mics is for those situations where you’re recording a singer/guitarist. If you were to use normal cardioid microphones for the singer and his guitar, you would typically end up with quite a lot of the guitar in the vocal mic and quite a lot of vocals in the guitar mic. This can be a problem when mixing; any processing, including simple things like changing levels, used on one mic, will have an impact on the other. And that assumes that phase issues won’t arise (which they often do when two mics are used in this manner). The use of two bi-directional mics will minimize these problems; place the vocal mic so that the null is towards the guitar, and place the guitar mic so that the null is pointed at the singer’s face. The amount of bleed will be minimized. A more detailed treatment of this problem and its solutions, with photos to demonstrate placement, is available in the article “Recording the Vocalist/Guitarist” on this site.
Placing lavaliers
Lavalier mics can also be great problem solvers when used on acoustic guitars. Most folks see lavaliers used on television, where they’re attached to the clothing of people being interviewed on camera. But those same mics can be attached directly onto a guitar. Some guitarists simply cannot sit still when they play; they move around so much that a ‘normal’ mic can’t be used. By attaching a lavalier onto the guitar, the swaying of the guitar player can effectively be negated.
Another situation which calls for lavalier mics is the recording session where 6 or 7 musicians are all sitting together in a room—unfortunately a much less common situation these days than 15 or 20 years ago. When I came to Nashville in 1985, many studios had a drum booth and a vocal booth; all the rest of the musicians (acoustic guitar, electric guitar, steel, piano, bass, and sometimes fiddle) would be together in the tracking room. There would usually be a couple of amps in the room.
At those sessions, the only way to get any isolation on the acoustic guitar would be to tape a lavalier inside the sound hole of the guitar. Fairly radical EQ was required to get a usable acoustic sound, but a whole bunch of records were done in exactly that way. These days, this solution would most likely be needed to minimize things like the noise from a computer, or for a live recording.
Built-in pickups
And while I’m thinking about it, don’t neglect the built-in pickup that many guitars have these days. While none of the pickups sound (to my ears) as nice as a good guitar well recorded, there are times when the sound of the pickup is the most appropriate tone for a given song.
If you have the tracks available to record both a mic and the direct sound, you’ll have some interesting possibilities for experimentation. Sometimes combining the two signals will be cool; sometimes panning one left and the other right will give you what you want. More often, I’ve found that putting effects (whether it’s a chorus, a delay, or even distortion or an amp simulator) on the direct track sounds better than doing the same thing to the miked track.
Stereo guitars
If you have the tracks (and the microphones) available, you can greatly enhance the sound of your acoustic guitar tracks by recording them in stereo. All of the usual stereo recording methods—XY, ORTF, or even M/S—can be used on acoustic guitars, as can multiple mic configurations that really shouldn’t be called “stereo.”
I tend to use one of two setups on acoustic—one is a straight XY configuration, with the mics about 2 feet in front of the guitar, centered about two inches to the right (as you look at the guitar) of the sound hole. The other method puts one mic about 8 inches away from the guitar and a little below the center line of the instrument, pointing up towards where the neck meets the body. The second mic is placed even with the bridge of the guitar, about 18 inches out from the body, and about even with the player’s chin. This mic points down towards the body of the instrument.
A variant of this placement brings the second mic over the musician’s shoulder from the back, placing it even with his ear and pointing down at the guitar. (The idea behind this is that it’s what the guitarist hears, so it ought to sound good on tape as well.) Check to see that the same levels are being recorded from both microphones.
Check for phase
It’s extremely important to check for phase issues with multi-mic setups. If your console (or workstation) has a ‘Mono’ switch, use it. If not, try panning both guitars to one side, and listen for changes in the tone of the guitar.
If the guitar sounds thin, boxy, or simply bad when both mics are panned together, move one or both mics until the sound is acceptable. Then pan the two mics hard left and right. When panned to opposite sides, the acoustic should sound huge.
A nifty doubling technique
Using two microphones, either in a traditional stereo setup or in the configuration just described, has another advantage for the way that I usually work. About 60% of the time I end up doubling the acoustic—that is, I’ll have two acoustic guitars playing more or less the same thing (though one may be capoed in a different position to change the sound a little). With a multi-mic setup, I can record the first pass of acoustics in stereo; then, if I decide to do a second guitar track, I simply rewind to the beginning of the song and take one of the two tracks out of Record.
The first track will be panned to one side and the new track will be panned to the other in the musician’s headphones, so he will be able to differentiate between the two passes. I don’t have to touch a pan control on the board or (more important) have to repatch anything for the second pass. And when I mix, whatever processing I’m using and even the relative volumes of the two tracks will be the same from song to song, whether there’s one or two acoustics on any song in the project. This kind of setup makes my job as an engineer easier.
On your own
Remember that the key to successfully recording acoustic guitars is the willingness to experiment. Think about what the song requires the acoustic guitar to sound like, and then try to create that sound. If the sound you need requires you to do something strange, then try it—the worst that can happen is that it won’t work. But then, it might be the coolest thing you’ll do all week.
Not long ago, we were looking for a wiry, almost metallic acoustic guitar sound. After trying a bunch of different microphones without success, I lowered a metal music stand as far as it would go, and pointed it at the face of the guitar from a couple of feet away. Then I pointed a mic at the stand, to get reflected sound of the acoustic guitar off of the metal surface. A little judicious EQ, and we got exactly what we needed. It was goofy, but worked great. Experiment on your own, and you’ll find something just as goofy that works even better.