A studio’s-eye view of mic types, choices, and placement to get the very most out of your guitar amp
By Eleanor Goldfield
“It’s never wrong if it sounds right.” That was one of the first things I learned when it came to recording. It just so happens that when Barry Conley (Zakk Wylde, Black Label Society, Red Elvises, Bullet Boys, etc.) said this, he was placing two mics in front of a guitar cabinet at what seemed, to me, to be very awkward angles. In the end, however, it sounded amazing. There are countless ways to mic a guitar cabinet… and really, none are wrong unless they sound wrong.
There are some tried and true ways of miking guitar cabinets that I have seen, and more importantly, heard. Years after Barry showed me that miking trick, I used it on a session at the Village Studios, blending the formerly bizarre with a customary classic.
This article will focus on both sides of that spectrum, and the in-between, giving you a solid foundation on which to build as you experiment.
What follows—the plan
First, I’ll start with mics. Although any mic can be put in front of a guitar cabinet, here I will focus on those that pop up time and again, and a little bit on why they never get old.
Next, I’ll get into the third dimension of cabinet miking: angles and distances. This is where creativity and technical knowledge/prowess lock step. Simply moving a mic a half of an inch, turning the diaphragm out or in, pushing it backwards or forwards, can be the difference between awesome tone and awful tone.
Blends will be the third section, dishing on ways to create the ultimate soundscape with the various mics and placements you’ve set up.
And lastly, for all you adventurers out there, I haven’t forgotten about you: the wild cards. Learn the rules so you can break them, as the saying goes, and here I will give you a little insight into some oddities and rare encounters that might just shift a paradigm or two. But don’t cheat—eat your veggies first…
Mic check—dynamics
Starting with dynamic mics, the most obvious and frequently used guitar cab mic is the Shure SM57. Actually, in the spectrum of all kinds of mics—dynamics, condenser and ribbon—the SM57 is the poster child for guitar cabs, for good reason: not only is it almost impossible to break an SM57, it has an ideal frequency response curve for most guitar cabinets.
The SM57 has a steady rolloff from 200 Hz down, allowing for on-the-grille miking without battling proximity effect or flabby frequencies from the cab itself. This rolloff also leaves more room for the bass and/or kick drum. A dip between 300–500 Hz sucks out some more muddy frequencies. The steady growing peak from 2–6 kHz highlights the bite and punch of electric guitars, pulling back slightly in the high shimmery ranges of 8–10 kHz to allow for sparkle without the harsh hiss.
 The Sennheiser MD421 is likely the second most popular guitar cabinet mic. Nicknamed “the fish” for its shape and awkwardly slippery quick clip, this large-diaphragm dynamic was built for vocals and broadcasting, and it has a rotary bass rolloff selector (near the mic-cord socket) for five different frequency responses, from S (Speech—with a bass roll-off below 400 Hz) to M (Music—a flat, steady response from 90 Hz–1 kHz). There is a smooth emphasis between 3 kHz and 8 kHz, before dropping off at around 15k. Start miking a cabinet with the M position—don’t forget to check! If the tone you get is too bass-heavy, first increase the distance from mic to speaker, rather than engaging the rolloff too soon.
The Electro-Voice RE20 is another dynamic mic with bass rolloff capabilities that’s regularly shoved in front of guitar cabinets. Also built as a broadcast mic, the RE20 has a pretty steady and flat response from 70 Hz–1.5 kHz, with a boost around 3k and subtle shimmer between 8–10k before gradually sloping down. With the bass rolloff, there’s a steep incline from 40 Hz–400 Hz, something to be aware of for both the good and the bad effects.
These are the three main dynamics that I’ve seen set up in front of guitar cabinets. This is a good place to start, but there are certainly others out there, such as the Shure SM7B and many others. Dynamic mics tend to have high thresholds for SPL, unlike most condensers and ribbons, which is where we’re headed next.
Mic check—condensers
Although condensers distort more readily than dynamics, some of the tones they can capture are certainly worth experimenting with. Many condensers do have pad switches; don’t be afraid to use them. You’ll still get all the rich goodness condensers can offer—typically a more expanded frequency response, particularly in the lows, with less bitey highs and rounded mid-upper mids, overall a more smooth and silky sound than dynamics.
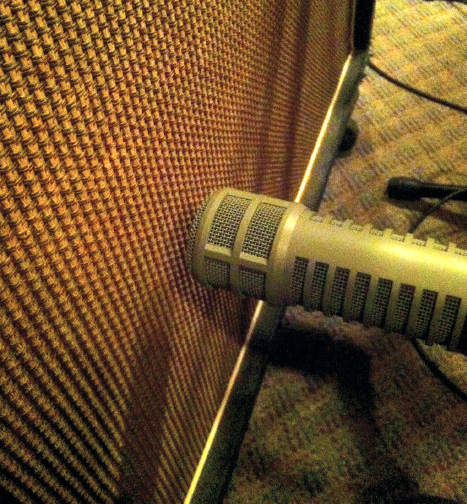
First up, the AKG C414 is a classic large-diaphragm condenser that has a beautifully flat response from 30 Hz–1 kHz, a slight dip around 1.5 kHz and a broad, smooth bell peak around 5 or 6 kHz, sloping off after 15 kHz. Now, to be exact, I am referring to the C414 B-XL II. There have been many versions of the 414 since the ’60s so there will be some variation depending on which exact model you have. The B-XL series is the latest and easiest to find. The other 414 in this series is the B-XLS, which has a very similar response curve, with slightly flatter highs.
In the world of condensers, one cannot escape the power of Neumann. The three sisters—U 47, U 67, and U 87—are beautiful mics that offer broad-spectrum capture and that “it” factor some producers and engineers can’t describe and can’t live without.
Again, Neumann and AKG don’t own the condenser-for-cabinet market, they’re just the most popular ones. For example, I’ve also successfully used Audio-Technica on a few cabs; the AT4060 and the AT4047, the former of which can handle 131 dB SPL (more than average for a condenser).
For me, however, the beauty of condensers comes not at close range and highest SPL, but at arms’ length and then some, which we’ll get into in a moment. Before that, however, let’s talk ribbons.
Mic check—ribbons
Historically, one has had to be careful with ribbon mics due to their delicate construction—quite literally an aluminum ribbon only a few microns thick. If you’re not sure how thick a micron is, one inch is equal to 25,400 microns. So, it’s a pretty thin little sliver of a ribbon in there. That ribbon is what gets blasted with SPL and conducts the electronics of the mic.
Nowadays there are ribbons that can take a beating, and when they do, they deliver a warm honey feel to the lows, and a rich and smooth creaminess to the mids. Ribbons are not generally known for their airy or crisp highs, which can make them a good pairing for, say, an SM57. Think warm caramel sauce as opposed to icy dibs.
The Royer R-121 is perhaps the most famous of these examples. With the ability to handle up to 135 dB SPL, it sits happily in front of any guitar cab, capturing creamy and rich textures that have become well known and loved in the studio world.
The Beyerdynamic M 160 ribbon is another popular choice, giving you a little bit more in the highs than the 121 with a comparable SPL rating of 129 dB.
The Coles 4038, made by BBC as a broadcast mic back in the 1950s, has a fairly flat frequency response curve. It breaks up more readily than the aforementioned two ribbons and is known for its delicacy, but delivers soft highs and almost goosebump-inducing smooth and cozy lows and mids.
So, with a nice smorgasbord of mic options, let’s dive right into where to put them.
Location, location, location
When it comes to cabinet miking, there are a few basic generalizations to keep in mind when you’re starting off.
First, the further you are from the cabinet, the more room tone you’ll get. The direct sound of the cabinet will be less bassy and have softer highs. The closer you are, the more direct cabinet sound you’ll get, with added proximity effect down low plus piercing highs.
Second, the closer you are to the center of the speaker cone, the brighter and more direct the sound will be. As you move towards the edge of the cone, the sound will get darker.
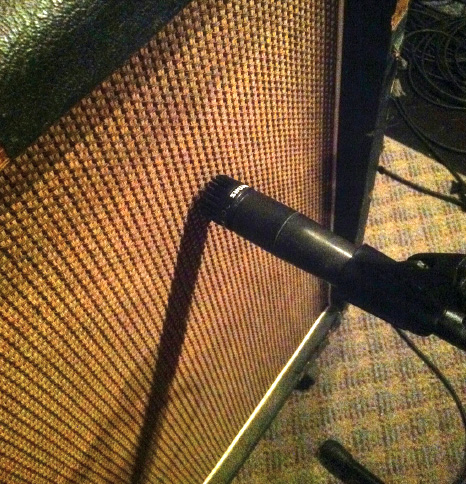
Third—on-axis vs. off-axis. This comparison refers to the angle at which the mic is placed in relation to the sound source. So, let’s say you have that SM57 placed at a 45 degree angle against the grille of the cab. That is 45 degrees off-axis. If you place it pointing straight towards the cab, that’s on-axis. Not surprisingly, on-axis gives your more treble and more punch. Off-axis gives a bassier, darker and warmer tone.
Let’s start with close miking, which to me is anything up to 6 inches away from the cabinet. Most engineers and producers have their own preference; some wanting to literally shove the mic into the grille while others prefer an inch or more of distance. In most cases, I like to see the smallest sliver of light between the grille and the diaphragm of the mic.
I say “most cases” because there is always variation. Something I recommend is to have someone out with the cabinet moving the microphone back and forth from the amp, 6 inches to right up front, while someone plays through the amp and you listen on headphones in the control room. This will allow you to hear the spectrum of close miking, solidifying your sweet spot.
First, however, grab yourself a flashlight and hold it up to the grille, revealing the placement and size of the speaker. Some engineers will just feel around for the edges of the speaker cone but I prefer the accompanying visual. Alternatively, you can simply remove the grille.
If your cabinet has multiple speakers, it’s not a bad idea to take the time in finding the best sounding one… or the best ones, if you plan on using multiples. This will require that you either move a mic in front of each speaker and record a sample of each, listening back in the control room, or that you stick your head close to the cabinet. If choosing the latter, make sure to check the volume on the amp first. I’ve learned this the hard way—no fun.
Once you have a good idea of which speaker(s) to go for, and of their size, you can go about placing mics! Not all the aforementioned mics work on all cabs. I’m giving some general placement ideas and options. But as with anything else in recording, there are no rules until it starts sounding bad. Use this as a starting point and don’t be afraid to get creative.
In 90% of the sessions that I’ve done where the engineer/producer didn’t have a specific reason for avoiding the SM57, that’s the mic that we started with. Because of its tonal characteristics, I like it on-axis, almost touching the grille, at the center of the cone.
If the cabinet is really bright, like a Fender Tweed or something similar, I may turn the SM57 to a slight off-axis angle, or move it out from the direct center of the cone, but not too much. Don’t try to turn one mic into several, or into a mic it’s not. Grab several and mix.
When I use the MD 421 and/or the RE20, I’ll typically place them halfway between the edge of the cone and the center, on-axis, about a half inch to an inch away from the grille.
I really like adding a ribbon to the mix here. For me, that’s been the Royer R-121, but as I mentioned, ribbons tend to have similar characteristics across the board.
This one I will also place about halfway between the center and the edge of the speaker, perhaps more cheated towards the edge so as to accentuate the smooth, warm lows and creamy mids that the dynamics don’t highlight.
Some other quick close-miking ideas:
~ Place a mic at center and angle it out towards the edge of the cone, about 1 inch from the grille.
~ Place a mic at the edge of a second speaker and angle it towards the center of the first.
~ Grab two of the same mic (I use SM57s for this one) and place one straight on and one at 45 degrees.
For close-miking I prefer the warm transparency of a ribbon and the edginess of dynamics at closer range. I don’t typically like a condenser for close miking, although I know several engineers who do. Why not condensers? The condensers are very clean and pure. I don’t like that kind of purity up close. I want it to blend with the cacophony of tones happening in the room and serve it up with a nice shimmery bow.
But for far or remote miking, a.k.a. room miking, I’ll use a condenser. I’ll throw one up about 4–5 feet or more away from the cabinet, depending on the room.
I once miked a cabinet in a room that was about a half-click away from being an echo chamber. There, I found it distracting to have the room mic any more than 12 inches away from the cab. The situation will dictate the placement.
 Blend big
I say “blend big” not because I’m assuming you want the “wall of sound,” but because in most cases, you’ll want to blend additively. In other words, check your phase! Any time you have more than one microphone on a single sound source, you run into the possibility of phase issues. If you start blending those lovely mics that you’ve placed and the sound becomes smaller, you have a phase issue.
Another way of checking this is to simply look at the compression and rarefaction of the sound waves inside your DAW. Does one go up when the other goes down? That’s a phase issue. You can fix this simply by nudging one of the regions to line up with the other track.
Yet another way that I’ve seen engineers tackle phase problems is by placing the diaphragms of two mics at exactly 90 degrees to one another, bodies crossing with the diaphragms as close as possible. This is basically XY stereo miking, but with two different mics.
A cool and old school way of dealing with phase, is this little trick: Turn the amp up loud, with the volume of the guitar all the way down, making the amp hiss. In front of your chosen speaker, wearing headphones, move the first mic around until you find the spot where the hiss sounds the most broad across the spectrum. Grab your second mic and invert the phase, sweeping it across the speaker until the hiss is at its lowest. Do the same with any additional mics. You won’t be able to completely cancel the phase like you can inside the DAW by moving regions, but it will be really close. Once your phase is in order, you can blend your mics together.
 There are also simple phase-shifting devices that you can put inline between one of the two mics and your recorder; you turn the dial until the blend sounds best. The best known of these are the Little Labs IBP (In Between Phase) and the Radial Engineering Phazer, but I’ve never worked with either.
In terms of the blend of mics you have up, I will typically choose an ‘alpha mic’ and at this point, I’ve become rather predictable: in most cases it will be the SM57. More often than not, I’ll use this as my alpha mic and blend the others in relation to it. The other dynamics fill out the sound, particularly in the punchy mids. The ribbon will add depth and warmth and the condenser will add room tone.
I’d like to briefly suggest recording a DI track if you have the space in your DAW’s track count. This isn’t because it’ll sound good now, but it may come in handy later to try some reamping (sending the recorded DI signal back out to an amp).
Now, before you print your guitars and call it a day, read this last little section about the fascinating oddities you may want to try when recording guitar cabinets (insert evil chuckle here).
Wild cards
Well, let’s start at the beginning: mics. I mentioned the staples, the cool kids in the class. I, however, appreciate the theater kids and geeks, so I like throwing up a wild-card mic every now and then, just to see what it gives me.
One such wild card is the Placid Audio Copperphone. It’s a band-passed microphone that highlights the frequency response of a telephone or AM radio, and it sounds pretty awesome on a guitar cab. It will unlikely be your alpha but it can add a nice sprinkling of distorted fizz and slice to your tone.
Next, mixing the extremes: Try a blend of expensive and cheap or dark and bright. For the former, take an SM57 and put it next to a Neumann U 67, then blend. The juxtaposed characteristics will give you a really interesting capture of the cabinet. Just make sure you watch out for the SPL on the 67! For the latter, take a mic like the AKG D112 or an Audix D6 kick mic and blend it with the Copperphone, or an AKG C418 or the Superlux PRA-288A (originally engineered for trumpet). Or take a Shure Beta 52 kick drum mic and blend it with an MD421 in the “S” position.
These will essentially give you a highpass and lowpass snapshot of the amp, offering interesting blending options. To make for a 3-band EQ snapshot, add in a mid-punch mic like the SM57, all pointed to the center of the cone, or in a straight line as close to one another as possible. I’ve also seen this idea done with a Sennheiser 409 for the lows, SM57 for the mids and an AKG C 12 A or C 414 for the highs.
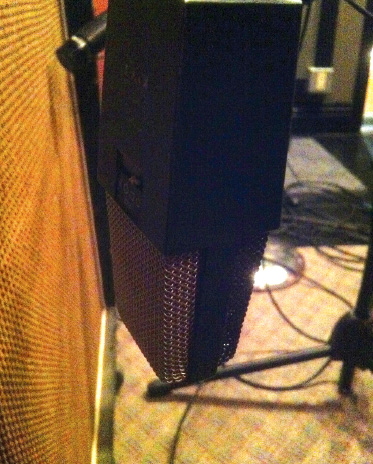
 If you want to try something a little different in terms of placement, try behind the cab or off to the side. On one track, I placed a mic behind an open-backed combo, so that the mic sat underneath the spring reverb. At one point, the amp crackled so the guitarist walked up to the amp and hit the top of it. The mic picked up the shaking of the spring reverb and we ended up using it for a really cool-sounding effect!
Back in front of the cab, try turning that room condenser mic away from the sound source. In figure-8 pattern, face it towards the walls so that it rejects the sound coming from the cabinet. Hello, room tone!
If you want to throw a wild card into the control room, try some phase EQ. This technique calls for three mics, two of which are close mics, one of which is a room mic—let’s say two dynamics close and one condenser far. Position them so that they form a triangle, with the two close mics at an angle against the grille, off-axis. Bring up one mic at a time to an ideal level on your board or DAW, making sure that they’re in phase with each other.
Then start to raise and lower each fader, creating a unique EQing effect. To get real crazy, try flipping the phase on one of the mics. It will act like a filter and really throw some interesting mojo into the mix.
Now you try
With everything from the straightforward on-axis to the crazy wild card behind the cabinet, you have a solid range of cabinet-miking options. Take your time in experimenting. Don’t figure you’ll fix it later. Really dive into mic choices, placements and blends. Even when you find something you like, why not make a note, shift the placement and see if you like that even better?
Friendly tip: know when to experiment, i.e. not on a big session that you’re assisting on. And even if it’s all about you and your miking adventures, once you get past two hours of play time, you may want to offer the guitarist a drink or some food. Happy miking!
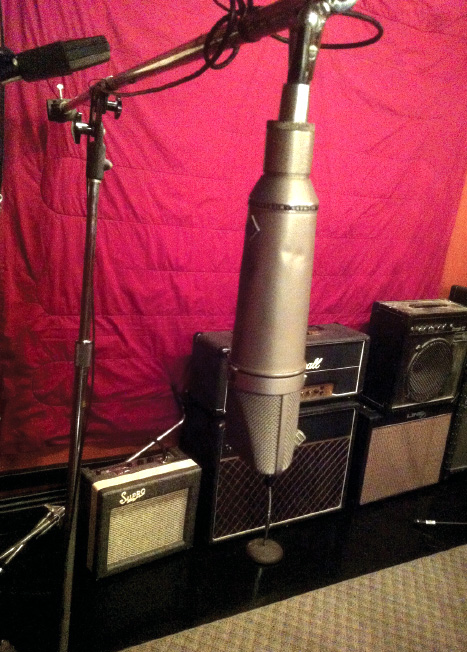
All photos by Eleanor Goldfield at The Mouse House Studios in Altadena, CA.