Here’s how to give your music the final polish
By Dave Moulton
Mastering continues to be one of those tantalizing pursuits where we’d all like to do it, but aren’t sure quite what is needed. Meanwhile, we hear sage advice telling us to leave it alone. “Don’t do any fancy compression,” we’re told. “Leave that for the mastering engineer. He or she has very special compressors that will do a much better job than you can do.”
Well, I guess we’ve been told! First, we ain’t Dale Earnhardt (which we probably already knew). Two, we ain’t even got a custom racer (don’t we wish!). So if we’re not going to be champion drivers in world-class cars, why in the world would we have the temerity to even think about venturing out onto the parking lot of audio life?
The answer is that because, at the same time that all this elitist advice spells out once again our all-too-obvious inadequacies, we are still trying to make our own recordings; one of the traditional verities behind our efforts is that we simply haven’t got the friggin’ green we need to go out and hire all the really best folks that we know we’re supposed to need in order to do anything worth doing!
On Mastering
So, in spite of everything, we know, in our heart of hearts, that we really have to try our hand at mastering. How tough can it be? Buy one of the special mastering plug-ins, jack those levels right up, and master a kick-ass disc! Why, we can do it for about a tenth of the cost of takin’ it to some guy/gal that’s simply gonna tell us how hopeless our tracks really are, and how before he/she will even consider listening to them a second time we need to remix them yet again.
Why not to master by yourself
With that all said, there really are some good reasons for having somebody else master your work. As Mark Twain pointed out, “A man who represents himself in court has a fool for a client.” It is tough to put on the mastering hat for a recording that (a) you know really well, and (b) you have a strong emotional investment in. You aren’t going to be very rational about it, and some rationality is called for.
Think of it this way: the mastering engineer functions as “the ears of last resort.” It is the masterer’s job to translate your efforts into something really palatable (and hopefully delicious!) to the public, a.k.a. your fans. That’s the masterer’s specialty. It’s a tricky, creative and quite subtle process—they will hear and be sensitive to things that you and I, in our creative turmoil, don’t even begin to sense.
At the same time, it is not reasonable to assume that—just because you can create a really cool recording—you also have the chops to master it. That first task is plenty hard; concentrate on it. I’ve always found great comfort in knowing that somebody else is gonna edit or master my work, catch my mistakes, clean up my various crazy misguided ideas.
Enough said. Sometimes we just gotta do what we gotta do.
Level Management: The Three Realms Of Sound
Probably the most critical element of mastering is taking care of the levels of the recording. For this to happen, we need to know something about levels. This is hard. First, our range of levels is huge. Second, we use the term “decibel,” which by itself is truly confusing and maddening. Third, we need to concern ourselves with three realms of sound, all of which have their own weirdnesses and pitfalls. Let’s go there for a second.
The acoustic realm
The acoustic realm is where sound actually occurs. Conversational voice level is approximately 65 dB Sound Pressure Level (SPL). Orchestral music in a concert hall ranges from about 50 dB SPL to 120 dB SPL, rock ‘n roll in a club from 80 to 125 dB SPL.
Sound becomes really unpleasant for humans above 120 dB SPL, and air begins to distort above about 130 dB SPL. Low-level noise floors hover around 50 dB SPL (I’m not going to discuss the meaning of A-weighting here) in our noisy modern world. Interestingly, that acoustical noise floor is not white, like electrical noise, but instead steeply biased toward low frequencies, so we can expect the acoustical noise floor level to be 30 dB louder at 30 Hz than it will be at 3000 Hz.
More importantly, thanks to the way our hearing works, the perceived frequency response in the acoustical realm varies significantly as a function of loudness (the Fletcher-Munson Curves). The perceived loudness of 30 Hz will probably be 40 dB less, relative to 1 kHz, at 40 dB SPL than it is at 100 dB SPL. That’s a lot!
Finally, there is no fixed correspondence between electrical signal levels and acoustic sound pressure levels. However, in the film industry, such a level has (roughly) been established so that 0 VU (–20 dBFS) yields 85 dB SPL at the listener’s position for each loudspeaker. Meanwhile, in the television world, Dolby’s Dialogue Normalization (a.k.a. “dialnorm”) is intended to calibrate the dialog level of video programs on the entirely reasonable assumption that viewer/listeners will intuitively set that dialog level (which is at –31 dBFS in a “good” stereo television set viewing a correctly calibrated program) to 65 dB SPL.
The analog realm
The analog realm is a representation of sound as a two-dimensional map of “voltage amplitude” over time, where voltage amplitude stands in for “relative air density” in the acoustic realm.
This realm is bounded on the top end by the onset of non-linearity, usually clipping as the limits of the voltage supply is reached. “Non-linearity” refers to the entire family of distortions, including clipping, THD [Total Harmonic Distortion], IM [intermodulation], etc. As we approach the supply limits, a variety of “little” distortions can begin to emerge in the analog side of things especially. So, it’s a cover-yer-ass expression that includes all the stuff besides clipping.
On the bottom end the analog realm is limited by random electrical noise (white noise, rising 3 dB/octave in amplitude), power supply hum and whatever acoustic noise is carried into the analog realm.
The tradition for analog recording has been to have a “nominal” signal level that represents some sort of ongoing average level over time that is some amount below the level of clipping, typically 15–20 dB below. In the analog realm, as clipping is approached, non-linearities may be incurred as a function of limitations in the equipment relating to the comparatively large voltage swings that occur (i.e. “slew rate”).
That tradition has been supplanted by the digital tradition, so that now analog levels converted from the digital realm hover very close to the level of clipping until they are attenuated. As discussed by Joe Albano in his article Mixing In The Virtual World in our resource library, hot digital mixes may be hovering around +20 dBV coming out of the converters, which may be a little much for some analog electronics. Beware!
The digital realm
Digital audio is, of course, a subset of analog (all digital audio comes from analog and goes back into analog). As you know, it consists of numbers. Its amplitude is bounded on the top by 0 dBFS, which represents the greatest amplitude of a single frequency (sine wave) that can be represented by a signal swinging between “all ones” and “all zeros.” At the smallest amplitude, it is bounded by dither noise, zipper noise (the noise generated by the Least Significant Bit randomly toggling back and forth between zero and one in the absence of dither) and/or noise from the analog and acoustic realms carried into the digital realm.
It has become a tradition (unfortunately) to try to get our mastered recording to have as high an amplitude as possible, which is to say that we tend to place it as close to 0 dBFS as we reasonably can. Meanwhile, 0 dBFS has, as a matter of electronic design tradition, been made equivalent to the “point of clipping” in the analog realm, which is usually at the amplitude of the voltage power supply.
I’ve taken you through this brief review because I believe it is essential to get and keep in your head these basic relationships when you are preparing a recording for public release. You need to keep in mind all of the digital, analog and acoustic issues and their interactions as you work. Otherwise, your success will be restricted to what dumb luck will give you.
About audio levels themselves
Audio levels themselves, although they seem simple enough, are actually fairly difficult to talk about and understand. Keep in mind that sound itself is a constantly varying amalgam of various frequencies at various amplitudes. When we talk about the “level” of a sound, we are actually describing the power summation of all those various frequencies (hundreds of them, usually) at various amplitudes at any given point in time. This summation also changes rapidly and dramatically over time.
To simplify matters, we often refer to “peak levels” (the highest level amplitude reached in some time period, such as 3 seconds), or RMS (Root-Mean-Square) levels, an averaged level over some brief period, such as 0.3 seconds. For a given musical signal, the peak level may be up to 20 dB greater than the RMS level, and it is typically around 8–10 dB greater, depending on (a) the nature of the program material and (b) the nature of audio compression used.
It is important to keep in mind that a loud signal does not simply drown out (or mask) a softer signal. Further, any complex signal is made up of many softer components (see above), most of which are audible. It has been my experience that we can easily hear signal components that are up to 60 dB softer than the overall level of the signal. Meanwhile, it is fairly easy to hear disparate signals that are also up to 60 dB different. Even in the worst case (broadband noise), it is generally possible to hear a pitched signal (if not other noise of a similar spectrum) up to 20 dB below the noise.
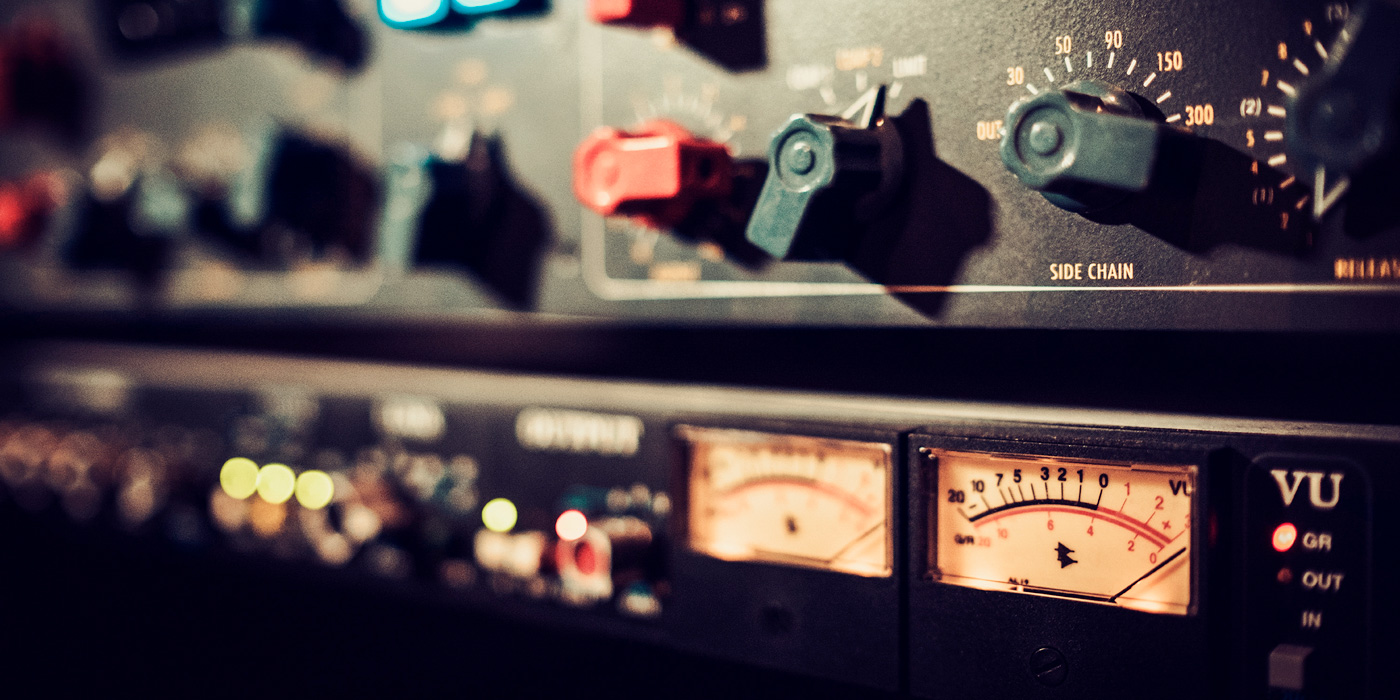
About audio level meters
Meters only tell us something about the summed components of a signal, or what the amplitude (not loudness!) of the whole thing is at any given moment. You need to know what kind of detection the meter does: is it peak, RMS, old VU ballistics, slow (10 second average) detection, other? With practice, you can guess what the other meter values of a signal might be from any given meter reading, if you know what your meter is detecting and you are paying attention to what kind of material you’re listening to. But remember, it takes practice!
I use a batch of different meters in my work. These days I work almost exclusively in Pro Tools, to a point where I even play back CDs through Pro Tools. In Pro Tools I use the Metric Halo SpectraFoo plug-in for a variety of analytic displays, including their own meter protocol, which I set for a 72 dB range, with peak and RMS-peak (the loudest average level obtained) tell-tales. These meters also include “over-counters” that show the number of overs and “continuous overs.” iZotope makes a similar metering suite called Insight. Very handy!
These days I use my outdated Yamaha digital console as a “monitor mixer” (if you can believe that!). For stereo work, I sometimes refer to its main meters as a general check, but more often I refer to a pair of analog Dorrough meters, which are calibrated so that their highest level (+14) equals 0 dBFS at the Yamaha.
Finally, I set up a DPA test microphone on the meter bridge and use it to measure acoustic levels and spectrum, which are computed by a TEF analysis system. This permits me to know explicitly what acoustic levels I’m experiencing, so I can be quite fussy about maintaining stable acoustic levels (and therefore spectral consistency).
To me, this stuff is all a big help in mastering. It allows me to very carefully and precisely determine a great deal about levels on the CD, in the electronics and in the room. I can also study and satisfy myself that what I’m doing actually is louder or softer than some reference signal, and by how much, as well as to measure complex spectral changes. It’s a fabulous set of study tools, which really help me with clients’ recordings, not to mention my own.
The Spectrum: Touchy Feely
At the same time, while mastering we have to concern ourselves with the spectrum of our recording. At this point in the production process, the mix has been fixed, and what is called for is to adjust the overall spectrum of that mix so that it will play back most effectively on our fans’ range of playback systems. This is a very gentle, touchy creative process as well. Two things are needed:
First, we have to know the spectrum absolutely solidly, so that we can make the various fine adjustments that (a) bring out the best qualities of the mix while (b) gently de-emphasizing spectral problems. All this in a subtle enough way that it ends up just sounding natural and correct for the genre.
Second, we have to successfully anticipate how this spectrum will sound for the broad range of end users. This one is really tough! It takes years of apprenticeship and mastering experience to develop the feel and touch needed to make such anticipations reliably. In fact, this is probably the strongest argument for not doing it yourself.
Touchy parts
For me, the touchiest parts of the spectrum are the bass (from 120 Hz on down) and the extremely critical octave band around 4 kHz. If you can get those to sit right, you’re well on the way. Immediately above the bass range, in the lower midrange from 120 to about 500 Hz, there can be many troubling problems that distinguish themselves as tubbiness, muddiness, thickness, etc. However, if you simply turn down this part of the spectrum, you run the risk of making the mix thin, wimpy and/or sterile. You need to be very picky about what you turn down.
In the octave between 500 and 1000 Hz, if you reduce level the mix will tend to sound “open” and “transparent,” while if you boost level the mix will tend to sound “rich,” “warm” and “full.” The trick is, of course, to tease out both sets of qualities, so the mix sounds “warm,” “open,” “full,” “rich” and “transparent.” This takes work, practice and ears!
From 1 kHz to 3.5 kHz is a range where many overtones exist, including some fairly harsh resonances. A lot of experimentation and care are needed here to bring out the best while avoiding the nasty stuff.
I find the region above 5 kHz fairly easy to deal with unless there are real sibilance problems in the mix. There is a metallic brilliance up here, and above that, “airiness.” The main thing is to make sure that you don’t lose these qualities, while at the same time not being crass about it. You need to tiptoe between giving enough top end so the car-stereo listeners can sense some of that brilliance while audiophile listeners won’t find their wine-glasses shattering due to excess ultrasonic energy.
To do all this, you need to have a gentle but sure touch with the equalizer. This is not a place for dramatic timbral gestures! As far as I’m concerned, when you are done equalizing, the recording should seem to distinctly emerge when you switch the EQ in, but without the actual level going up! (Check on this last! I’ve bagged myself more times than I care to remember on just this issue—thinking I’ve really improved the spectrum only to find that what I’ve really done is turned the level up 6 dB!)
Who’s loudest?
When we master on our own, or for a friend, there are a couple of tendencies to watch out for. We all get into groupthink games that can really throw us off.
There is a commonly held belief that “louder sounds better.” Without delving into exactly how much truth there is in this, we cannot help but acknowledge the Loudness Wars. We’re all limited to 0 dBFS (or actually, up to +3 dBFS if we don’t mind massive distortion!), but a number of manufacturers have come out with plug-ins that essentially allow us to “pack” or ”hypercompress” our levels right up against 0 dBFS.
Meanwhile, artists have bought into this idea big-time. I’ve mastered stuff where the client insisted that I make his mix louder than a number of other recordings he brought along for comparison.
How do you hypercompress a recording? One way is to use a multiband compressor/limiter (more about this in another article in this library) with some sort of lookahead feature that analyzes the upcoming signal. You pull the threshold up toward 0 dBFS while tightening the ratio to head off overshoots in each band, and make each part of the spectrum as loud as you can make it so that there are as few low-level components as possible in the signal.
The result is a recording that may be relatively loud, but probably will be fairly unpleasant to listen to. I own a lot of major-label CDs that fit that category all too well.
Back off!
How can you make it better? Back off! These days I use a multiband compressor/expander to do a variety of things that actually require me to turn down the levels. I then do a little gentle squeezing with a Waves Maximizer plug-in to restore those levels, adhering to several principles in the process:
• no overs in either the Maximizer or the multiband compressor/expander;
• no more than about 3–4 dB of gain reduction in the Maximizer and something similar in the multiband compressor;
• I’ve got to feel that the compressed mix “sounds better” to me at both reference level and at 20 dB below reference, after repeated listenings, as well as in my car; and
• I don’t feel at all fatigued by the sort of breathless maxed-out assault sensation that I get from so many hypercompressed mixes that don’t breathe properly.
When you do things like this, your mix may no longer be the loudest in town, but it may very well be the most popular, especially if you’ve got all the other stuff right. Me, I think this is the better way to go.
Second-guessing the end user, the radio station and the car
The next mind game we play has to do with making it sound bad so it’ll sound great some other place. We rationalize, saying things like, “This’ll really work well in a car,” or “For streaming airplay, this mix will be fabulous!” We usually say these things when we aren’t really happy with what we’ve got and are trying to make something “kick-ass” or “really hot” and/or trying to please a fairly dubious-looking client.
I’ve found it’s better to work on it until it sounds better on all your speakers, under all reasonable conditions. I’ve grown to have real doubts about letting it get bad on my reference monitors in the hope it’ll sound good someplace else. And now that I’ve got really good monitors, I’m doubly suspicious of that tendency.
So I vote for Tom Bates’ words of wisdom: “Your work isn’t done until the mix sounds great on all the speakers you have at your disposal, not just your favorite ones.” Amen!
Especially for mastering, you have to get in a groove where you know that the sound you’re producing sounds good in the studio and will sound good in release.
My friends hear better than your friends (or me)
We all like and need to play our work for other people. We often want their opinion. Sometimes we psych ourselves out by giving their opinions undue weight. I get hit with this a lot. Because I authored Golden Ears Audio Ear Training, people often think I must have ‘em. (Meanwhile, I figure my hearing is about average.) They bring their work to my studio both to hear it on my really good monitors and also to get my opinion.
What I’ve noticed is that my opinions are often given more credit than they deserve. I’ve done exactly the same thing myself, in getting opinions from others.
Here’s the deal. Such opinions are useful, but you’ve got to sort of calculate their validity, in terms of such as “how intense was the listening session?”, “how rigorous and well-controlled was the session?”, “how deeply involved was the listener?” etc. Don’t psych yourself out—take those evaluations for what they seem to be worth in terms of actual listener involvement and engagement with the recording.
Did Mr. Golden Ears listen a dozen times, on different monitors and different levels? Did he try things? Did he really get into the tune? Or did he listen carefully once and say “That’s pretty good, but I think the bass is a little light”? Mr. Golden Ears may be right about the bass, so you probably should consider changing it, but you don’t have to become obsessed with it based on that observation. Just dial that view in as one more thing to consider. You don’t need to go back and re-equalize everything you’ve ever done with a +9 dB shelf at 110 Hz. Enough said.
The straight skinny, for fun and profit
Mastering is an art, not a science. However, it involves a lot of technical craft and control, plus practice. To get started, you need to
• get your monitoring really under control;
• get your levels, at the mix bus, at the meters and in the room, really under control;
• really get to know the best recordings in the genre you’ll be mastering in, really get ‘em in your ears;
• get to know as much as you can about the media you’ll be mastering to, and find out what happens to it after it leaves your hands;
• get really good with the signal processing devices you want to use;
• practice, practice, practice.
To do all this well, you’ll need some measurement gear. As I mentioned, I rely on SpectraFoo, Dorrough and TEF. The Terrasonde Audio Toolbox was a nice general purpose analyzer when it was being produced; you can find devices that combine signal generation and analog, acoustic, and digital analysis in various combinations from companies ranging from Neutrik to Phonic. If this is too rich for your blood, you can start with a Goldline Oscillator/Meter set (which I also have and use), or even one of the many SPL and metering apps available on smartphones.
I suspect that if you aren’t a measuring fool like the Count on Sesame Street, mastering may not be for you. On the other hand, it’s not all that hard to get into it, once you start being curious about it all. Happy masters!
PS: For a lot more detail on how to do this, I recommend Bob Katz’s book Mastering Audio: The Art And The Science (Focal Press). It’s a really comprehensive look at the whole business.