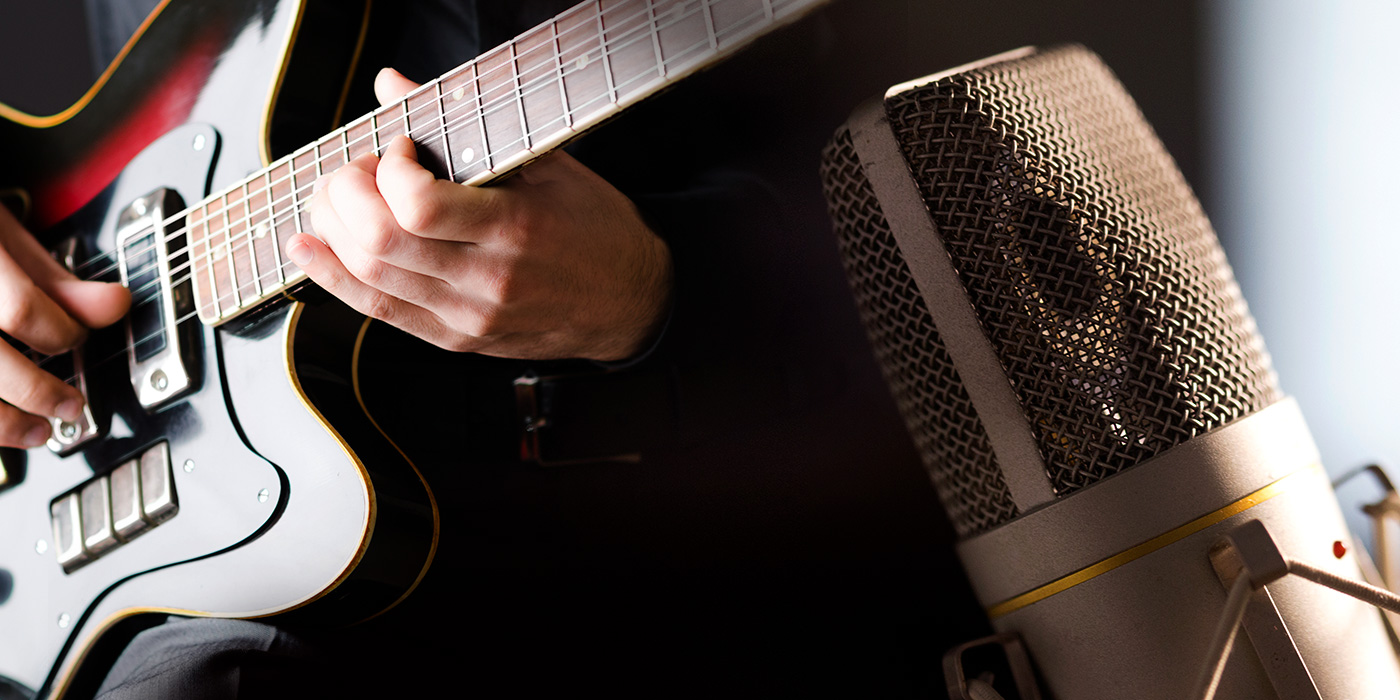
Everything from basic mic placement to DI and reamplification, covered in depth
By Joe Albano
Recording the guitar would seem to be among the most straightforward of tasks in the recording studio—just choose a mic, point it in the right direction, and hit the big red button. Of course, nothing is ever as simple as it seems, and, as with so many aspects of recording, the devil is in the details. And those details can make the difference between a merely okay guitar sound and a great recording that brings out all the nuance and richness of a brilliant musical performance. Follow along as we take a look at those details, and explore some of the winding pathways to superior guitar recordings. This article covers electric guitar, and its companion piece covers the acoustic guitar.
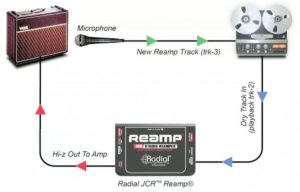
Reamping: a second bite at the apple. Graphic courtesy Radial Engineering.
Options and more options
Traditionally, recording electric guitar involved a basic set of tasks: choose the guitar and amp, get a good sound in the room, choose and position the mic (or mics), and go. Nowadays, modern technology has added a few more wrinkles.
The amp, speaker and mics can be replaced by an analog or digital amp simulator on the way in. Or the sound of the amp/preamp can be sent directly to the recorder, bypassing the speaker/mic. Or the guitar can be plugged directly into the recorder or run straight in through a DI (direct injection box), and the dry guitar recording then run through plug-ins after the fact, to provide simulated amp/speaker/mic tones. Or a dry-recorded DI guitar signal can be re-routed back out into the real world through a real amp/mic after the fact—a process called re-amplification. Or some combination of these techniques can be employed.
While purists tend to stay away from digital simulations, many others embrace them—either way, there are a lot a different solutions to getting that guitar track down these days. To get the ball rolling, let’s start with the basics of traditional electric guitar recording: guitar —> amp —> mic(s) —> recorder.

The Royer R-101 ribbon mic, popular for cabinet miking.
The preliminaries
The sound of a good guitar track starts in the player’s hands. Many guitarists have a preferred instrument, and if that decision is made by the player, it can be one less element to worry about for the engineer or producer, who in other situations might get involved in the choice of the instrument. If you’re going for a very particular guitar sound, half the battle is won if you choose the right instrument and select the best pickups up front. For example, if the song calls for a bright, crisp, clean tone, a guitar with single-coil pickups (like a Fender Strat or Tele) is probably a better choice than one with dark fat humbuckers (Gibson or PRS). If a jangly sound is required, the bridge pickup would be a better choice than the warmer-sounding neck pickup (on any guitar).
These decisions are usually left to the guitarist, and an experienced player will instinctively go for the right option. However, if you’re recording a less seasoned artist, then a little direction from the engineer/producer at the outset might avoid a lot of work later on trying to adapt a less-than-ideal tone. But tread lightly here… musicians (even novices) can be very sensitive about “their sound”—a happy player with an okay sound is still probably preferable to a killer tone in the hands of a disgruntled artist.
Pump it up—choosing the amp
On stage, the choice of amp can have as much to do with volume as with tone—an amp that provides the appropriate level allows the player to dial up the degree of distortion and sustain required for his/her playing style and musical genre, without being out of balance with the rest of the players. This is especially true when performing in clubs, where the sound from the stage goes out directly to the audience, as opposed to being pumped through a PA system as in larger venues. But in the studio, sheer volume is less important, as the guitar tracks can be re-balanced later in the mix, and tone becomes the primary consideration. Additionally, if musicians are recording together in the same room, then isolation also becomes a key factor.
One popular trick for studio recording, one that guitarists and engineers have employed since the early days of rock & roll, is to use smaller amps in the studio than would normally be used on stage. A one-watt amp, cranked up, can sound just as huge, if recorded and processed properly, as a 100-watt behemoth, but will put much less sound out into the room, allowing for more successful isolation and control during tracking. Famous examples: early Led Zeppelin tracks were recorded with a tiny Supro practice amp rather than the Marshall stacks employed in concert; many of Clapton’s guitar tracks on the classic album Layla were recorded through a Fender Champ, another diminutive practice amp.
So in the studio, the focus is on the amp’s tone—not just EQ (the bass-mid-treble-presence controls of the “tone stack”), but also gain and the amount of edge or distortion employed. These affect not just the sound, but also playing feel, and are as important to the performance as to the resultant recording. Again, this is sometimes left to the player (see the caveats above), but remember that the player, if he’s out in the room with the amp, may be setting his tone without hearing what the mics are delivering to the control room/recorder, and some input from the engineer/producer can help to avoid the need later on to “fix it in the mix”.
Also, keep in mind that the player may be basing his preferred tone settings on what he hears standing up at an angle to the amp’s speaker(s). This may influence the positioning of the mic(s) to a similar angle, closer to the perspective the player is using, to determine what constitutes the perfect tone—see the discussion below about mic placement.
Too many mics, too little time
Miking up an amp would seem to be the most straightforward thing of all—so many engineers, if asked what they usually do, say “Just stick a Shure SM57 an inch in front of the speaker and you’re done!” In fact, this is exactly what you see in most clubs/on most stages, and even a lot of the time in the studio as well. To be fair, it does work just fine a lot of the time. But if you’re looking for a more nuanced guitar sound, or just want the absolute best tone you can get for each specific track, then miking options get a lot more interesting than just the “old reliable” 57.
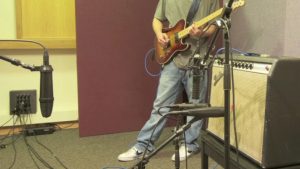
Three close mics plus one distant mic for tonal variety and ambience.
Miking up electric guitar amps involves the following factors: mic choice (brand, design), mic pattern (unidirectional, bidirectional, or omnidirectional), mic placement (distance, angle), and mic combination (more than one mic on the same cab). There’s no space here to get into a deep mic primer, so I’ll just recap the basics very briefly before going into applications—there are several good, detailed articles on mics and microphone technique in this online library.
Mics come in several basic varieties:
~ Dynamic (moving-coil) mics are rugged, good for miking amps (especially live), but lack the airy high end of more expensive studio designs—they often have a presence boost (around 5 kHz & up) that accentuates electric guitar tones well in a mix.
~ Ribbon mics can be more delicate, and typically have a warmer sound, great for smoothing out a harsh or over-jangly guitar tone.
~ Condenser mics are the high-end studio standard: crisp and airy with an open high end, but also more delicate, perhaps better used at a distance for amp miking.
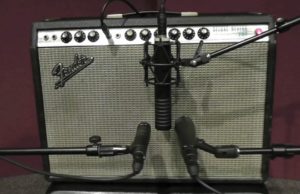
Three different close mics for plenty of tone choices and combinations.
Mic patterns, the directional response of the mic, include:
~ Unidirectional (Cardioid, Supercardioid, Hypercardioid): picks up sound in front of the mic, rejects sound from behind; good for isolation.
~ Bidirectional (Figure-8): picks up sound equally from in front and behind, rejects sound from either side; also good for isolation in some situations, but will pick up more “room tone” (ambience).
~ Omnidirectional (“Omni”): picks up sound equally from all directions (front, back, top, bottom); good for capturing the warmth or air of a nice-sounding recording space, but poor isolation in a noisy environment, e.g. a session with other players in the same room.
As we go over the different approaches to miking, I’d recommend connecting online to recordingmag.com/videos, where you’ll find a great collection of how-to video demos on guitar recording, illustrating mic choice, position-ing, etc.—all the things I’ll be touching on here. As the well-worn cliché goes, a picture—in this case, with sound!—is worth a thousand words. In this article and the companion article on acoustic guitar, I will refer to these videos as the Electric Guitar (EG) and Acoustic Guitar (AG) series, with part numbers to identify the correct video.
Mic it up
The Shure SM57 mentioned above, many engineers’ go-to amp mic, is a rugged cardioid dynamic mic with a pleasant presence peak from about 3 kHz up to 9 kHz, centered around 5–6 kHz, that many people feel makes a guitar track “sit well” in a mix, especially on clean, relatively undistorted guitar parts (it’s also very popular on snare drum for the same reason).
Another dynamic mic popular for guitar/amp recording is the Sennheiser MD 421. This mic adds a bit more high and low end to the sound of the ’57, and has a subtle, but distinctly different midrange emphasis, easily heard in the first video (Electric Guitar Part 1). Yet another alternative, for a warmer tone, might be a ribbon design—some excellent, fairly robust, models are available from Royer, who specialize in ribbons. Keep in mind that ribbon mics are bidirectional, and usually side-address, which means that the “front” of the mic is not the tip but the side, and must be positioned accordingly (again, see the same video EG Part 1 for an illustration, and sound comparisons).
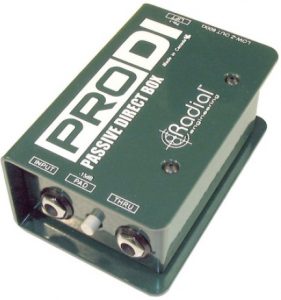
A typical DI box, the Radial ProDI.
Condensers are also commonly employed, but often at a greater distance (see below). When I mic up smaller cabinets with one or two speakers, I prefer dynamics or ribbons, but for larger cabinets like 4×12 speaker stacks, I feel that often a condenser best captures the rich blend of interference between the multiple drivers. Keep in mind, the brands and models mentioned are common choices, but there are a great many equally good mics of every type out there, and no one mic is necessarily best.
Choosing a mic is only the beginning—mic placement is also critical to getting the best sound, and is quite literally a game of inches. Mic positioning is always measured relative to the speaker, which consists of a central cone, and a larger vibrating area within an encircling “surround” (see EG video Part 1, at the very beginning). If you put your ear to the speaker (carefully!), you’d notice that the sound is brightest directly in front of the central cone, and gets progressively mellower as you move toward the edge (the surround). The sound also gets smoother if you listen at an angle to the speaker, what the player might hear if he/she is standing and the speaker is on the floor or on a chair well below ear level, with the speaker pointing straight at the player’s knees or torso (“off-axis”), rather than angled up at his/her ears (“on-axis”).
When positioning a mic, varying the factors of distance, position, and angle will yield distinctly different tonalities—sometimes this can be subtle, and at other times quite obvious. Starting with distance, a common approach is to close-mic the speaker from an inch or so, anything from right up against the grille cloth to several inches away—this will provide good isolation, especially with a unidirectional mic. Closer positionings will also usually provide more low-end response, especially with directional mic patterns, due to the well-known microphone proximity effect.
To determine exactly where the best sound is to be had in a particular case, I’d start by positioning the mic pointing straight in, dead center in front of the speaker cone, have the player play, and then try gradually repositioning the mic further and further off-center up to the edge of the speaker surround. Typically the sound will be brightest and most focused at center, but possibly a bit harsh and peaky, becoming gradually smoother but mellower (duller but also possibly more well-balanced) as you move the mic toward the edge of the speaker. Depending on the tone the player has dialed up (and whatever magic is coming off their fingers!), one of these positions will probably yield the best tone for that particular song/part.
If I had several mics available, I might try this with a few, even at the same time, to see what combination of mic and position is best suited for the guitar part going down that day (again, see EG video Part 1). And yes, every engineer has their favorites, but you’ll be pleasantly surprised if you step out of your comfort zone and change it up now and again.
I also might play around with the angle of the mic(s), varying from straight-in to up to a 45-degree angle relative to the speaker/grillecloth. This should also subtly change the tonal balance a little. For example, with a bright, peaky guitar/amp tone, I often position a mic at the edge of the speaker surround at a 45° angle, which smooths out the peaks. If the player has dialed up his “perfect sound” while standing at an angle to the speaker, then a similarly placed mic, angled off-axis, will likely capture a tone truer to what he’s going for—what the amp is sounding like to him in the room.
Off the beaten path
The close-miking positions discussed above are not the only options, of course. Sometimes, a mic may be placed 1–3 feet from the cabinet, rather than a few inches away. This positioning will offer less low-end response—at those distances there won’t be any of the bass boost from proximity that you get with close-miking, but there will be more ambience, or room tone, especially from reflections off the floor in front of the amp cabinet. This can impart a nice sense of “air” to the recording, as well as smoothing out excessive peaks in the frequency response that may have been emphasized by close-mic placement (see Electric Guitar video Part 3). Although any mic will do for this distant placement, here’s where I’d often go for a condenser mic—the condenser’s extra air and detail will bring out the ambience and smoother tonality.
More distant placement can also be a good idea when the speaker cabinet being miked up has more than one speaker in it—this is especially true with the classic 4 x 12″ speaker configurations of Marshalls and other high-gain amps. With these cabinets, the sound heard in the room is a combination of the contribution of all four (or, in a stack, eight) speakers, and the phase cancellations that occur as the wavefronts from each speaker meet a foot or two in front of the cabinet produce a much richer sound—one which you won’t capture fully with a mic an inch or so away from only one speaker (or even by combining close mics on each speaker, for that matter). These kinds of cabinets are often used with high-gain amps for musical genres where part of the guitar sound is how the sheer volume loads the room, and picking up a little more of that room reaction also helps achieve a truer representation of the style.
At the other end of the spectrum (literally!), sometimes a mic is placed at the rear of a speaker cabinet. This is obviously not done with closed-back cabinets like the 4×12, but with smaller open-back cabs, typically with one or two 10″ or 12″ speakers. The sound to the rear is very low-end heavy (low frequencies radiate omnidirectionally—the higher frequencies beam out the front), but it can be a interesting variation on the sound of that amp.
There are two caveats to this technique: One, the sound may be too dark on its own, but combined with a mic in the front, it could add a pleasant fullness to the overall recorded tone. And two, since the wave coming off the rear of the speaker is reversed relative to the wave a front-placed mic will see, combining both mics will result in waves that are in reverse polarity—peaks and nulls will partly cancel each other, and the resultant tone may be very thin and phasey. The solution: reverse the polarity (often mislabeled “phase”) of the rear mic, either on the mic preamp or at the console channel strip, to put them back in phase for a properly full tone. Incidentally, this is the same approach taken when mics on the top (thwack) and bottom (buzz) of a snare drum are combined.
1 plus 1 plus 1…
That brings us to an obvious point—if you have all these mics set up to compare them, as is often done before a session, why not record ‘em all, and blend them together later for a really rich sound? Well… why not? In fact, that’s exactly what many engineers do, especially now with the enhanced track counts of modern DAWs. But even back in the days of limited track availability, this was still often done whenever possible.
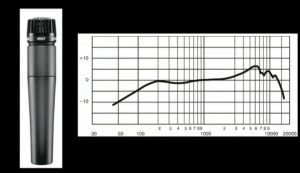
The frequency response of the classic Shure SM57 dynamic mic.
Very often, a combination of one or two close mics is recorded (usually on separate tracks, to maintain control over the blend later on, in mixing)—these are often different brands/models, whose different tonalities may complement each other. And often a distant mic is also added on its own track, to be blended in for extra ambience and to round out the peakiness of the close-miked sound—in EG video 3 this is demoed, with a polarity-reversed rear mic mixed in as well, for good measure.
Now, this practice of recording multiple mics on the same amp gets us into an age-old studio argument about “time-aligning” the mics… okay, maybe it’s not an “age-old” debate, but it’s certainly been going on as long as DAWs have made it easy to do (or not)! When a mic positioned at, say, an inch away from a speaker is combined with a mic placed, say, a foot from that same speaker, the waveform peaks and dips do not line up. A positive peak from the close mic may happen just as the negative dip from the previous cycle of the distant mic occurs, causing partial cancellations at various frequencies.
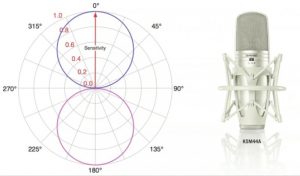
A figure-8 (bidirectional) polar pattern, as available on the Shure KSM44A multipattern condenser mic, will look something like this.
This effect is not inherently good or bad, but it’s a judgement call as to whether, in a particular situation, it enhances the sound by adding that sense of three-dimensional ambience we’re used to in live listening situations, or degrades the sound by making it weaker and thinner, with less punch, than either of the mic signals on their own. If the result sounds fine, then no tweaking may be needed; but, if the combined mic signals do sound weaker than either alone, then many engineers may opt to time-align the two mics. This involves either delaying or advancing the region (clip) of one of the two recorded mic tracks, until the waves’ positive and negative peaks line up in time, or using plug-ins to delay the clip that’s ahead (the close mic) until it matches the phase of the later (distant) mic recording.
This is best done by eye, and when all the mic tracks are time-aligned (in phase), the sound will be fuller and punchier, but possibly at the expense of some sense of ambience or depth. It’s the engineer’s call—try it and listen to the difference (and check out EG video Part 2 for a demo). By the way, this same argument goes on in relation to combining the signals from the close mics on a drum kit and the more distant overhead mics on the same kit.
EQ—or not?
Now, if you try recording with multiple mics as described above, or watch the first three Electric Guitar videos, you’ll hear the subtle and not-so-subtle tonal variations from the different mics and positions, and how blending multiple recorded signals is almost like EQing—you can dial in certain aspects of the sound that are emphasized by particular mics, until you have a good overall balance. It may occur to someone to ask, “Hey, why not forgo all that extra work of setting up and recording all those tracks, and just EQ one track until it has the perfect balance?” Or, “Why not add ambience with a really good reverb plug-in (like a convolution reverb, which captures the sound of a real space), instead of a separate distant mic track?”
Well, you could, but the results will be somewhat different. While a good reverb will indeed add a nice ambience to a close-miked guitar track, if you’re recording in a good room without leakage issues, why not make use of the most natural ambience available? And EQing a single guitar track, while easy and quick, will provide a subtly different quality than blending multiple mics.
If you ever checked out the spectrum graph that comes with many EQ plug-ins, you’ll have noticed that EQ curves are smooth and gradual. If you viewed the online videos, however, and saw the spectrum graphs of the different mic signals, you noticed that they were full of narrower peaks and dips—this is the natural consequence of the phase interference in all acoustic environments, even when close-miking is employed. Combining complex spectra like this, from different mics, can yield a richer, more complex balance than simple EQ adjustment—a result with a subtly greater sense of depth and three-dimensionality. This can help a guitar part maintain a nice sense of depth and richness even when blended into a busy, frequency-rich mix.
Now, that’s not to say you won’t want or need to EQ your guitar tracks at the mix stage—you probably will, whether they’re single-mic recordings or blended-mic recordings. But any extra richness you get from your use of multiple mics can only help, at least if it’s done well. Recording multiple mics can also provide more flexibility later on than committing to EQ during the recording, something I’d avoid. I hope that this article and the accompanying videos have served to suggest some effective techniques to that end.
Going straight (in)
From a recording purist point of view, capturing the sound heard in the room at the time of the performance is the primary goal, and miking up the amp, however elaborately it may be done, is the only real option. But, as most home/project studio recordists already know, it’s not the only way to record electric guitar. The alternative approach involves bringing the guitar signal into the console/recorder via a more direct path, bypassing the acoustic environment altogether.
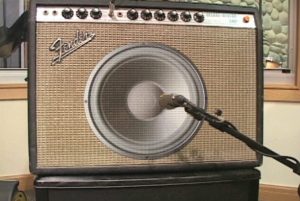
This graphic shows the rough location of the speaker cone behind the grille cloth. This is probably the most common mic placement for an electric guitar amp.
This can be a desirable approach when the acoustic environment presents drawbacks to getting the best sound. For example, a recording space with poor isolation may allow too much unwanted sound from other instruments or the outside world to leak into the mics, compromising the recording. Or the space may have insufficient soundproofing to allow the amp(s) to be cranked up to the level necessary for good tone and playability, at least without an unwelcome visit from the local constabulary. Or appropriate amps and mics may simply be unavailable at the time of the session. In cases like this, sending the guitar signal straight into the console/recorder electrically can be the best solution—this is called direct input or direct injection, DI for short.
Plugging an electric guitar straight in, bypassing the amp/speaker/mic components, brings its own set of considerations into play. First off, the voltage transfer from the signal coming out of the guitar’s pickup(s) to the console or DAW interface input must be optimized to insure that there is no loss of sound quality. Signal from an electric guitar’s magnetic pickups is low in level, and requires a specific impedance for proper transfer to the recorder (impedance is a measurement of, in this case, voltage transfer). The operating level and impedance value of mic inputs or the line-level inputs found on most consoles or interfaces is not suitable for direct guitar signals—the resultant recording will likely be noisy and thin, with compromised tone that is difficult to fix later on.
Instead, guitar signals require what’s usually labeled an instrument-level input, with the same sort of gain and impedance that the guitar signal would see if it were plugged into a real guitar amp input. Many DAW interfaces have this, but for those that don’t, a DI Box is required between guitar and DAW input (see EG video Part 4); often better-quality outboard DIs may provide a fuller sound.
An alternative to plugging the guitar’s output straight in might be to use a real guitar amp but taking the signal from a direct output on that amp (if there is such an output). Usually this pulls the signal out, at the more standard recording line-level, after it’s passed through the amp’s preamp and tone sections, but before it hits the power section. This means that you miss out on the tone from both the power stage and the speakers.
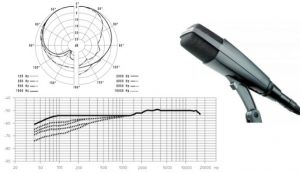
The Sennheiser MD 421 dynamic mic has a 5-position bass rolloff switch.
While this may work well in some cases, providing at least some of the real amp’s sound, there is this compromise: With many amps, especially older/vintage/all-tube models, the most distinctive part of the tone comes from overdriving the power amp tubes, and a preamp output misses out on this, often resulting in a “fizzier”, buzzier distortion quality than the player would normally expect from that particular amp…. not to mention the sound that the speakers would create that we’re not hearing in this arrangement!
Option B, in that case, could be taking the recording signal from after the power amp section, bypassing only the speaker/mic. This must be done with extreme caution, however, or it can result in damage to the amp! Typically, the power output of a guitar amp requires a proper impedance load from a speaker cabinet; lacking this, the amp may overheat and go up in smoke. To accomplish this kind of connection safely, a specialty device will be required. One type may tap off a signal appropriate for a recording input while still feeding signal to a speaker. Another may eliminate the speaker altogether, replacing it with a “dummy load” (basically a big resistor/heatsink), which will safely absorb the output current while feeding an appropriate signal on to the recorder. You may have seen the term “Power Soak” used for this type of device—that was the brand name of an early model from Tom Scholz of the Rockman company,
Reanimate (with reamping)
The analog way of adding amp/mic tone to a direct-recorded guitar track is a process called reamplification or “reamping”. (The name comes from the original Reamp, now made and sold by Radial Engineering.) This involves pulling a recorded guitar signal out of the DAW (via extra outputs—you’ll need more than stereo I/O on your interface for this), and sending it through a real, miked-up amp in the studio. The mic’s signal is then brought back and recorded on a separate track. This allows the option to choose an amp for its particular tone or distortion after hearing a more fully-finished version of the mix, and it puts back a lot of control in the engineer’s hands at the later stages of a project, much in the way that the use of sampled instruments introduced previously unheard-of flexibility at the mix stages.
Just as with direct recording, an appropriate “reamping” converter box should be used to guarantee proper level and impedance for the transfer of the line-level recorded signal back to the instrument-level guitar amp input. The process is demoed in EG video Part 4.
Virtual guitar tone
The other approach is digital, and there are many options. Now it’s true that some guitarists and engineers feel that digital amp simulators (amp “sims”, hardware or software) just don’t cut it when compared to the real thing. It’s certainly true that the experience of performing through a digitally-simulated amp, run straight into a DAW, can feel different than standing in a room with a real amp on the verge of feedback, feeling the rush of air and pressure of the sound waves.
However, in many cases, studio recordings are made with the guitarist in the control room and a miked-up amp in the separate studio room—playing through an amp sim feels very much like this. Of course, not all amp sims are created equal, but these days the better ones provide a good sense of dynamics and touch response (something lacking in the early days of the technology), making the playing feel much closer to performing through a physical amp.
Hardware-based amp sims, like the venerable POD Series and other Line 6 and Roland virtual amps, can be employed as an alternative to a real amp at the initial session; the ones that are actual amps can still be miked up using all the same techniques discussed above. But more to the point, for this discussion, are plug-in virtual amps. These are available from a host of companies including Line 6, Native Instruments, IK Multimedia, Avid, Peavey, Studio Devil, and many others. Running a direct-recorded guitar track through one of these is a piece of cake, and usually dozens of different simulated amp models and speaker cabinets are provided with the ability to mix and match, including virtual mic selection and placement options. Leaving aside arguments of tonal quality and playing feel (a subjective matter), the one caveat I’d offer is that to get the best tone out of a good amp sim, it helps to not only be familiar with the sound and controls of the real amp being modeled, but with the typical miking techniques that might provide the best results in the real world.
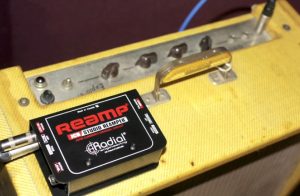
A previously recorded signal is sent back to an amp for reamping.
Best of both worlds
It’s not uncommon to combine the traditional and the modern approaches when it comes to recording guitar. Quite often, an engineer will record, on separate tracks, both miked-up signals from real amps and (with the use of an appropriate DI splitter box) a direct signal straight from the guitar on its own track—something that is routinely done with electric bass. This offers maximum flexibility without compromise. You have the sound of the real thing, but if for any reason a different sound turns out to be needed as the mix progresses, you have the raw material of the guitarist’s performance on the DI track, available to be used to rethink the amp tone from scratch, via reamping or plug-in amp sims.
It also allows for more options in mixing, like doubling a guitar track with the same performance run through two distinctly different-sounding amps, one the original and the other a reamp or sim-generated tone. That’s more a mixing consideration (that would be the subject of a whole separate article), but doubling is something that might even be addressed during the recording/tracking stages.
Two-by-two
As most readers probably know, doubling means having two (or more!) performances of the same musical part, providing extra thickness or a wider spread (if panned to opposite sides of a mix). Doublings can be created artificially, by duplicating a track and delaying the copy by a few (typically 15–20) milliseconds.
But often a more natural-sounding doubling is desired, and that’s best achieved by having the player perform the part more than once during the tracking sessions, with the goal being two near-identical versions of the musical part, but with just enough human performance variation to make them distinct. This is also an opportunity to switch things up—recording the doubled parts with different amp settings, or even through different amps on the different takes, as well as running DIs simultaneously for maximum flexibility down the road.
Wrap-up
We’re starting to touch on topics now that may have more to do with mixing than recording, so this is a good place to pause. However, we’re not done yet! Guitars come in two flavors, and recording the acoustic variety brings up many unique issues and challenges—and that’s subject of our companion article. In the meantime, happy hunting for the perfect guitar tone!


