
So you have a good-sounding room. What should go into it, and why?
By Paul J. Stamler with the Staff of Recording
 In the predecessor to this article, we concentrated on the first and most important part of any Startup Studio: the room. Now we can finally get to the gear that goes in the room, starting with the second most important piece of the puzzle: the monitors.
Note that in this article, the Editor is supplementing my concrete recommendations with some of his own, based on recent reviews in this magazine and on the track records of our other contributors, most notably Paul Vnuk Jr. The fact is, I haven’t heard everything on the market, and I prefer to recommend pieces I’ve actually heard, or whose close relatives I’ve actually heard. And that leaves a lot of latitude for very worthy gear that might otherwise go unmentioned here.
Where feasible, I’ll provide a basic, rock-bottom recommendation from my own experience, and another recommendation that I feel is a solid step up from the basics. We’ll then fill in some alternatives. My original intent was to name prices, but they go out of date too quickly; online searches are your friends for numbers like these. Punchline up front: at the time of this writing it is possible, using the basic recommendations I make below, to outfit a Starter Studio for under $4000, including the room treatment and a very good computer.
It comes out here: monitors
You could write an entire issue of Recording magazine—in fact we do, once or twice a year—about the ins and outs of monitor speakers: size, near vs. far field, directivity, power issues, etc. Here I’ll stick to the absolute bare bones.
Why do monitors matter? Because every decision you make about mic choice and placement, EQ, compression or level in the mix will be based on what you hear coming out of the monitors, and if they aren’t right, your recordings won’t be right. A good neutral monitor leads to good choices when tracking, and that, on a good day, leads to tracks that practically mix themselves.
What about the argument that, in years past, great recordings were made on less-than-great monitor speakers?
It’s true, but it leaves out a crucial element in the system: the trained ears of the recording engineers. I spent five or more years mixing on an Altec 604 (used for many Beatles mixes, and far from neutral) during my time in the television industry, and eventually I could create a mix—live or in post-production—which translated well to other loudspeakers, whether big, high-quality systems or little 3″ whizzer-coned squawkers in a cheap TV set.
It took me five years to get to that point—five years of trying out mixes on the 604, and comparing them with what I heard on the other speakers in the building or at home. But you’re relatively new to this game, and I think it’s unfair for a new engineer to have to learn the quirks of an un-neutral monitor, while at the same time they’re learning the ins and outs of mic choice, placement, mixing and effects. It’s much better to start out with a monitor setup that’s reasonably neutral, one that doesn’t skew your listening in a particular direction.
Aren’t genuinely neutral speaker systems prohibitively expensive? They can be; achieving truly flat response across the entire audible spectrum at robust listening levels, which (for example) a mastering engineer’s setup needs to do, comes at a remarkably non-trivial price.
But it’s possible to achieve reasonably neutral response in a speaker with more limited ambitions—one with more limited response in the subterranean bass, for example, or one with less lofty volume goals—with a relatively modest design such as a two-way system incorporating a 6″ or 8″ woofer. Most 2-way monitors are bi-amped (one amp per driver) and many now have internal DSP; both design choices can help in achieving relatively neutral response in the all-important midrange frequencies. That’s where the most vital musical information lives, leading to the old slogan, “If it ain’t got it in the midrange, it ain’t got it.”
So, for our Starter Studio, I recommend a small, active monitor (no need for a separate amp), intended for use in the nearfield (relatively close to the engineer’s ears). There are plenty of those out there, and while many are designed with the “boom-and-tizz” sound that helps a speaker stand out in a big box store’s showroom, there are a fair number which manage to achieve surprisingly neutral sound within their designed frequency range, as long as listening volumes remain reasonable.
More and more really inexpensive speakers that sound far better than they should at that price are making their way onto the market. For $500 per pair or less, the Fluid Audio FX8 coaxial monitor is an excellent choice, as are the ESI uniK 05+, but in the American market the affordable speaker to beat is the JBL 3 Series, which has 5, 6, and 8-inch speakers with exceptional performance for the money. If their sound doesn’t suit you, consider the Samson Resolv SE, ADAM Audio’s new T speakers, and the KRK Rokits and V Series.
Many of these speaker lines let you save money and space by choosing a monitor with a 5″ or smaller woofer. However, you pay a price in bass extension and power handling—you can’t play the 5″ versions as loudly as their larger siblings. Significantly, however, the speakers built around 5″ woofers should retain the neutral midrange that you need. So if you’re strapped for funds, you’re much better off compromising woofer size rather than, say, skimping on room treatment.
Along with your monitors, you’ll need a control box for them; in a pinch you can get along without one, controlling level via your DAW, but it’s a lot more convenient to have a physical knob at your fingertips. The Radial MC3 does the job passively, without adding amplifying stages to the chain feeding the monitors, and also includes a separate headphone amplifier and the ability to add a subwoofer if your future needs and budget require it. (I suggest starting out without one.) Drawmer, PreSonus, JBL, Mackie, and Samson also make very affordable controllers; when you want higher quality at a higher price, there’s Drawmer, Crane Song, Grace Design, and Dangerous Music.
Depending on your studio’s layout, you may need to place your monitors on stands; if you do, you’ll want to isolate them so their vibration doesn’t spoil what you hear. Reviewers have had very good results with the Primacoustic Recoil Stabilizers and the IsoAcoustics stands.
And it goes in here: mics
Okay, we’ve covered the outside edges of the audio chain: the room and the monitoring, which are the places where most Startup Studios get tripped up. Now we can safely look at the next layer—microphones. Often the practice in home and project studios is the “one good mic” model, in which 90% of the work is handled by a single high-quality microphone, usually a large-diaphragm condenser.
I’m going to offer a variant on that model, which I call “One Mic Plus”. And, for my entry-level recommendation, I’m going to depart radically from the usual practice, because the mic I’m recommending for the do-many-jobs position is a high-end dynamic microphone, rather than a condenser. Stick with me here; “though this be madness, yet there be method in’t.”
In the “One Mic Plus” setup, we choose one good dynamic mic plus a pair of small-diaphragm condenser mics. This lets us get great drum kit recordings (stereo overheads in ORTF plus kick), and a whole lot more.
Small-diaphragm condensers do a great job on acoustic instruments like guitars, banjos, and mandolins; when properly padded they can handle horns and winds, and if you set them up in ORTF configuration on a stereo bar like the König & Meyer 23510 they can even record choirs and small orchestras. Their lack of off-axis coloration will help assure that room coloration will be from the room, not the mics.
My personal favorite for this task is the Oktava MK012; buy from oktava.com and beware of cheap Chinese knockoffs and dealers selling mics that had less strict quality control. There are many others, of course; you’ll find useful and affordable alternatives from RØDE, Audix, Audio-Technica, Shure, MXL, and others, with the Aston Starlight an especially interesting new contender.
As for the dynamic mic, I’m recommending the Electro-Voice RE20 (or, if you need to save a little money and get 90% of its utility, the RE16). The RE20 is a truly remarkable mic, period. It’s a great kick mic for our 3-mic array, but it can do a serviceable-to-excellent job on many other sound sources; in fact, the RE20 is the closest thing to a do-everything “Swiss Army Mic” on the current market. It makes a great vocal mic; the rise in its upper midrange is similar to that of a Neumann U 87, giving vocals the emphasis they sometimes need to punch through a dense mix, and the mic’s lack of proximity effect provides uniform sound at a variety of mic-to-source distances. The RE20 takes the edge off horns and saxes, and its tight pattern means leakage is seldom an issue when you have several mics open in the studio at once. And it’s dynamite for miking the speakers on guitar and bass cabinets. Other high-end dynamics worth looking into are the Sennheiser MD 421 and the Shure SM7.
If you want a large-diaphragm condenser that’s almost as much of a mic-of-all-trades as the RE20, I must mention the remarkable Neumann TLM 102. It does a fine job on acoustic instruments, amplifiers and vocals, and it’s one of the few condenser mics I’d stick inside a kick drum and expect good results. This is a true high-end condenser mic at an unprecedented price, well worth looking into.
Small-diaphragm condenser mics have proliferated in the market, as manufacturers and users have recognized their useful qualities (typically flat on-axis response and uncolored room response). At the “upgrade” price level are everything from the well-established Neumann KM 184, which I’ve worked with a lot, to many designs with which I don’t have personal experience, like the Earthworks mics renowned for their very flat frequency response.
If you want a snare drum mic (that’s useful in other applications as well) in addition to these three, I personally like the much-underrated Shure Beta 57A more than the ubiquitous SM57, and many engineers swear by the Audix i5. There are many worthy makers out there that I haven’t touched on—Telefunken, Kel Audio, Blue, LEWITT, Mojave Audio, Lauten—and we haven’t even touched on ribbon mics from the likes of AEA, Royer Labs, Coles, Cascade, and others… but that’s for an article well beyond the Startup Studio.
Into the center
Now we get to the heart of the matter: the machines that actually make, store and process the recording. I won’t presume to advise you on what computer to use or buy; you have probably solidified your preference already.
What I will tell you is that overkill is your friend. Buy faster than you expect to need, and buy twice as much memory as you think you’ll need. Believe me, you won’t regret that. Get a whopping big second hard drive to store your audio files, rather than keeping them on the main drive; hard disk storage space is so cheap these days that you won’t regret that, either. Get a big external drive for backup, too.
Finally, if at all possible, try to dedicate your audio computer to only audio. Use a different computer for other applications, especially Internet surfing. Virus scans and malware detectors constantly switch on and off and can wreak havoc on your audio; an audio computer with no Net connection can live without them. If you need to do downloads or software upgrades, pull them down to your other machine, virus-check them (yes, once in a while even a legit upgrade will have a worm in it), and move them to your audio machine via a USB drive.
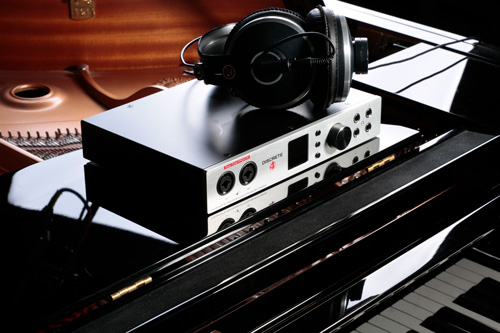
Interface and DAW
Next we consider the interface, the part of the system that actually takes analog signals and converts them to the yes-or-no information that we mess with in the DAW.
I don’t believe that a $150 box with its own preamps will have the sonic refinement of a $2500 box with a $2000 pre-amp plugged into it. However, I’ve heard enough interfaces to suspect that at a given price point, most interfaces will offer a similar level of sound quality, since they use many of the same chips and design strategies.
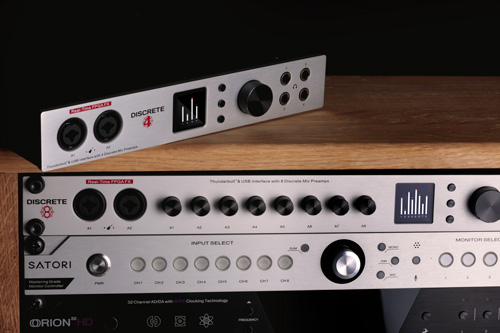
Furthermore—and this sentence is the key to this article!—I suspect that the quality of many low-priced interfaces, including the mic preamps that are almost always included, is good enough so I can say, “I’d rather hear a good room recorded through a $300 interface than a bad room recorded through a $3000 interface.”
This level of consistency and quality in interfaces is the development that enables us to concentrate on getting the room and monitoring right. We can be reasonably certain that the interface, even if it’s not a multi-dollar world-beater, won’t let us down. These days, much budget-priced equipment follows the old rule promulgated by J. Gordon Holt way back when: If a piece of equipment is imperfect, its imperfections should be errors of omission, not commission; it should err by leaving out the tiny last measure of detail, rather than by adding a nasty edge of distortion to the sound.
So if you’re sure that your audio quality will be good enough for getting started, how do you choose an interface? Look at features and choose based on your needs.
Which DAW? That’s a whole article in itself. Again, audio quality is uniform enough for a beginner that it’s a secondary consideration; look for features and useful bundled content (why pay an extra $200 for 50 GB of loops you’ll never need?), a comfortable-feeling workspace (everyone’s tastes are different), and strongly consider who’ll be sharing your work, if anyone. Pro Tools isn’t cheap, but it’s still the most popular DAW out there. Recent advances in DAWs like Cubase and SONAR have largely leveled the playing field, so Pro Tools isn’t the prerequisite it used to be at the starter level, but if your colleagues are using a particular platform, it will help if you do too.
Sometimes choices can be dictated by your genre: Ableton Live is a great example. Originally designed for dance music, Live is a very flexible and powerful DAW in any style but still wears its four-on-the-floor heart on its sleeve.
In terms of bang per buck, perhaps the most cost-effective DAW right now is Cockos’ Reaper, for which you can buy a license for as little as $60. One Windows alternative is Acoustica’s beginner-friendly Mixcraft. And, of course, all new Macs come with GarageBand for free, and the full Logic Pro X DAW is now under $200.
Some final thoughts
Of course, even in the best room with splendid monitors, an interface, a DAW and microphones aren’t enough. You’re going to need mic stands—including one robust enough to hold a stereo pair over a drum kit—and cables. For the moment, because this article is already plenty long, I’m going to fudge that, and say that since you’re probably a performing musician, you likely have those already, and can use your live kit to furnish your recording kit. But!… if any of your mic stands rattle, tighten what’s rattling—and if you can’t get the rattle to go away, pitch the stand. Rattling stands degrade both live and recorded sound. You’ll pay a lot for Latch Lake micKing stands, but they will be the last stands you’ll ever buy.
One final note: Readers may still be tempted to shave some cost off their bottom line by omitting the room treatment we discussed in Part 1. I urge you—don’t do it. If you need to cut costs, do so by using some of the DIY room treatment options I outlined earlier. They may look a little funkier than the factory-made treatments—but, properly employed, they can make a mediocre space into one capable of making truly fine recordings. And isn’t that what all this is about?