Taking a song successfully from idea to completed mix requires careful preparation in the studio
By Michael Nickolas
Home studio recording sessions can be an exercise in frustration—so much can go wrong. But when all works smoothly, it’s a joy. I recently completed a demo project with a client where all went well from start to finish. Let me share how preparation contributed to this, how my sounds were achieved, and let me offer tips and pictures showing how project studio obstacles like small rooms, messy mic wiring and outside noises were overcome.
The gig
A friend and client, Jim Dower, was looking to make a demo of a ballad he wrote called “I Made You Mine.” He planned on using drummer Mark Mahoney and bassist Steve Skop from his jazz trio. Since these musicians weren’t able to come in at the same time, we had to record in pieces, drums the first half of the day and acoustic bass the second. Jim would play piano and sing. He asked me to play nylon string acoustic guitar. “No problem,” I said, and we scheduled for a few days hence. That gave me some time to prepare for a smooth session.
The studio
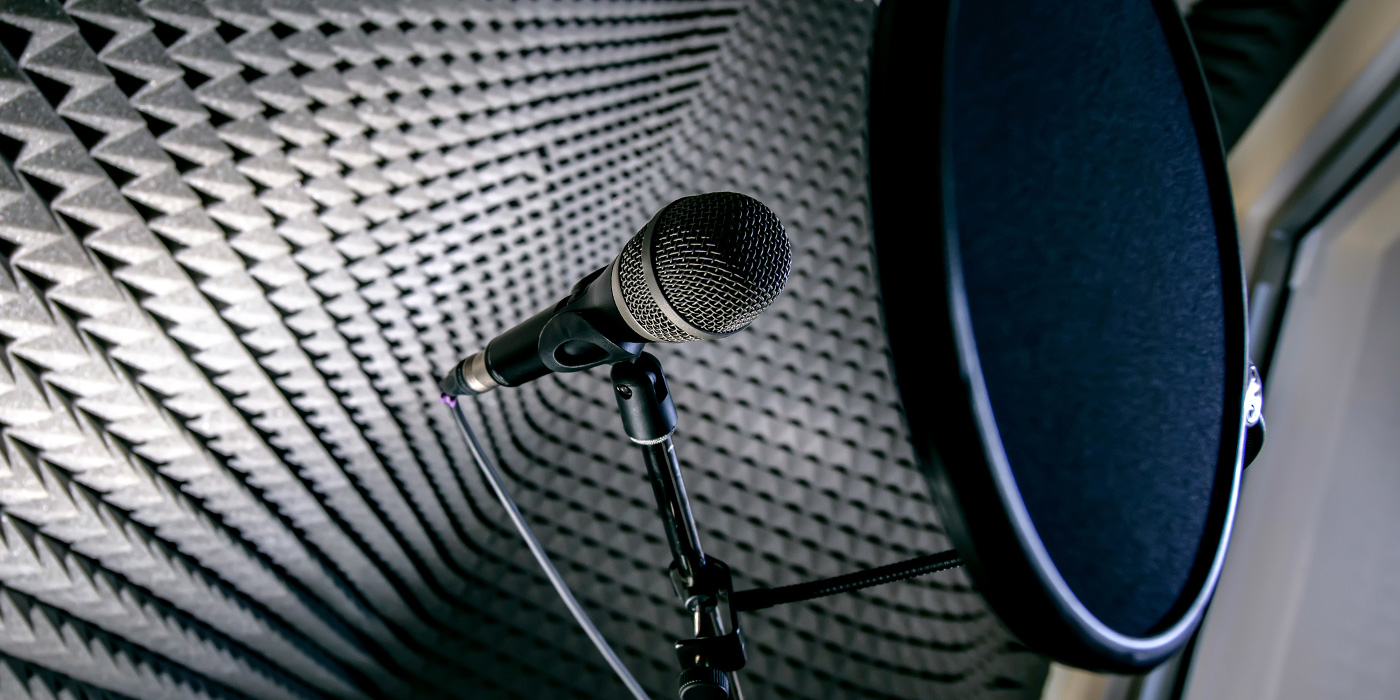
 Let me back up and describe my studio. It is in an old house and consists of two small rooms and a closet converted into a vocal booth. In the live room I installed XLR wall plates from Conquest Sound to connect directly to the control room (see picture 1). These plates mount into a standard outlet box (usually a buck or so at the home improvement store), great if you’re not shy about cutting a hole into your wall for the box and drilling through to the other room to run your wires.
Just take the usual precautions about cutting or drilling away from electrical wires, and check for studs—you don’t want studs in the way of where you will be mounting the wall plate. The hardest part really is soldering the bare ends of your mic wires onto the wall plates. Once it is all said and done, it does make your life easier. No running wires around the door! Simply plug the mics into the wall.
The vocal booth
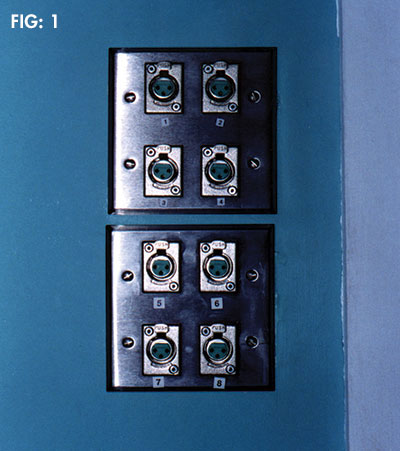
 The iso booth is the converted closet I mentioned (see picture 2). Yeah, it’s tight. I think the picture makes it look smaller than it is! You’re seeing two-inch foam on the walls and door. When I built it, I learned that the two-inch would not be enough treatment. The booth sounded too “boomy.” So what you see in the back behind the music stand is a big pillow of cambric cloth (a breathable cloth, typically used in landscaping) stuffed with six-inch fiberglass. This is enough mass to absorb the low frequencies. Not shown is a similar pillow attached to the ceiling. (I’ll describe these baffles in more detail below.)
On the left wall is a window to the live room, which slides open to give the impression of being able to get air in there. You can also see that a door panel has been replaced with Plexiglas to provide a sight line to the control room, and to make it feel a bit more open. Incidentally, replacing that door panel was one of the hardest modifications I made, but not impossible as you can see.
Baffles and window treatment
I used self-made baffles (see picture 3) and window isolators—construction is simple. The frame of the baffles is made of 1″ x 6″ pine. The back is 1/4″ masonite.
The resulting box is stuffed with six-inch open-face fiberglass insulation and covered with cambric cloth. This is mounted to a piece of 3/4″ plywood. I have three baffles. Two are four feet tall and the one shown is a bit taller at five feet. They really absorb the sound, not giving it too much of a chance to bounce all around the small confines of the room.
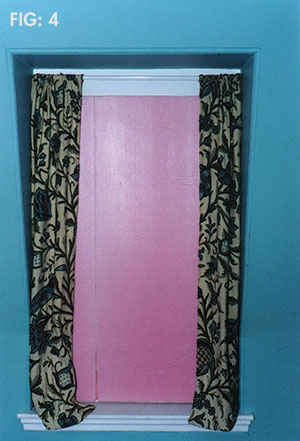
The foam inserts for the windows (see picture 4) are pieces of 2″ thick Owens-Corning “Foamular 250” Extruded Polystyrene Insulation.
I glued them together and cut them to the shape of my windows.
Again, not a difficult project, and a way to lower noises from the outside world. Pick foam insulation with a high R-Value.
Session prep
It had been some time since I’d done real drums here, so the night before the session I took inventory to make sure I had enough cables, mics and stands here to do that job. As part of my preparation I checked the inputs from the wall plates to the board. I didn’t need to find out the day of the session if any were out.
I cleared out all my guitar gear to make room for the drums and ran a vacuum cleaner. The only thing left in the room were my baffles. I find it best to record while capturing as little of the room as possible—I can add room later, either using a room simulator plug-in or a straight-ahead reverb. To deaden the room I have a carpet on the floor, some two-inch acoustic foam on the walls, and the baffles and window cutouts mentioned previously.
The morning of the session, before the clients arrived, I put in place my window isolators, powered up the computer and did a quick check of my audio disk to ensure plenty of hard disk space.
Since we would be doing live drums in a small room on the hottest day of the year (so far), I put out bottled water and turned on the window air-conditioner in the control room. I opened the door to the live room and placed a fan to draw in the cooler air. Without quiet central air-conditioning, which isn’t going to happen here anytime soon, that’s what we’re stuck with. I just planned to turn it on and off as necessary. One of the downsides of a project studio compared to a commercial facility, but reflected in the price.
Drum miking
Jim and Mark arrived on time. For the ballad Mark decided to use just kick, snare, hi-hat and cymbals and to perform with brushes. No toms. As he set up, I surrounded the kit with my baffles.
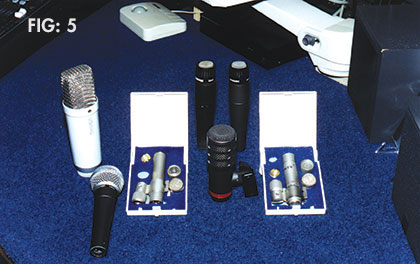
The choice of mics is easy at my studio—there are not that many choices. I have two small-diaphragm condenser mics (Oktava MC-012), one large-diaphragm condenser (RØDE NT1), two Shure SM57s, a Shure SM58 and an Audio-Technica ATM25 kick drum mic that’s been on loan here for some time (thanks Frank!) (see picture 5).
The Oktavas went overhead, separated left and right over the kit. The RØDE was on the hi-hat, a 57 on the snare and of course the ATM25 on the kick drum. The kick drum had a closed head; I placed the mic six inches from it. The 57 was a few inches from the top of the snare drum. The RØDE was placed horizontally about four inches above the hat.
I had Mark play and went to get the sounds and levels. The only thing that sounded good was the kick drum. The overheads were weak, the snare dull, and the hi-hat had too much bleed from the other instruments. Time to go to work!
I started with the overheads. Out of habit I was using the –10 dB pad on the Oktavas, which wasn’t necessary with Mark playing with brushes. Without the pad engaged I now had good signal, but the cymbals sounded distant. Back out to the live room to lower the mics closer to the kit, which did the trick.
Angling the snare mic more straight-on rather than pointing down gave me a brighter sound there. And repositioning the hi-hat mic helped with the bleed. I got the sounds I wanted without using any EQ on input. I also decided on no external compression on input. I thought it best not to monkey with the dynamics of the ballad but to let the song breathe naturally; subtle compression could be used in the mix.
Recording drums and MIDI piano
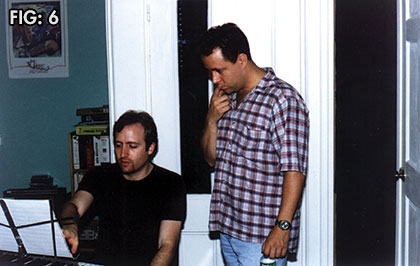
Jim’s plan was to record the piano at the same time as the drums, so he set up his 88-key synth in the control room. The plan also included replacing the synth’s built-in piano sound later using my massive virtual piano library, meaning I needed to also record his performance as MIDI. Jim and Mark went over some last minute details. (see picture 6)
I was recording 24-bit audio to my hard drive using Cakewalk SONAR. Since bass was going down after the fact, I got a click going for this initial performance. I made the proper assignments in the software, and we recorded a few bars to check for correct operation of everything. I also wanted to check for possible click bleed from the headphones before going through the entire song. There was no bleed. If there had been, the choices would have been to simply bring it down, or replace the sound with something less cutting.
We did a take all the way through, and decided to keep it and do another. To be quick about it, I saved the file as “take 1,” deleted all the recorded data and saved again as “take 2.” In just seconds, this results in two separate files saved to the hard drive. One contains the first take, the other a blank file for the next take setup exactly as we need it.
The second take was better, and it was decided to use that one and punch from the bridge out. I set up the software to auto-punch and we did it. Punching drums is always “iffy” so we took care to punch at a reasonable spot. Turned out the drums punched well, but the piano had a pop. We kept the drums, and punched again to fix the piano (still audio and MIDI). And that was it for piano and drums. The entire process took about two and a half hours.
Bass overdub
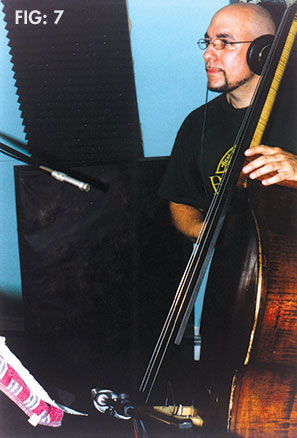
Later in the day, Steve arrived to do acoustic bass. I surrounded the instrument with baffles and placed the RØDE mic at the body and one of the Oktavas at the neck (see picture 7). The RØDE was running through a tube preamp (ART Tube MP). Since the mics were in close proximity, I experimented with the preamp’s phase switch. I decided it sounded better normal, i.e. not reversed, so we went with that.
We recorded the bass in just a few takes. From start to finish, Steve was at the house no longer than an hour!
Vocals
Time to get Jim in the booth. Jim is a great songwriter, a great piano player, and holds his own on guitar. He is also a good singer, though not formally trained. I suggested we do three takes all the way through, one after another, then composite the best parts of the three into one, finalizing the resulting track with a judicious amount of the Auto-Tune plug-in.
No complaints from Jim, so that is what we did. Of course recording digital makes this a breeze. Jim picked which sections of which tracks to use, and I created envelopes in the software, bringing these parts in and out as necessary. In this case I did track with compression, which makes sense when recording an untrained singer.
That brought us to the end of the day, a total of five hours working time. Backup was done to a removable hard drive, which is a lovely modern touch—it’s so much faster than burning backup CDs.
Guitar and mix
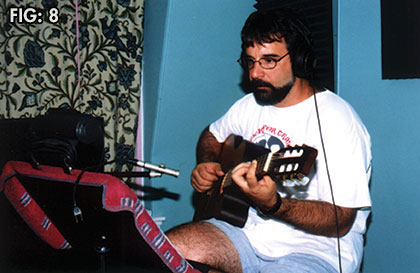
The next session was held a few days later, to do acoustic guitar and mix. (I won’t go into the mix here—I’m sure that could be an article in itself!) My acoustic guitar was recorded in the live room, that’s yours truly behind the baffles (see picture 8). If acoustic is to be the backbone of a tune, I will often use two mics for a stereo effect. This song was mostly supported by stereo piano (the virtual piano came out great, by the way), so I decided to use just the one mic aimed near where the neck meets the body.
I had Jim play while I fiddled to get the best sound, then it came time for me to play the part. I was sight-reading the tune, so I also decided to do a comp. Knowing that one verse or one chorus could be substituted for another, I tried to play each section a bit differently from the previous one during the two takes that would make up the composite. That way we would have plenty of material to choose from. The part came out well, so we even overdubbed a little solo section during one of the breaks.
We thought the nylon-string guitar sounded just fine dry, and so we used no reverb in the mix. Recording the guitar and mixing probably went about 4 1/2 hours, giving us a total of 9 1/2hours from start to finish.
So there we have it. My best tips: Accessories like wall plates, baffles, window inserts and a vocal booth. Preparations like checking the gear, taking inventory, making for space and comfort. Add this to a little experience with your room and equipment, and most sessions can be this smooth!
Michael Nickolas is a recording engineer and producer in Massachusetts. His website may be found at www.studionineproductions.com. Our thanks to Jim Dower, the artist recorded in this demo session, who has a site at www.jamesdower.com.