
When mastering is usually the province of pros —why do it yourself?
By Darwin Grosse
Working with professional mastering engineers can be a rewarding and positive experience, but there are some instances where you may decide to do your own mastering work. The reasons behind this decision probably fall among four issues: cost, speed, quality and creativity.
Decisions, decisions
Let’s be frank: A good mastering engineer will cost you some cash—and will generally be worth the money spent. However, when no budget for mastering is available, you are left with no other choice than to do the work yourself. You may save money, but realize that saving this money may cost you a significant amount of time. Mastering engineers are pros because they are masters (ahem) of the process; you on the other hand will have to work extremely hard to gain the insight you need to do a credible job. You also may have to purchase some task-specific tools, and that costs money. Once you are set up, you may be able to save some money by doing your own work.
On Mastering
Perhaps a more important reason for doing your own mastering is to speed up the turnaround time between recording and release. This is especially the case for creating fan-accessed material. If you want to get last night’s gig into your fans’ hands tomorrow, you don’t really have a choice other than to master the work yourself.
A flip side to quicker turnaround is working purposefully slowly. When I’m doing creative mastering work (whether for myself or my clients), I’m notoriously slow with the work. I’m honest with people up front: I let them know that I have to live with the work, and let it “reveal its nature” to me. This may sound rather New Age-y, but I find that when I spend time with the tracks, I can often come up with results that are more cohesive and more interesting to the listener.
Another important consideration is quality control. Depending on the type of material you produce, you may find it difficult to find a mastering engineer who can do right by your music. A good example is found in experimental music genres: these can often be ruined by a rock/pop or dance-oriented mastering engineer, because the techniques that are “correct” for a chart-bound release are completely different from those for more experimental works. If you find yourself at odds with the mastering engineers you meet, it may well be time to DIY.
 Perhaps the most compelling reason to do your own mastering is the ability to take a creative approach to the process. As you formulate a release, you will have many options. What happens if you do long fades between tracks? How about quick fades? Should you use long gaps between songs, or short gaps? Do you push the levels TO THE MAX, or give them some breathing room?
Having the opportunity to try all of these options is one of the great advantages to doing your own mastering work. In fact, doing this may not preclude you from using a mastering engineer; many pros would be more than happy to use your ideas as a stepping-stone to a more creative release. But having the tools—and the desire—to do this work is the starting point for creating a release that can shine.
Tools
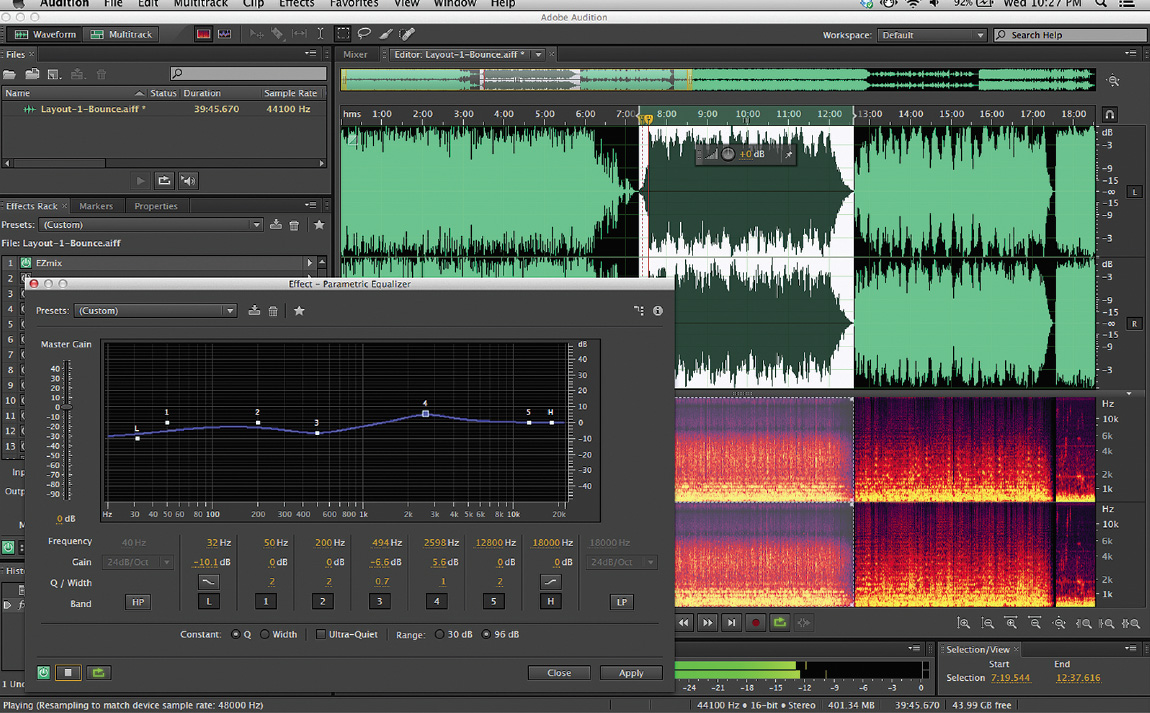
To perform your own mastering, you will either have to accumulate some new tools or repurpose your existing tools. The primary tool is an audio editor. Some people like to use a file edit-capable DAW, while others prefer to use two-track editors. For my own work, I’ve found Adobe Audition to be a great system for mastering work. It is a highly capable editor, but it also includes spectral editing/processing functions that allow me to analyze and fix problems that can’t be otherwise managed.
Audition also has the ability to “composite” a number of tracks into a basic release format. This is a great way to hear your work in the context of the intended release format; for example, you can lay out tracks (similar to any other DAW) to find out their best order and transition points, but with a double-click of a waveform you enter the audio file editor, tweaking away at the track. This workflow really suits me. Audition also now has a pretty capable CD marking/burning system that will allow you to generate physical product releases.
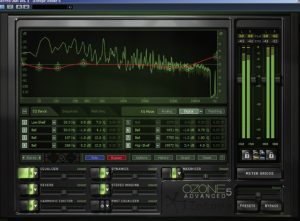
Whether you choose to get a mastering-oriented editor, or choose to use standard DAW software (which sometimes contains its own “mastering” environment, e.g. PreSonus Studio One Producer), you will probably want to invest in some mastering tools to help create the best possible results. I use a number of different plug-in products (like iZotope Ozone, shown at right); however, recently my Editor pointed me toward Toontrack’s EZmix 2 and its mastering-focused preset packs. There are presets that range from a ’60s sound to dance-floor mania. I was really pleased with the result on some recently processed tracks: the plug-in preset system did things that I would-n’t have necessarily done myself, but it inspired me to change my workflow to include EZmix 2 as part of the process.
Perhaps the most important part of a DIY mastering setup is your monitoring setup. Most professional mastering engineers will have monitor systems that cost more than your car (if not your house), but that doesn’t really resonate with the DIY mentality. Instead, you may have to try something else, such as using a variety of audio monitors that can provide you with different insights into your tracks.
A good combination is a primary set of monitors, a secondary set of small speakers and a really good set of headphones. Try to find a set of primary monitors that you can listen to for a long period of time, since the process of monitoring is one where you obsessively listen to the work, and avoiding ear fatigue is a serious concern. This is a case where begging, borrowing and renting monitors will be of great value; nothing works against a good mastering session like a pair of burned-out ears.
 Education
To prepare yourself to take on mastering tasks, you need to educate yourself. While there is some good information on the Internet, much of the best information is available from a pair of books: The Mastering Engineer’s Handbook by Bobby Owsinski and Mastering Audio by Bob Katz. These two books offer a wealth of information about the mastering process, details about analog and digital audio formats, explanations about the entire mastering process, and tips to help you do a great job. For a variety of hands-on information, you’ll also want to check other articles on mastering in the online Resource Library at recordingmag.com, as well as the Sound Advice On Mastering e-newsletter that comes out monthly.
Reading will be helpful for accumulating information, but also you need to spend a lot of time listening. Find work by artists in a style similar to your own, then listen to them for technical details. One trick that I’ll use, especially when I feel like something is “off” on a track, is to create a mix CD where the track in question is surrounded by tracks from other artists whose recordings I respect. This helps position the track in the real world, and allows me to identify misjudgments that I may have made during the mastering, mixing or composition process.
Another source of knowledge about mastering are mastering engineers themselves. Whenever you get a chance (and without being a pest), engage with mastering engineers about their perspectives on the art, techniques they prefer, things they can’t stand, and things they can’t do without. I fondly remember Dave Neitzke (of DNA Digital Systems in Milwaukee, WI) being incredibly patient with me as I stumbled my way through my mastering education; he helped me understand the need for gear, as well as the places where gear was not an answer. If you can find someone willing to help you, you will be miles ahead.
Hard work
Educating yourself is important, but it is really through doing that you can learn to become your own mastering engineer. This means working on your tracks until they sound as good as—if not better than—commercial tracks.
The most important way of verifying the quality of your work is through constant testing. If you are doing work for the dance floor, have a DJ review your work to see if it measures up. If you are working on experimental music, have other artists give you insight. In many cases, the best advice you will get will be from people who aren’t your friends; they may be able to give more honest advice since they aren’t worried about hurting your feelings.
In early stages of your efforts, you may want to have a mastering engineer try their hand at your work, then compare their result to a version you create. You may find that the pros are able to highlight parts of your tracks that you obscured, and you can find out how a professional’s ears work. A constant process of comparing your work to that of others, and having your work held up to the standards of others, will be an important step in improving your efforts.
 Faced with choices
You will find that every mastering project is really about making practical as well as artistic choices. For example, you may at times have to choose between audio quality and output levels. Decide on proper track order and how to transition from one track to the next. You have to find ways to make an entire release sound coherent, while still allowing each track to have its own personality.
Those kinds of choices are another reason why you want to take your time as you begin doing your own mastering: You have to live with and evaluate your decisions for a day or three, until you can be sure that you made the right ones.
Making the right choices is perhaps the most demanding part of mastering, but it is what makes DIY mastering a creative and rewarding endeavor.