
The mic is the center of the recording studio, and it pays to know how they work and what they do.
By Joe Albano
The recording industry is changing rapidly, but there’s one area where the technology is pretty much the same as it always was—microphones. While it’s true that better mics are available at lower prices than ever, it’s also true that vintage models and designs are still the most sought-after options for recording today. In this brief primer, I’ll do a quick rundown of the basics of microphone design and recording techniques—just the background knowledge that any modern recordist should possess on that most important first link in the recording chain.
Transduce this!
As some of you may remember from Physics class, microphones are transducers—they change a sound’s acoustic energy (variations in air pressure) into electrical energy (variations in voltage). From a technical design standpoint, therefore, the most basic way to classify different types of mics is by the method they use to do this.
In all cases, microphones employ a diaphragm, usually of thin, lightweight material, that is struck by sound waves and vibrates accordingly. The pattern of acoustical vibration is turned into an analogous pattern of varying voltage, and the electrical signal is then available for recording and processing. Based on the way this is accomplished, we can break microphones down into the following categories:
• Dynamic Moving-Coil designs (the diaphragm is attached to a coil of wire)
• Ribbon (actually, dynamic as well, but with a ribbon instead of a moving coil)
• Condenser (a.k.a. Capacitor mics, where the diaphragm is part of a capacitor)
Dynamic duo
Moving-coil microphone designs, better known as dynamic mics, use the principle of electromagnetic induction to convert acoustic energy to electrical. The diaphragm is attached to a coil, which lies in a magnetic field (generated by a magnet incorporated into the mic). When sound waves strike the diaphragm, it vibrates accordingly, and this causes the attached coil to move within the magnetic field, generating a voltage which varies in accordance with the pattern of the original sound wave (a typical loudspeaker works by the same principle, only in reverse). Moving-coil designs are usually sturdy and rugged, and so are popular for live use, especially hand-held applications—I’ll talk more about typical applications of the different designs below.
Another type of mic design that uses electromagnetic induction is the ribbon mic—although technically it is dynamic in design, most people refer to ribbon microphones just as “ribbons”. Here, a thin (usually) corrugated ribbon of metal foil is used as the diaphragm, again suspended in a magnetic field. When sound waves hit the ribbon, it vibrates in the field, inducing a voltage whose pattern is analogous to the original acoustic sound wave’s, as above. In older ribbon designs, the ribbon material itself was extremely fragile, making these mics more suitable for studio use than live, but modern designs can be much more sturdy (though dynamic moving-coils are still more widely employed when ruggedness is a prime factor).
All charged up
Condenser mics employ a design principle that’s different from dynamic mics. The diaphragm of a condenser mic is actually one of the two plates of a capacitor (“capacitor” is synonymous with “condenser”). The Physics geeks among you will recall that a capacitor is a device that can store a charge, comprised of two plates with a non-conductive material between (called the dielectric). In a condenser mic, one plate is fixed, the other is the mic’s diaphragm, and in between them is air. When sound waves hit the diaphragm, it moves (vibrates) relative to the fixed plate, resulting in a changing capacitance. When a charge (voltage) has been applied, this results in a varying voltage, one again analogous to the pattern of the original sound wave. The voltage signal requires a dedicated preamp to bring its level (and impedance) in line with other microphones.
Condenser mics must have some sort of power supply to provide the charge for the capacitor plates, as well as power for the required onboard preamp. Older models often came with their own power supply units, usually an external box which connected to the mic with a special multi-pin cable. Modern designs use 48 volts of DC power, usually supplied via the mic preamps (standalones or the ones in the console). This is supplied to the mic via a technique known as phantom power, where the DC is sent back to the mic on the same wires of the standard balanced mic cable that carries the signal (in the opposite direction) to the console/preamp.
A variation on the condenser design described above uses permanently charged capacitor plates, eliminating the need for phantom power, but still requiring power for the mic’s preamp. This type of condenser is referred to as an electret condenser (an electret is to electricity what a magnet is to magnetism). Typically, power for the mic’s onboard preamp is supplied by a battery, but some electrets can use phantom power for this as well. Years ago, some people looked down on electret condensers as inferior to regular externally-powered condenser designs, but nowadays they are widely accepted.
Bring on the tubes
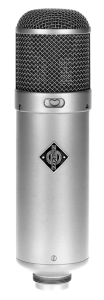
Neumann U 47
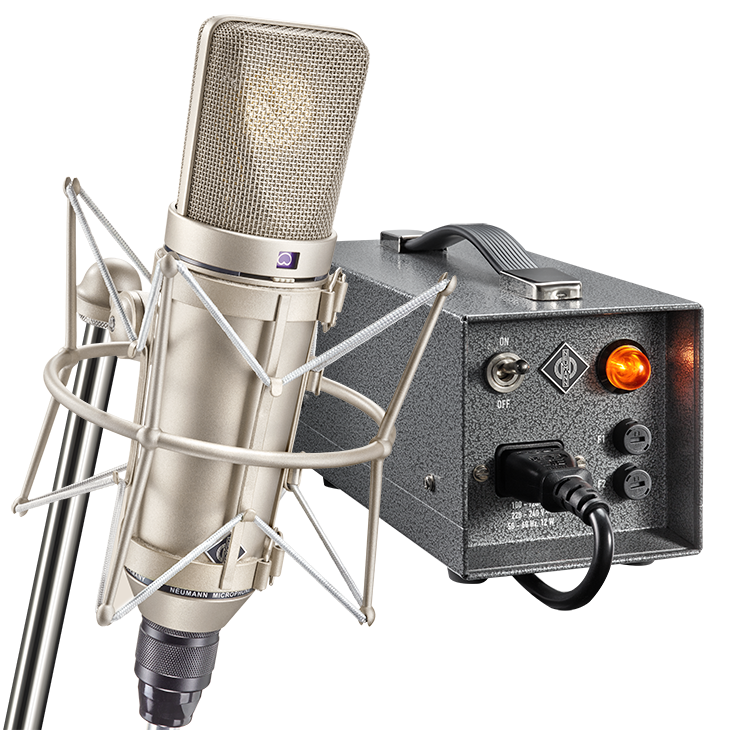
Neumann U 67 Set
On classic older model condensers, the dedicated preamp was typically powered by an onboard tube, which added its own and often pleasing coloration. Some of the most sought-after vintage mics are tube-based, like the Neumann U 47 and U 67, and others.
Modern condensers are more likely to employ transistorized preamp circuitry, but many models still do use tubes for the warm quality they impart to the sound—this trend includes not only high-end mics and reissues of classic models, but also relatively budget-priced units.
Pick a mic, any mic
In practice, condenser mics are generally the favorites for studio use, thanks to their superior clarity and delicacy of sound (along with the better-quality ribbons); this goes for most applications, like vocals, acoustic instruments, and ensemble (stereo) miking.
Dynamic (moving-coil) mics are the choice when ruggedness is of paramount importance, as in live situations, or in proximity to especially loud or aggressive instruments. Dynamics are often the mics of choice, even in the studio, for close-miking around the drum-kit, close-miking guitar amps, or close in on trumpet bells—situations where a more delicate condenser might be less likely to withstand an errant drumstick or a sudden blast of air.
That said, there are no hard-and-fast rules, and for every engineer that follows these suggestions, there’ll be another who breaks them with good results, so take the above as only the most general of guidelines.
Patterns of behavior
The way in which a microphone responds to sounds in the air around it is expressed as the mic’s pattern (short for pickup pattern, or polar pattern as plotted on a 360º graph). This describes the microphone’s sensitivity to sound coming at it from the front, sides and rear of the diaphragm—in other words, the microphone’s directional characteristic. Mics can be classified into three basic patterns:
• Omnidirectional: the mic responds with equal sensitivity to sounds from all directions (front, rear, sides);
• Bidirectional (aka Figure-8): the mic is sensitive to sounds from the front and rear (0º and 180º, resp.), but rejects sounds from the sides (90º, 270º);
• Unidirectional: the mic is primarily sensitive to sounds from one direction (Cardioid, Supercardioid, and Hypercardioid), and rejects sounds from the rear (see below).
An omnidirectional mic (omni, for short) picks up sounds from everywhere equally (well, almost equally). It consists of a disc-shaped diaphragm in a sealed enclosure, open only at the front. All sound waves, regardless of their point of origin, eventually work their way around and strike the diaphragm, resulting in a mostly uniform sound pickup (the body of the mic itself may shadow sounds from the rear very slightly). Since all sound is picked up by direct pressure on the (front of the) diaphragm, omnis can also be referred to as pressure mics. A two-dimensional graph of this pattern looks like a circle, but remember we’re really talking in three dimensions here, so an omnidirectional pattern could also be visualized as spherical.
Now, imagine instead the same diaphragm element without the enclosure, open on both sides. Sound waves still hit the front, but also the rear of the diaphragm, and sounds from either front or rear will be picked up equally well by different sides of the diaphragm. However, sound waves from the side (90º or 270º) will strike both sides of the diaphragm at the same time, resulting in equal but opposite pressure on the front and rear—this will result in no movement, and those sound waves will be rejected (cancelled). The mic therefore picks up sound from the front and rear, and rejects sound from the side—this is a pressure-gradient design, also known as a bidirectional mic, or a figure-8 mic (the “figure-8” designation comes from the plot of the mic’s response on a graph).
Point & shoot
For situations where a more restricted pickup characteristic would be desirable, the third type of pattern, unidirectional, comes into play. One approach to creating a unidirectional response uses a single diaphragm, open at both its front and rear. Sound waves arriving at the rear of the diaphragm are delayed, usually by rear-entry ports (acoustic chambers) in the body of the mic. This delays the arrival of a sound wave relative to its arrival at the front of the diaphragm—in other words it puts the sound coming in at the rear out of phase with the same sound coming in at the front.
If a sound wave originates in the rear, it can be delayed long enough to make it strike the rear of the diaphragm at the same time as it works its way around and strikes the front—this will result in equal but opposite pressure at front and rear, and cancel out, causing that rear-originating sound to be rejected.
A sound from the front will also be delayed at the rear, but as it’s already arriving ahead at the front, the rear arrival will be delayed long enough to make it once again in-phase with the front arrival, reinforcing that front-originating sound. As a result, you now have a mic which is more sensitive to sounds coming from the front, and which will reject sounds from the rear. When the pattern of this kind of unidirectional design is plotted, it looks like a heart shape, and so is commonly referred to as a cardioid pattern from the Latin for “heart”.
Now, a sharp reader will realize that using phase differences to cancel out rear sounds must be frequency-dependent. This is correct, and in the real world, the response to sounds arriving from the rear (off-axis sounds) is irregular—to get the full picture on a graph, you’d have to plot the directional pattern at different frequencies, which is often done on the same graph, using different line patterns or colors. This is why two cardioid mics with the same on-axis (front) frequency response can sound very different in reality—they may have significant differences in their frequency responses for off-axis sound pickup.
Pick your pattern
Now, another way that some mics achieve a unidirectional pickup characteristic is by using two diaphragms back to back. By combining the outputs of the two diaphragms, a variety of patterns can be achieved, from omni to bidirectional, and everything in between, which includes not only the basic cardioid pattern described above (maximum rejection at 180º), but other cardioid variations as well. Adjusting the blend will yield a supercardioid pattern, which allows a little more sound in at the rear (180º) and moves the angle of maximum rejection a little out to the sides of dead-center rear.
Further adjustment will yield a hypercardioid pattern, which allows even more sound in at 180º, pushing the maximum rejection points further to the sides. Eventually, the rear pickup will approach full response, and the side rejection points will approach 90º/270º, for a bidirectional characteristic. Multipattern mics often offer all these patterns, for a wide degree of flexibility in use.
Besides those basic patterns, there are a couple of other more specialized patterns worth mentioning briefly. A shotgun mic is an extreme variation of a unidirectional design, with a strong but especially narrow front pickup, and a number of rear/side rejection nodes. Shotguns achieve this degree of directionality at the expense of smooth response, and so are not very well suited for studio use, and are typically found in situations where isolated pickup from a distance in a noisy environment is more important than ultimate sound quality, such as Electronic News Gathering.
Another specialized type of pattern is found in a boundary mic, where the diaphragm is designed to be placed virtually flush with a room boundary (surface). The pattern is omnidirectional, but because the pickup is so close to a surface, in effect it becomes half-omnidirectional, or hemispherical (rather than fully spherical). This type of design is well suited for music, in situations where a wide pickup pattern is appropriate.
Set ‘em up
This discussion of mics wouldn’t be complete without a brief rundown of the basics of mic placement. For the sake of simplicity, I’ll divide miking techniques into distance miking and close miking approaches. Distance miking typically involves a stereo pair, and includes spaced mic arrays, coincident mics, and near-coincident mics. Close miking is often mono (though stereo is also employed), and usually means placement anywhere from a couple inches to a foot or so from the source.
Stereo miking techniques are commonly employed for recording both large and small ensembles. A basic technique involves placing two mics in front of the ensemble, widely spaced apart (several feet or so, depending on the spread of the source). These mics are often omnis, but if a less ambient sound is required, cardioids can be employed as well. Sometimes, to capture a widely-spaced group, the placement is so wide that a “hole” develops in the center of the stereo image (instruments tend to cluster too much to the left or right)—in that case, an additional mic is often used in the center, and mixed in just enough to stabilize the imaging.
When the mics are widely separated like this, the sense of stereo separation results from both amplitude differences and timing differences (between sounds arriving at both mics). This creates a nice wide stereo image, but if collapsed to mono, it runs the risk of revealing unpleasant phase cancellations due to the timing differences.
Another stereo miking technique, one that avoids this problem in mono, places the mics’ diaphragms as close as possible, so that only amplitude differences (based on the mics’ directionality) create the stereo image, and timing differences (and the resulting phase cancellations) don’t come into play. This approach is called coincident miking.
Just a coincidence
In coincident microphone placement, two directional mics are placed with their diaphragms as close as possible, typically at an angle of 90º–110º, with the mic on the left side pointing right, and the mic on the right side pointing left. One popular variant of this uses bidirectional (Figure-8) patterns at an angle of 90º—this is called the Blumlein system. The null spots of one mic correspond to the primary pickup of the other, and this yields a particularly well-balanced stereo image, although one that has a high proportion of room tone, thanks to the rear pickup of the mics. When less room (or audience) pickup is preferred, the same approach can be taken with cardioid mics—here, the angle is often widened slightly, to about 110º, to adjust for the difference in side pickup of the cardioids. This variant is called XY technique, and is one of the most common stereo miking approaches.
An interesting take on coincident technique is called Mid-Side, or M-S. This employs a cardioidmic and a bidirectional mic at a 90º angle, with the cardioid facing forward (0º, the “Mid”), and the bi facing 90º to pick up the “Side” signals. These two signals are then combined in a matrix which can be set up either in a specialized M/S preamp or in a console or DAW. The matrix duplicates the Side signal, then adds it to the Mid to create one side of the stereo image, and subtracts it to form the other. (Justin Peacock wrote a great article on setting this up.)
If the channels are combined to mono, the cardioid (Mid) mic is heard alone—the matrix completely cancels out the Side mic, and the signal is pure mono, without any possibility of potentially problematic phase cancellations. In stereo, the image widens and becomes more stereophonic as the Side mic is fed into the blend—this allows for a lot of freedom to adjust the spread after the recording is made.
Some people feel that a little bit of timing (phase) difference between the mics is more desirable than the purely amplitude-based stereo image of coincident pairs. To achieve this, a pair of mics is placed fairly close together, but with their diaphragms separated by about the width of a human head (more or less the distance between our ears). The ORTF system places the mics 17 cm (about 7″) apart, at an angle of 110º, while a variation of this approach, called the NOS system, moves the mics slightly further apart, to a distance of 30 cm (about 1′), at a 90º angle instead. Either approach works well, offering a nice sense of depth—these near-coincident placement techniques are also widely used.
There is also a specialized mic technique involving the use of a dummy head with mics placed in the “ears”, which captures a strong three-dimensional field (binaural recording), but this only works well when heard back through headphones and so is not a mainstream, everyday approach.
Get close
Close-miking is the way much (if not most) of today’s studio miking is done, with individual mics on each instrument for isolation and greater control in the mix. That’s a topic that could comprise a whole article (or several) by itself, so I’ll only mention a couple of basic points here. One is that, in a multi-mic environment, it’s important to watch out for leakage, when the sound of an nearby instrument leaks into another instrument’s mic unintentionally. This not only compromises control of the individual instruments’ balance later on, but can also impart unpleasant phase cancellations when both mics’ signals are present in the mix. Additionally, even if only one mic is open, reflections from the sound source off nearby surfaces (like the floor between the mic and the source) can also impart similar phase-induced colorations.
When multiple mics are in use, a suggested remedy is the often-cited “Three-to One Rule”, which says that any secondary mic should be at least 3X as far from the primary mic as the primary mic is from the source—this is designed to avoid overly strong phase effects from small timing differences that could otherwise occur. As far as the problem with reflected sound into the primary mic, keeping a greater distance (2X or more) between the reflective surface than the distance between mic and source is advised, and when this isn’t possible, damp down any suspect nearby surface to avoid potentially problematic reflections.
Get closer
One last point to mention regarding close miking is a phenomenon known as the proximity effect, which occurs when directional mics are placed within a foot or so of the sound source. There is a strong rise in bass response (relative to midrange and high frequencies) that results, especially at very close distances (i.e. a few inches).
Some singers and most radio announcers like to “work” the mic live to use this effect to fatten up their voices, and even in the studio it can occasionally work to advantage, but as often as not engineers seek to minimize it by either keeping mic distance at around a foot or so when appropriate, or sometimes using lowcut filters—either on the mic or on the console—to compensate.
Wrap-up
Well, that’s all the space I have here. Of course, there’s certainly much more to be said about mics and miking techniques; look through Recording’s online library for more useful information on this topic. After all, audio recording starts with the microphone—get it right up front, and the rest is smooth sailing.
