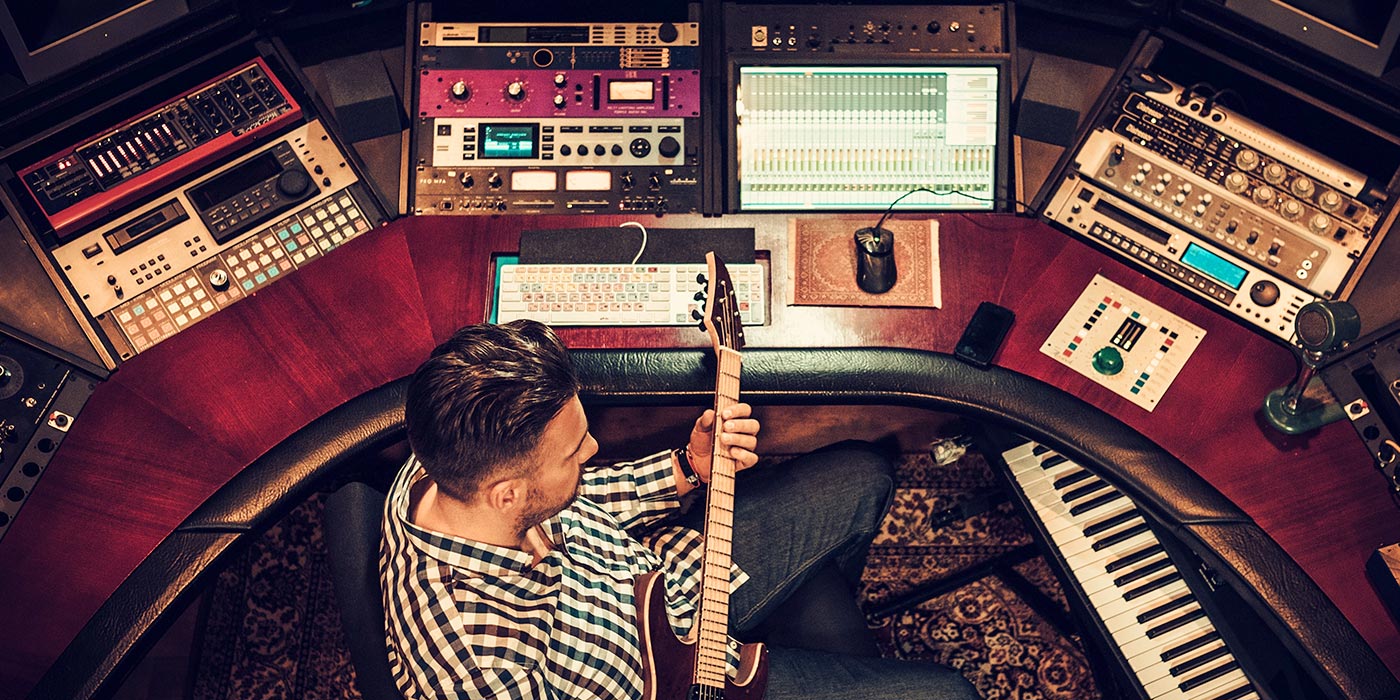
By John Shirley
Welcome to the first installment in this comprehensive 36-part biweekly series on the recording process. While this series is based on the previously published series entitled The Compleat Recording Musician, it has been updated and reedited to in clude extra material. To take advantage of the new web format, further emphasis has also been placed on offering accompanying audio and visual examples available for download. Specialized, original software applications will also be included to demonstrate, and allow you to experience, the various techniques and technologies discussed in the series first hand (even using your own recorded materials.
Over the next year and a half this series will explore: microphones, preamps, EQ, effects, signal flow, workstations, digital audio, converters, MIDI, production methods, acoustics, consoles, DIs, dynamics processing, connections, mixing, mastering, even distribution/sales. As the series progresses, previous installments will remain available for download on the Recording Magazine website. When complete, the collection may be downloaded and used as a text for personal, professional, or academic use.
Learning never ends – This promises to be a fun learning experience for us all, recent newcomers and veterans alike.
We begin with a look at the big picture, using some specifics of instrumental recording for demonstration purposes. This overview utilizes numerous concrete examples and introduces topics that will be taken up in greater detail in later installments. If some of the material is alien to you, don’t sweat it…. Read it through now and come back to it again after reading further into the series. As the principles outlined here are both fundamental and overarching, TCRM #1 may best serve as both introduction and coda.
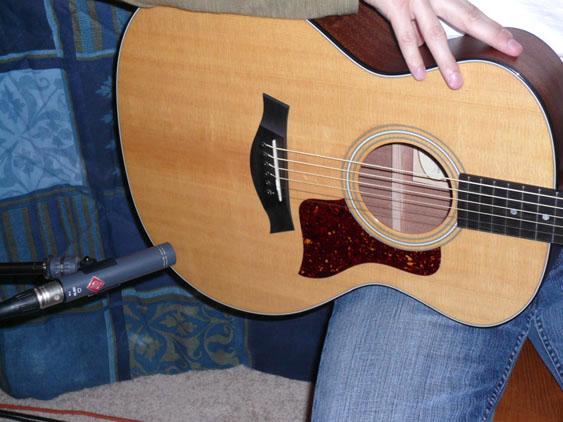
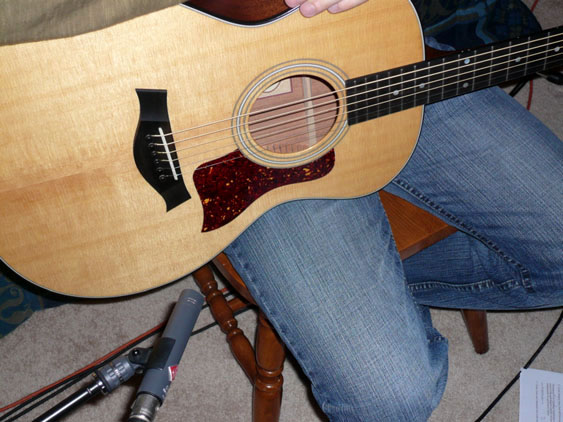
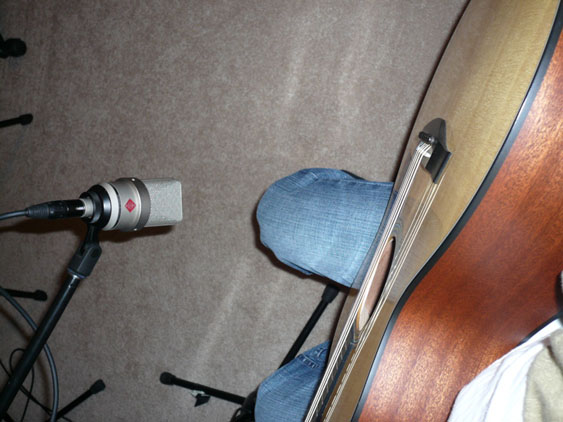
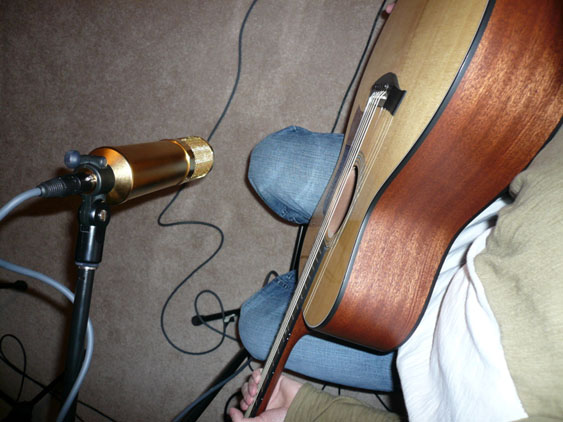
KM 184 on the guitar
Mental Preparation
Before we begin this long journey together, let’s take a moment to consider some elemental questions: Why do we record? What do we expect to gain from it?
Recordings allow us to create:
- a product to sell (at shows, in stores, on the web, to the TV/Radio/Film industries);
- portable examples of musical works that can be used for promotion (to radio stations, clubs, record labels, publishers);
- documents of a moment in history;
- powerful methods of communication (which can be distributed and used at a later date).
Though all of these reasons are valid, they just don’t seem to get to the heart of the matter. Recording is a curious blend of science, technology, business and, most importantly, art. That’s right, it’s not just the composing, playing and singing of music which are artistic endeavors… so is the recording process itself. We record in order to express ourselves through sound.
That recording is an art – not just a craft or skill set – is evidenced by the many poor, or just unimaginative, recordings that are being made despite the use of the latest or most expensive gear. Even using the best equipment, and knowing how it operates, is not enough to guarantee a good recording. To expect this would be like expecting that simply by buying the best paints, canvas, knives and brushes,… anyone can paint a masterpiece (or even a decent likeness of, say, a dog). This is simply not a reasonable assumption. On the other hand, a true master can pluck a singed piece of wood from the fireplace andcreate a moving work of art using just that charcoal and his fingers upon a tablecloth,.
So what does this mean? The gear we use is less important than our knowledge and creativity level. With a combination of strong creative vision and know-how we can make great recordings with the most basic of equipment. Without imagination, our work will be mediocre at best, even with expensive, cutting-edge audio toys.
Thinking Outside the Box
In the studio it is necessary for technical knowledge, musical concept, and creativity to share equally in the experience. As you work, remind yourself to let go of the mouse, faders or knobs and consider the greater musical picture. Technical issues such as mic choice/placement, stereo imaging, effects usage, and even editing concerns, should all be considered in light of musical style and artistic expression.
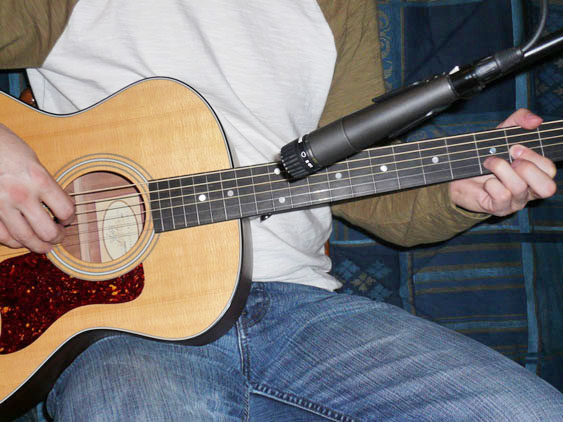
Another KM 184 view
To be successful in the studio you must:
- Define your goals – Know what you’re looking to accomplish.
- Create a Plan –Outline specifically how you’re going to achieve your goals.
- Analyze – Listen critically and as objectively as possible. Determine if what you’re hearing is in line with your goals.
- Adjust – Revise your approach, try again, and reanalyze. Use both technical and musical skills to reach your goals.
For example…
Goal:
- You want the vocals to be aggressive, clear and out front in the mix
- You want to be sure the bass and beat are both distinct and clear… but they should still make you want to move your tailbone.
- You want to get a very detailed but natural acoustic guitar sound, not a “thick” or “jangly” one.
Plan:
- Place the mic about 6 inches from the singer and run my preamp pretty hot.
- Use a high-quality DI for the bass and mike the kick with something that will accentuate the beater sound (aka. the “attack”) as well as the low end.
- Try a small diaphragm condenser back three to four feet.
Analysis:
- The vocals sound a bit like the singer has a clothespin on his nose.
- The low end of the mix is thick, undefined, and muddy.
- The expensive acoustic guitar sounds like a stringed cardboard box.
Adjustments:
- Use a narrow notch filter to sweep through, find the louder chest resonances, and bring them down. (These are usually in the 150-400Hz range)
- Bring some lows out of the guitars and duck the bass with the kick drum.
- Try swapping microphones, new mic placement, or a fresh set of strings.
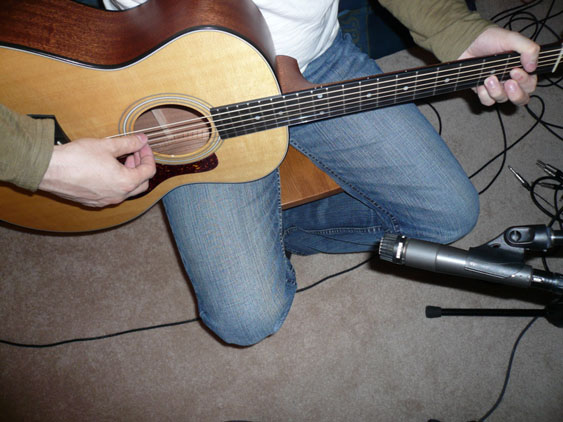
The TLM 103 in action…
The Realities of Recording
One of the first things many of us notice when recording any acoustic source is how different it sounds after it’s been recorded. It never seems to sound exactly the same, no matter what methods we use. There are many unavoidable reasons for this.
By simply recording an instrument and listening back to it, we have subjected the sound to a huge host of variables. In essence, we’ve just placed the following extra things between our ears and the instrument:
- microphone
- XLR cable
- preamp
- A/D converter
- storage media
- D/A converter
- more cabling
- amplifier
- monitor speakers
- secondary acoustic space
No wonder it doesn’t sound the same. On top of that, we haven’t yet accounted for the disparity between the way the ears and brain process sound versus how microphones do it. There are vast differences in relation to time, frequency, loudness, phase, acoustic space, and three-dimensional localization.
That’s OK.
Take a few deep breaths and repeat the mantra: “Recording is an art.”
Think about photography. A picture of an object, person, or landscape doesn’t look quite the same as it does to the naked eye. Family snapshots never fail to capture the precise moment someone is either blinking, mid-sentence, or contorted into some impossibly weird facial expression. Lighting, contrast, color, depth and scale all change. Professional photographers get paid well to make the world we live in look much “better” than we normally see it. Others use the frozen image to reveal the depth of meaning stuck in a single moment in time.
Neither pictures nor recordings capture exactly what the naked eyes or ears do. By altering our experiences and removing them from their natural context, both art forms actually increase our awareness. In many meaningful ways, this is good.
Hocus Pocus
One of my earliest experiences that got me really excited about recording happened at a summer music camp in 9th grade (“and then there was this one time… at band camp.”) I attended a practical seminar taught by a very suave gray-haired older gentleman who’d been in the radio and recording business since before analog tape. When he asked for a volunteer, a marginally talented classmate jumped at the chance.
The student played an original song, first laying down a simple keyboard arpeggio and the guitar changes. After recording the vocal line, the instructor brought up the three faders on the console, pressed play on the state-of-the-art analog 8-track machine, performed some basic EQ, and added a little reverb and chorus to the vocals. When he was done, he quickly rewound the tape and played it from the top. I was absolutely blown away by how much better it sounded than when the student had performed it. To me, this was pure magic! As a guitarist and composer struggling to learn his craft, I was definitely intrigued by the notion of sounding better than I did live.
To this day, this is one of my primary goals in the studio: to make the recording sound “better” than the actual performance. To me, the idea of recording a performance strictly “as is” is a model for live work or historical documentation. The studio is about EQ, compression, multiple takes, comp tracks, effects, automation, and all of the other cool techniques for making the music sound as good as possible. There are rare circumstances in which the performance, tone, and balance of a top-notch performer or group are so utterly fantastic that we can hope only to record it without messing with that perfection. 99.999% of the time this will not be the case for us mere mortals.
The Lawson on the guitar…
Art meets reality
Since the underlying theme of this installment is instrumental recording, let’s apply what we’ve been talking about to aspects of this process. We’ll start with some general instrumental recording concerns and then move on to a nylon-stringed guitar example. Keep in mind that most of the basic principles utilized here apply to the wide range of studio endeavors.
Microphone Placement
The “rights and wrongs” of mic placement depend on many factors. Placing the mic very close to the sound source can turn out great (bell of a trumpet, top head of a snare), or it can generate a very unnatural sounding recording. People rarely experience instruments by placing their ears a few inches away. First of all, that could be painful. Second, at that distance the sound may be too localized to a specific spot on the instrument.
Depending on the exact acoustic nature of an instrument, this may not give an accurate picture of its entire tonal balance. If a mic is too close to the soundhole of a stringed instrument, it may miss bright sounds produced elsewhere on the instrument, capturing the soundhole’s boomy low resonances; placed too close to the bars of a vibraphone, it will strongly accentuate the nearby notes over the more distant ones. Close miking also tends to remove the acoustic context of the musical performance.
Also beware of the proximity effect – directional microphones tend to emphasize low frequencies as the mic is placed closer to the source. Equalization can be used to offset this if necessary. This can be done either with the mic’s built-in bass roll-off switch ((a high-pass filter) or further down the audio chain (even in software).
Placed further away from the sound source, a mic may give a more balanced representation of the instrument’s acoustic attributes and impart a greater sense of the physical acoustic space in which the performance occurs.
Unfortunately, there is a diametrically opposed tradeoff. As a microphone is moved further away, an exponentially lesser amount of energy is concentrated on the diaphragm. To make up for this loss in amplitude, greater amplification is required. This tends to accentuate all kinds of noise and unwanted ambient and environmental sounds. A compromise position must be found that reconciles , the desired sound with both musical and technical factors.
SM-57 in place…
The “right” mic?
Microphone selection is to the recording engineer what paints are to the painter -each offers a different color and tone. “The right mic” is the one that imparts the desired sonic character. Finding the one that will do this in a particular situation comes from experience, knowledge, and patient tinkering.
Each of the three major mic types (condenser, dynamic, and ribbon) has different characteristics. Condenser designs tend to have a flatter frequency contour and faster transient response than do dynamics. While this means condensers are capable of reproducing a sound more accurately, this does not always equate to “better”. The tailored frequency peaks, slower response and ruggedness of a dynamic are sometimes exactly what is required. Ribbons microphones are also capable of a flat frequency response and a relatively fast transient response. They lend their own distinctive color.
The mic’s pickup pattern, also called polar pattern, is another important factor. This is the sensitivity of the microphone to sound coming from different directions. An omnidirectional (“omni”) mic is equally sensitive from all directions. A cardioid (or unidirectional) pattern is most sensitive from the front and least sensitive to sound coming from behind. Further variants on the cardioid concept include supercardioid and hypercardioid (where there’s some sensitivity to the rear and the least sensitive areas are back and to the sides) as well as subcardioid (nearer to omni). A figure-8 (bidirectional) pattern picks up sound from front and back, but rejects sound coming from the sides.
In a later article we’ll address mic design types and applications in great detail.
Another view of the SM-57
Ideas in Action
Now we’ll demonstrate how all of these ideas come together using a specific, real-world example. Let’s consider some goals and approaches to recording a nylon-stringed guitar. (Example sound files are below.)
An acoustic-style guitar is an instrument that requires a bit of space to get a balanced tone. Placing the mic too close will accentuate the specific qualities of that area alone. Distances of greater than 6-inches are most common. Anything within two feet can still be considered close miking.
Goal: Very forward, present, bright sound.
Try a small-diaphragm cardioid condenser with a fast transient response and a mild accentuation of the higher frequencies. Placing it about 9 inches away and over the bridge will help achieve the closeness and higher harmonic detailing you’re looking for. Angling the mic towards the soundhole will bring up the lower frequency sounds of the internal resonance’s of the guitar body (if needed).
Goal: Deeper tone, but still forward.
A large diaphragm cardioid condenser placed a foot back from the sound hole will accentuate the low tones of the air within the guitar. Angling the mic slightly off axis (towards the bridge) will help balance the tone a little.
Goal: Close and detailed, but with more sense of the acoustic space.
By using a figure eight pattern, it’s possible to get close to the guitar, but still pick up room tone when it reflects back to the rear of the mic.
Goal: A strong sense of the acoustic space. The sound should be like the experience of listening to live chamber music, but only a few rows back.
To get this sound, an omnidirectional microphone placed further back may do the trick. If this gets too much of the room sound, you can move it closer or try a cardioid.
Goal: To capture a less refined, less “natural” sound. It should have some distinct tonal interest.
This could be a job for a dynamic mic (maybe an SM-57). The slower transient response, high-end rolloff and non-linear frequency response could do just the trick. Try placing it 12 inches back from the sound hole at an angle towards the bridge.

The Rode NT2 in omni back in the room…
Until next time….
Recording success depends on knowledge, experience, well-defined goals, critical listening skills, imagination/creativity, and patience. As this series unfolds we will keep these fundamental principles in mind and place our discussions in an appropriate context, all with the aim to channel the learning process into productive studio experiences. Remember, we both produce and record music because it’s an outlet for our irrepressible imagination and creative energies.
Now, if we happen to make a few bucks in the process….
John Shirley is a recording engineer, composer, programmer and producer. He’s also on faculty in the Sound Recording Technology Program at the University of Massachusetts Lowell. Check out his wacky electronic music CD, Sonic Ninjutsu, OR on iTunes.
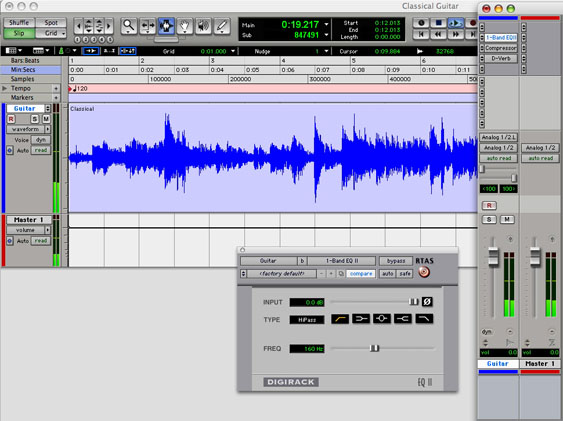
A high-pass filter engaged on the recorded track…
Audio examples – Recording 101: Using your ears (and your head)
In all recording endeavors you should have a goal and a specific plan to achieve it. Listen carefully to your initial results to see how close they come to achieving your goal. Make adjustments and try again if necessary.
Below is a list of basic goals and plans for microphone choice and placement while recording a nylon-stringed guitar. Sound files of the results are included on the Recording website. (A number of these still need “adjustments” as absolutely no EQ, compression, or effects were used until #’s 6 and 7). These ideas and techniques were outlined in greater detail in the article itself, so be sure to read it….
Check it out:
1 – Goal: forward, present, bright sound.
Neumann KM 184 small diaphragm condenser, cardioid pattern, around 12-inches back from bridge and angled towards sound hole. Note: Low end needs to be rolled off with EQ to compensate for proximity effect.
2 – Goal: deeper tone, but still forward.
Neumann TLM 103 large diaphragm condenser, cardioid pattern, around 12-inches back from sound hole and angled slightly towards the bridge. Note: Also needs a high-pass filter to compensate for proximity effect.
3 – Goal: close and detailed, but with more sense of the acoustic space.
Lawson L47MP large diaphragm condenser, bidirectional pattern, around 12-inches back from sound hole and angled slightly towards the bridge.
4 – Goal: less refined sound with distinctive tonal coloration.
Shure SM 57 dynamic, cardioid pattern, around nine inches back from 12th fret and angled towards sound hole.
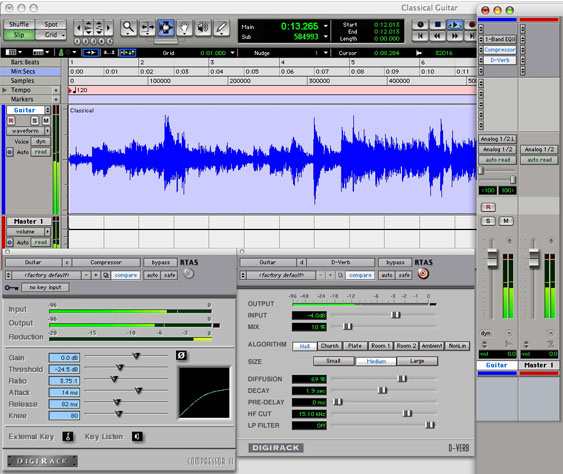
The compression and reverb added to the guitar track…
5 – Goal: strong sense of the acoustic space.
Rode NT2 large diaphragm condenser, omnidirectional pattern, placed across the room.
6 – Goal: “adjust” #3 for less proximity effect.
Run through a gentle High-Pass filter whose cutoff frequency is 160.
7 – Goal: “adjust” #6 for more even dynamics and greater sense of space.
Added compression and some reverb.